Helpful Tips For Painting Golden Oak Kitchen Cabinets
Our 20-year-old appliances were hanging on by a thread and it was time to bite the bullet and replace them. The thought of putting new stainless steel appliances into the golden oak wood box we call a kitchen makes my heart sink. But a new kitchen is not in the budget.
Besides, our custom oak cabinets from the early 90s are still in perfect condition. Instead, we chose to get that dated golden oak outta here and paint the cabinets instead. I hope you find my helpful tips for painting golden oak kitchen cabinets so they last helpful.
Helpful Tips For Painting Oak Kitchen Cabinets
If you're looking to update your kitchen on a small budget, you're in the right place. We did have some splurges like replacing our white appliances with stainless steel but the kitchen makeover itself did not cost a lot of money.
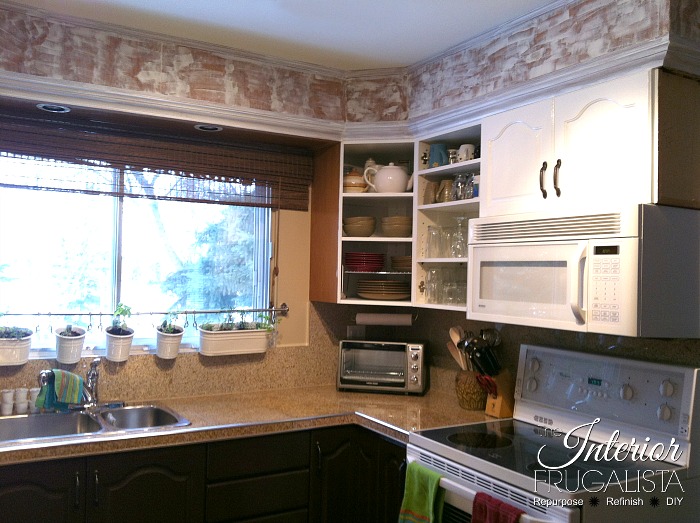
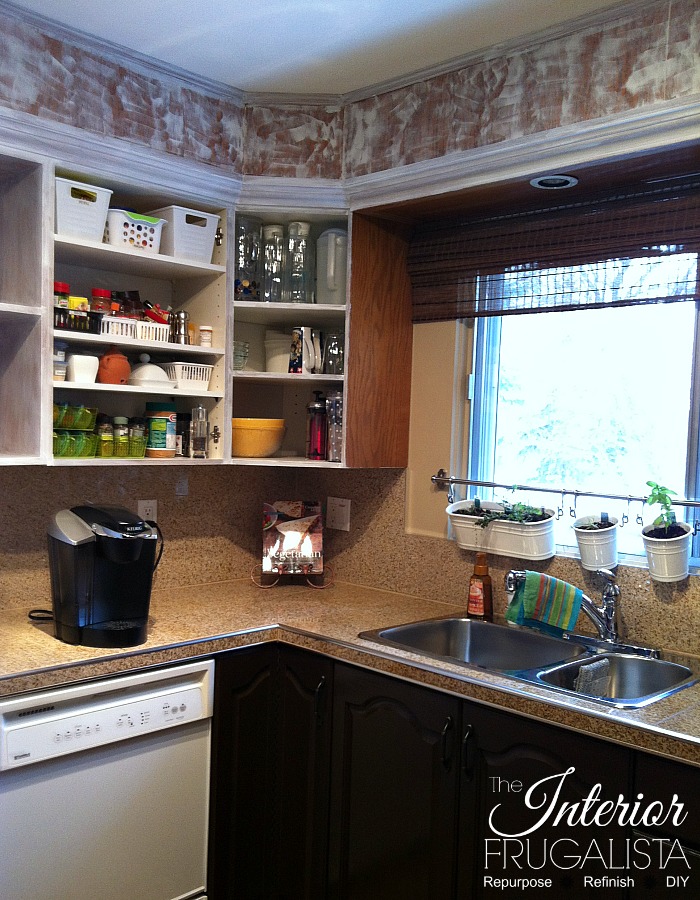
So you understand what I mean about the wooden box we called a kitchen for far too many years, this is what it looked like before.
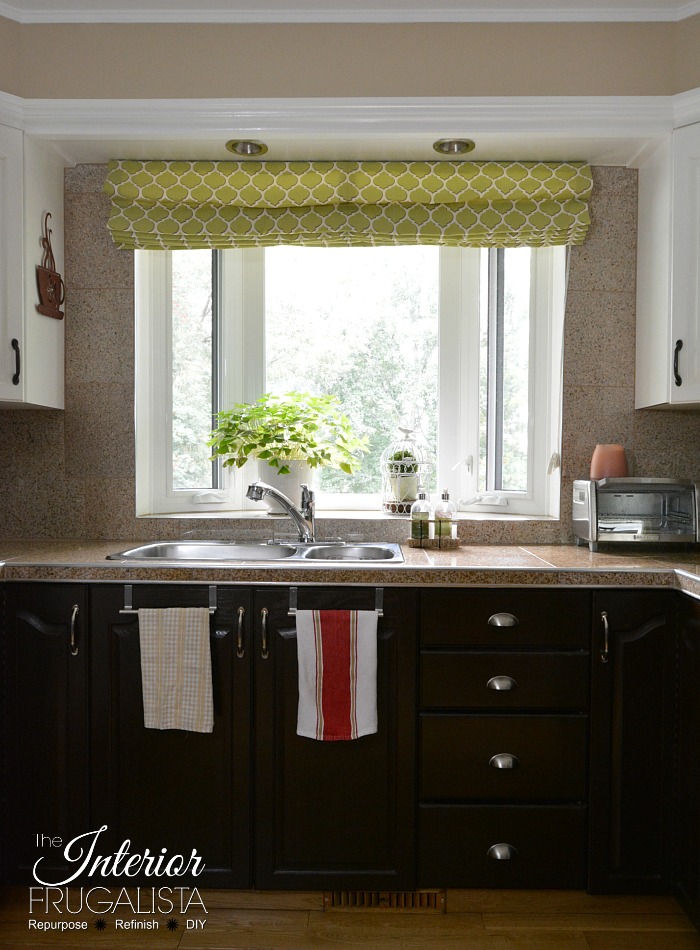
See what I mean? Big difference, right? Now the floors no longer compete with the cabinets and the room looks so much brighter.
Before we go further, I must apologize for the poor quality of the before and in-process photos. They were taken with an inexpensive point and shoot camera and as you'll learn further down in this post, the photographer was a little unsteady on her feet.
This post contains affiliate links so you can see what products I used or recommend for this project. As an Amazon Associate, I earn a small commission from qualifying purchases at no extra cost to you.
Before we get into the nitty-gritty of the small kitchen makeover, almost all of the DIY projects shared here at Interior Frugalista have step-by-step tutorials so why not get your budget DIY on and subscribe. You can also follow us on Pinterest, Facebook, Instagram, and YouTube.
Besides new appliances, we also splurged on FINALLY replacing the nasty aluminum slider window with a gorgeous bay window. During our brutal Canadian winters, the old window would freeze closed and it was always covered in condensation. Replacing it had been on my wishlist for well over a decade.
I'm so glad we spent the extra money and went with a bay window. It adds so much light into the room, gives an unobstructed view of our backyard, and I love having a ledge for plants.
Budget-friendly Countertop Compromise
We replaced the laminate counters a few years prior to the makeover. My wish was to replace them with a granite slab but it wasn't in the budget. So we compromised with granite tiles found at a local auction for a fraction of the cost.
For a seamless look, we butt the tiles close together so the grout lines are less visible and carried the tile right up to the base of the upper cabinets. Maybe one day there will be room in the budget to replace them with the real thing
What Happened Midway Through The Makeover
A small kitchen like ours should only take about a week at most to paint the cabinets. Mine took almost six because midway I fell on a patch of ice that landed me on crutches.
Determination is my middle name and I figured out a way I could climb the step ladder with my good leg while supporting my body with a crutch. Those new stainless steel appliances were arriving soon so I did what I needed to do to get er done!
Staining Lower Cabinets
I'm not going to lie, I had an itty bitty sense of guilt putting paintbrush to solid oak but felt less that we were at least staining the lower cabinets dark walnut. Thankfully those were finished before my accident.
The cabinet doors were prepped much the same way as the steps outlined further down to prep for painting with this dark walnut stain.
I love the two-tone look between the lower and upper cabinets that are so on-trend right now. We went with high contrast between the lower cabinets and the hardwood floor.
What To Do With The Bulkhead
The next order of business was dealing with the oak-clad bulkhead. Unfortunately, it couldn't be removed because there are ducts behind it. Otherwise, I would have modified the cabinets so they went right to the ceiling.
We contemplated replacing the wood with drywall but opted for a quicker option instead, by making the wood appear to be drywall. To do this we covered the grain and the wood joints with this patching compound. It dries quickly, it's hard as nails and doesn't shrink.
Sanded smooth and painted the same color as the walls, one would never know it is wood.
Helpful Tips For Painting Kitchen Cabinets
Prep, prep, and more prep is the most important step when painting cabinets. As they are usually laden with grease, caked-on food, and sticky fingerprints that must be cleaned first.
- Vacuum the interior of the cabinets and drawers and give them a scrub with warm soapy water.
- Clean the cabinet doors, trim, and end units with a liquid deglosser.
- Protect the surrounding walls, ceiling, and backsplash with painter's tape.
- Protect your countertops with plastic or an old sheet like I did, moving it along as you work.
- Remove the doors and shelves and label each with tape. You don't want to skip this step - ask me how I know.
- Remove the hardware from each door and transfer the door number from the tape into the hardware cavity with a pencil. Make sure to label the hardware with tape also.
- There is no need to strip the finish and sand to the bare wood. Instead, use a 150-grit sanding block and sand in the direction of the grain to scuff the finish to give the paint some bite.
- Wipe the dust with a damp cloth and follow with a tack cloth.
Important Step For Long-Lasting Finish
If you want your painted cabinets to last for many years, I strongly urge you to prime them first with a stain-blocking primer. It's a pain not getting right to the painting step but you won't regret taking the extra time for priming.
- Use a good quality primer that seals the wood and is staining blocking.
- You'll need a 1-inch brush for the recessed part of the doors, cabinet trim, and crown molding.
- You can use a brush but I prefer a 6-inch high-density roller for the door fronts, sides, end cabinets, shelves, and any other flat surfaces.
- Roll in long even strokes with a wet edge.
- Prime the interior of your cabinets if they are wood. Thankfully mine are white melamine so I got to skip this step.
- Lay the shelves and cabinet doors on the garage/workshop floor or work surface using these handy painter's pyramids. The more room you have, the faster this step will take. Unfortunately, I could only do 4-6 doors at a time.
- Once dry, flip them over and prime the opposite side.
Pro-Tip
If you paint the cabinet with a built-in primer, you only need to apply one coat of primer. It sounds counter-intuitive when the paint has it built-in but kitchen cabinets get a lot of abuse so why not err on the side of caution. It just adds that extra coat of protection!
Painting Cabinets White
The paint we used is Behr Premium Plus Latex Paint and Primer in a satin finish.
- Before applying the first coat of paint, lightly sand the primed surfaces with a fine 220 grit sanding sponge to smooth any raised bits on the primer.
- Wipe any dust particles with a tack cloth.
- Repeat the previous step between each coat of paint as well.
- Allow the paint to dry for 24 hours before applying the second coat.
- Use a good quality 1-inch angled brush for the recessed parts of the doors, cabinet trim, and crown molding.
- Use a 6-inch high-density roller for the door fronts and sides, end cabinets, shelves, and any other flat surfaces.
- Roll in long even strokes with a wet edge.
I started the upper cabinets from the tall pantry cabinet and worked my way to the right, painting 4-6 cabinet doors at a time.
Protect The Finish
Pro-Tip
We used a clear polyacrylic to protect the paint with a satin sheen. We learned the hard way that it yellows over time. I strongly urge you to use a non-yellowing Varathane Diamond interior wood finish instead.
Also in hindsight, our preference for the clear coat sheen is a matte rather than a satin finish. The satin has a slightly glossy finish that catches the light. It's completely a matter of preference. Maybe do a spot test first.
- Don't shake the can because you will get air bubbles and stir it well before and during the application.
- Apply it with a foam brush in long even strokes with a wet edge.
- Even better, apply it with a paint sprayer for a factory finish look.
- Apply two coats and sand between each coat for a smooth finish with a 220 grit sanding pad.
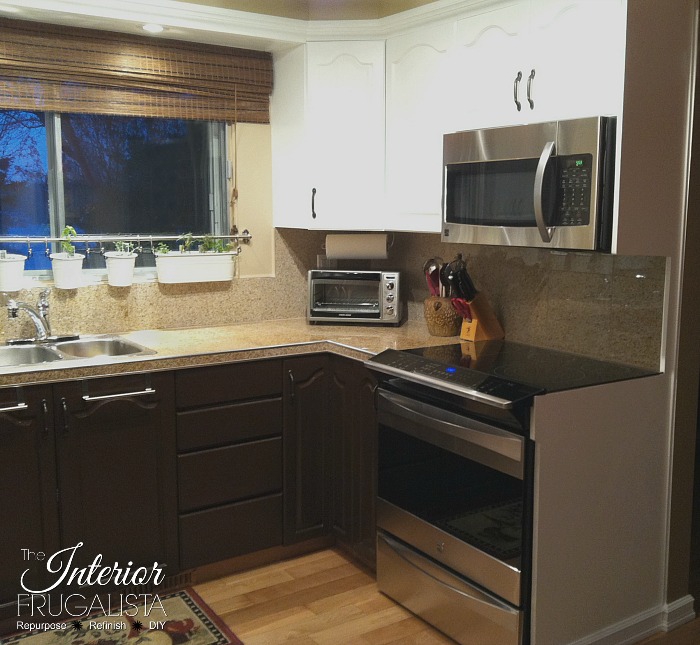
When the new appliances arrived we needed to address the problem of one side of the slide-in-range being exposed (pictured below).
To remedy that we built an end panel with oak plywood to conceal both the side of the range and microwave and painted them the same color as the cabinets.
I'm not going to lie, it was a heck of a lot of work but so worth it in the end. What a HUGE improvement from before and the bulk of the cost was sweat equity.
I was so happy with the results that I painted our Built-In China Cabinet in the dining room.
You may have noticed there is a small island that wasn't there in the before photos. If you look closer at the before photos you can see a china cabinet on the left. Would you believe the new island used to be THAT china cabinet?
You can see the transformation here in my China Cabinet Hack post.
Thanks for stopping by the Interior Frugalista today! I hope you were inspired by these kitchen cabinet painting tips. If you have any questions, please leave them in the comment section below or the Contact Me tab at the top to drop me an email. I love hearing from you!
If you enjoyed this kitchen makeover, I'd be so thankful if you shared it with a friend and pinned it to your Budget Kitchen Makeovers or Home Improvement board on Pinterest.

UPDATE FEBRUARY 2021
After living with the two-tone cabinets for a few years we decided to lighten and brighten our kitchen by painting all the cabinetry white. We also modified the built-in pantry and small kitchen island in our affordable kitchen refresh post.
I share my projects at these inspiring link parties.


Marie that is one incredible makeover! It sure was a lot of work but now it must feel like a breath of fresh air to walk in there.
ReplyDeleteThe painted cabinets and new window completely changed the room. I don't know why it took me over ten years to get it done! The best budget-friendly compromise 😊
ReplyDeleteIt looks beautiful. My cabinets are just like your oak cabinets, but mine unfortunately are not painted. I wanted to do it a few years ago but husband against painting oak cabinets. They were beautiful when we had them put in 30 years ago!! But I’m happy you got to do it.
ReplyDeleteThank you so much! I love our kitchen so much more since painting the cabinets white. Before blogging I was an interior redesigner/home stager and your story is one we would hear often. A lot of men have a strong aversion to painting oak, or any solid wood for that matter.
Delete