DIY Garden Screen With Repurposed Louvered Doors
A few weeks ago I noticed my neighbor had a stack of old wooden louvered bi-fold doors sitting by their garage. I asked what they were doing with them and learned they were heading to the dump. One person's trash is another person's treasure and I was happy to take them off their hands.
When Mr. Frugalista came home he asked why the heck there are a bunch of bi-fold doors in our backyard. To which I responded how lucky we were to hit the jackpot because we're going to build an amazing DIY garden screen with repurposed louvered doors.
DIY Privacy Fence With Repurposed Bi-Fold Doors
While we're building ours as a garden screen, this idea would also work as a backyard fence OR a privacy wall on a deck. Depending on the direction of the louvered slats, you'll be able to see out but the neighbors can't see in!
We have an area of our yard designated for stacked firewood for our backyard firepit, extra lumber for those "future projects", and extra garbage cans for yard debris. It has a direct sightline from our deck.
No matter how much I try to keep it clean and organized, it still looks like a junk heap. So I figured the bi-fold doors would be perfect to build a 6-foot high screen to hide that unsightly mess.
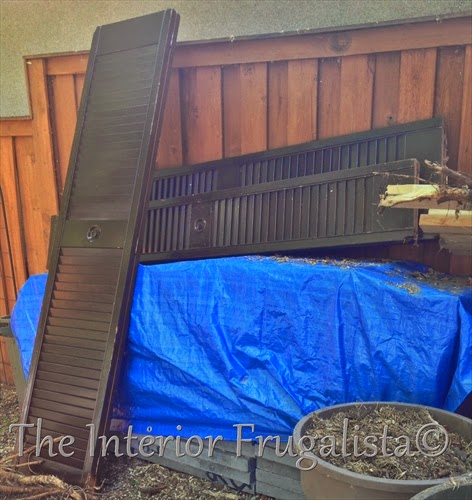
Pictured below are the salvaged wooden louvered doors from our neighbor. It gives me great pride knowing we rescued them from ending up in the landfill by giving them a useful purpose.
Before we get into the nitty-gritty of how to make the salvaged bi-fold door fence, almost all of the DIY projects shared here at Interior Frugalista have step-by-step tutorials so why not get your budget DIY on and subscribe. You can also follow us on Pinterest, Facebook, Instagram, and YouTube.
I should mention that we are self-taught DIYers and not trained professionals. This step-by-step tutorial is based on our building knowledge only. However, if you are a do-it-yourselfer like us, you'll find these steps helpful if you plan on making a version of our privacy fence.
What You'll Need To Make It
- Post Hole Auger (rented)
- Louvered Bifold doors (salvaged)
- Cedar Fence Posts (or pressure treated) 4 x 4 x 9'.
- Cedar (or treated) 1 x 6 x 6' Fence Boards
- Rapid Setting Concrete Mix
- Level
- 4" Galvanized Wood Screws
Here's How We Did It
Most Important Step
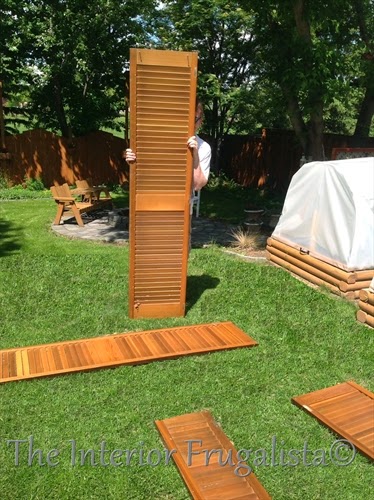
The first order of business was getting that area of our yard flagged for utility lines. In the meantime, we removed the hinges on each set of doors to separate them.
Post Holes
Once we got the all-clear from our utility company, we rented a post hole auger and got busy digging 3-foot deep holes every 6-feet for our fence posts. After the fence posts were dropped in and leveled, we used a rapid setting concrete to cement them in.
Paint Salvaged Doors
Unlike what we did, it's a good idea to paint the louvered doors before installation. Brushing the louvered slats is a pain in the neck. A paint sprayer is so much quicker and easier but make sure you use exterior paint for a lasting finish. We used Behr Exterior Premium Plus Paint And Primer In One in the color Sage Brush green.
Reveal Or Conceal The Door Knobs?
Should the doorknobs be facing into the yard or hidden behind the fence? The choice is yours but keep in mind the following tip.
Pro-Tip
Keep in mind the privacy element of the louvered slats. Facing towards you, when angled to the right you can see through the fence but your neighbors can't see in. When angled to the left you can't see behind the fence but your neighbors can see in.
Because ours is a garden screen, privacy is not an issue. Mr. Frugalista could not understand why for the life of me I would want the doorknobs visible from the yard. I, on the other hand, argued that they added a decorative element and gave the fence character. As you can see from the photo below, I won!
What If The Louvered Doors Are Different Widths?
If your bi-fold closet doors are different widths like ours, place the widest doors on the top and bottom and the narrowest in the middle (pictured above).
Space the bi-fold doors evenly and set them behind the fence posts like pictured below. Before attaching them check to make sure they are level. Simply screw them into the posts with 4-inch galvanized wood screws.
Repeat the steps above for the remaining fence sections.
Attaching Fence Boards
Much like how you attached the doors from the back of the fence posts, attach the 1" x 6" fence boards between each bi-fold door.
We had to get creative in the last section of our garden screen because we only had two wide bi-fold doors left. Instead of a small louvered door, we filled the space with two cedar fence boards butted up to one another.
The third section of our garden screen is on a sloped area of our yard. Still built at 6-feet high, this section of the fence is stepped down accordingly. That left a big gap below the bottom louvered door and so we added a third cedar fence board to hide the junk pile.
While the configuration of this section is different, so is the angle, which makes it less noticeable from our deck.
We could have left the cedar fence boards and posts alone and let them grey over time. Instead, we chose to brush them with Behr semi-transparent stain in the color Natural Cedar.
Unique Fence Post Caps
Instead of your typical decorative wooden fence post caps or solar light fence post caps, I got a little creative.
I think the painted wooden birdhouses from Michaels are such a cute and unique idea for garden screen post caps. And because the fence is far enough away from the deck, the birds do use it to nest in.
After a little elbow grease and a couple of afternoons, we can now enjoy time spent on our deck without staring into that unsightly woodpile.
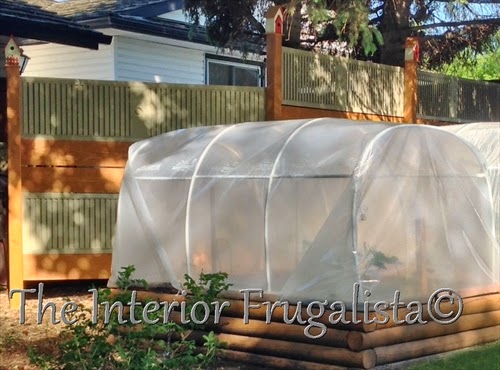
We have a short growing season here in the Canadian prairies where it is not uncommon to have snow in May. To help extend our growing season we built the budget-friendly raised garden greenhouses pictured below in front of our louvered door privacy screen.
On our deck, we salvaged more louvered doors to build a deck privacy screen. We also used salvaged bifold doors to make an outdoor vent cover bar table and BBQ Station.
Thanks for stopping by the Interior Frugalista today! I hope you were inspired by this DIY fence idea. If you have any questions, please leave them in the comment section below or the Contact Me tab at the top to drop me an email. I love hearing from you!
If you enjoyed this Vintage Louvered Door Fence, I'd be so thankful if you shared it with a friend and pinned it to your Repurposed Door Ideas or DIY Backyard Projects board on Pinterest.

I share my projects at these inspiring link parties.


Love the fence caps. How could Mr. Fugulista not like them. adorable.
ReplyDeleteRight! So much cuter than regular fence posts. They did grow on him eventually until birds started nesting in them. Now whether he likes it or not, they have to stay! LOL
DeleteThis is really a great work.
ReplyDeleteThank you so much Dona!
DeleteWow! That's amazing that you thought of building a fence with bifold doors--turned out amazing!!
ReplyDeleteThank you so much, Pamela! Louvered bifold doors is a great way to build a deck privacy screen as well. You can't see through the louvers on one side but can on the other.
DeleteI love it. Im thinking about using my shutters as skirting under my back porch. Has the weather warped them any? Thanks
ReplyDeleteThe weather hasn't warped them at all and they've survived a few brutal Canadian winters! However, mine are not touching the ground so I'm not sure how well yours will do skirting a porch. I guess if they are solid wood and you protect them with an outdoor rated clear coat, they may do fine.
DeleteYou did good girl. This is absolutely fabulous what an ingenious way to repurpose them. I have never seen this done before.
ReplyDeleteThank you so much, Anita! I'm thrilled that my vision ended up working and we couldn't be happier with our junk pile screen.
DeleteI love the privacy fence with the repurposed bifold doors!!! I sure wish I had the vision you do when you look at things such as the bifold doors & see something new & wonderful!! Great job!
ReplyDeleteThank you for your sweet comment, it made my day! I'm glad you like my quirky idea for repurposing old bifold doors. We are pleased to have our junk out of sight behind the garden screen.
DeleteI'm assuming that the doors had a polyurethane on them. So what kind of stain/paint did you use? I have 3 sets of doors that I am about to use to make a privacy fence.
ReplyDeleteWe used Behr Semi-transparent Natural Cedar stain on the wood sections and Behr Exterior Paint And Primer In One on the doors in the color Sage Brush (S370-3). It's much easier if you paint them with a paint sprayer before they are installed. I hope this helps!
Delete