How To Build A Large Upholstered Ottoman
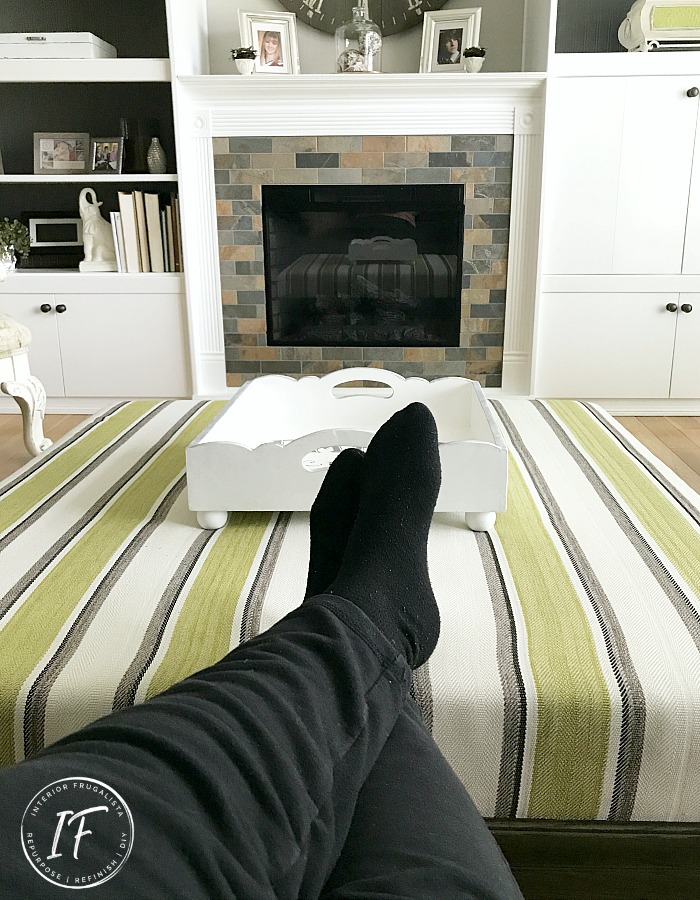
If this ottoman looks a little familiar, you'd be correct. A few years ago I wrote a tutorial on how to sew an ottoman slipcover but I've never shared a tutorial on how to build a large upholstered ottoman.
Recently we reduced the size of our DIY ottoman by six square inches. Considering we had to completely dismantle the original build to cut it down, it was a great opportunity to finally share a tutorial on how to build it.
It is not a difficult DIY furniture project and can be made on a relatively low budget. Plus you don't have to use power tools to make but it sure speeds up the process if you do.
How To Build A Large Upholstered Ottoman
We originally built our ottoman 46-inches square so that our large sofa and three armchairs could use it as a footstool. But when we replaced our sofa with a reclining loveseat, the ottoman was much too large, especially when the loveseat was in the recline position.
When considering building an ottoman, determine the size by using your sofa as a guide. For a full-size sofa, the ottoman should be no smaller than 36-inches if you want everyone seated to be able to reach it. The standard height of an ottoman is 15 1/2 to 22 inches but if you plan on using it as a footstool, a good rule of thumb is to have it the same height as your sofa.
What You'll Need To Build An Upholstered Ottoman
I've included both a materials list and a tool list for making the ottoman. I've included affiliate links in the post so you can see what products I used or recommend for this project. As an Amazon Associate, I earn a small commission from qualifying purchases at no extra cost to you.
Materials List
Tools List
How To Build An Upholstered Ottoman
If you don't have access to power saws, you can have the plywood and lumber cut to size for you at your home improvement store. Sometimes you can find just the right size in the off-cut lumber section of the store. For the mitered corners on the trim pieces, you could use a miter box and saw set.
Before we get into the nitty-gritty of how to build this DIY furniture project I should mention that we are self-taught DIYers and not trained professionals. This step-by-step tutorial is based on our building knowledge only.
However, if you are a do-it-yourselfer like us, you'll find these steps helpful if you plan on building a version of our 40-inch square fabric ottoman. You could apply these same instructions for building a smaller ottoman by adjusting measurements.
Step 1 - Stain Legs And Trim
This is a good time to stain the wooden legs, baseboard trim, and decorative rope trim with dark walnut stain (or stain color of your choosing). You may need to apply 2-3 coats to get it dark enough for your liking - we applied three.
Once the last coat is completely dry, protect the finish with 1-2 coats of clear Varathane. We'll get into the installation later in the post but first, it's time to build the wood frame.
Step 2 - Build Wood Frame
The first thing we need to do is build a wood frame for the ottoman with 1" x 6" lumber so it's 40-inches square. We're using butt joints to assemble the frame because the wood trim and fabric will cover the screw holes so no need for a pocket hole assembly.
To do this cut 1" x 6" into four pieces 39 1/4-inches long. Butt one end to another on each corner and screw together with 2-inch wood screws (see photo above). Set a square on each corner to make sure the box is completely square. The outside measurement of your box should be 40 square inches.
Step 3 - Plywood Top Installation
Cut a sheet of 3/4-inch plywood 40 inches square. You can use a table saw, circular saw with a circular saw guide, or have the home improvement store cut the plywood to size for you. Screw the plywood top onto the wooden frame you built in step 1.
Step 4 - Leg Support Blocks
Now we need to add support blocks for the legs. To do this cut 2" x 4" lumber into 3 1/2" x 3 1/2" blocks and attach them to the bottom corners of the wood frame with wood screws. It is important that they are flush with the wood on the bottom of the frame so the legs sit straight.
Step 5 - Attach Ottoman Legs
Screw metal table leg straight top plates onto each support block. Screw the stained wooden legs into the plates and flip the ottoman over onto its legs.
Step 6 - Attach Upholstery Foam
Ideally, you want 4-inch high-density upholstery foam. Unfortunately, it may not be readily available unless purchased at a foam retailer and it can carry a hefty price tag. We came up with a budget-friendly alternative by purchasing 3-inch foam at Fabricland (our local fabric retailer) plus 1-inch foam and used spray adhesive to join them together to get the 4-inch height we wanted.
Use a serrated knife or electric knife to cut the foam 40-inches square and attach it to the plywood top with upholstery spray adhesive.
We also couldn't get 1-inch foam in a 40-inch width so we used two sheets of foam also attached with a liberal spray of adhesive. Once the upholstery batting is wrapped around the foam it is snug as a bug.
Now we're ready to essentially sew a slipcover for the upholstered ottoman with nice professional looking stitched corners. If you can sew a straight line, you definitely can do this next step. If you don't have a sewing machine you could fold the fabric on the corners like I did here in my Claw Foot Upholstered Bench or 70's Coffee Table Upholstered Bench.
Why Didn't You Tuft The Ottoman?
You may be wondering why we didn't do a tufted upholstered top on the handmade ottoman. We did this for a few reasons:
- We wanted to reuse the original fabric which didn't have enough excess for tufting.
- No tufting gives it a more modern look.
- It provides a sturdier surface to serve food and drinks on coasters and trays.
If you prefer a tufted ottoman, I found this great tutorial on how to tuft in three easy steps that you might find helpful.
How To Upholster An Ottoman In Three Easy Steps
While shopping for the upholstery foam I found green, brown, and white striped heavyweight cotton French ticking fabric that was perfect for our living room coffee table/ottoman. With my membership, I got a fifty percent discount per meter.
Step 1- Pin Corners
Place the fabric over the ottoman with the wrong side facing up and line up the stripes nice and straight. Pin the two corners on just one side ONLY (as pictured below).
Here's a close up for a better visual. Instead of pins, you could use a tailor's chalk or a water-soluble marking pencil too on both sides of the fold to mark the seam.
Step 2 - Sew Corners
Remove the fabric and sew a straight stitch where you pinned. Place it back on the ottoman to ensure it fits well and adjust the seams accordingly, if necessary.
Place the fabric back onto the ottoman with the wrong side facing up, and pin the opposite two corners. You want a tight fit but not too tight that it distorts the stripes. Sew each corner with a straight stitch and place it back on the ottoman to check the fit. Adjust the seams accordingly.
Once you are satisfied with the fit cut the excess fabric from the corners leaving about a 1-inch seam allowance.
Step 3 - Attach Slipcover
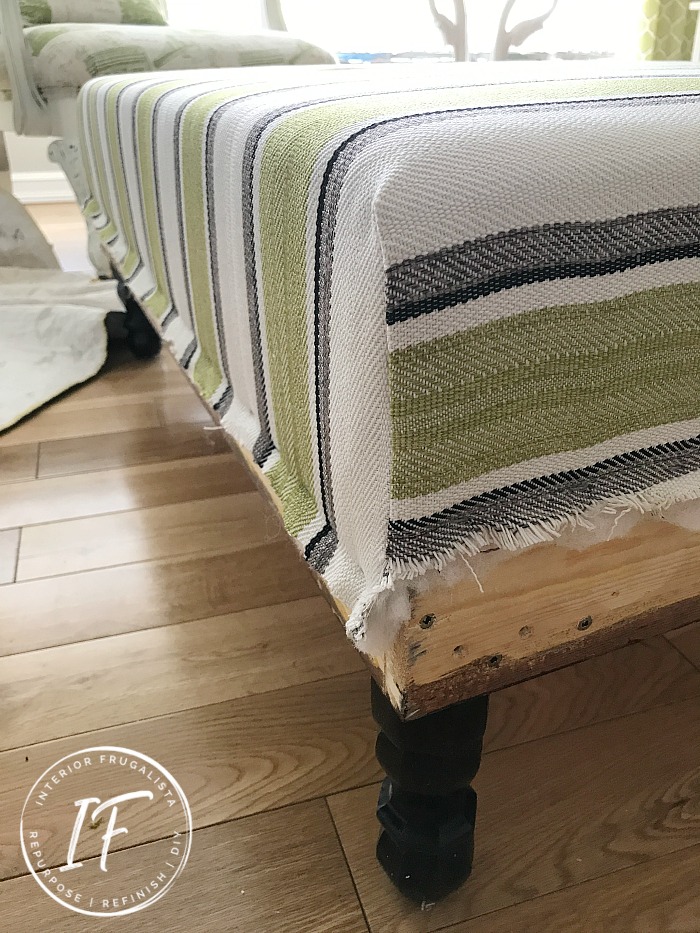
Lay a sheet of upholstery batting over the foam nice and taut. Set the slipcover over top and trim the excess batting.
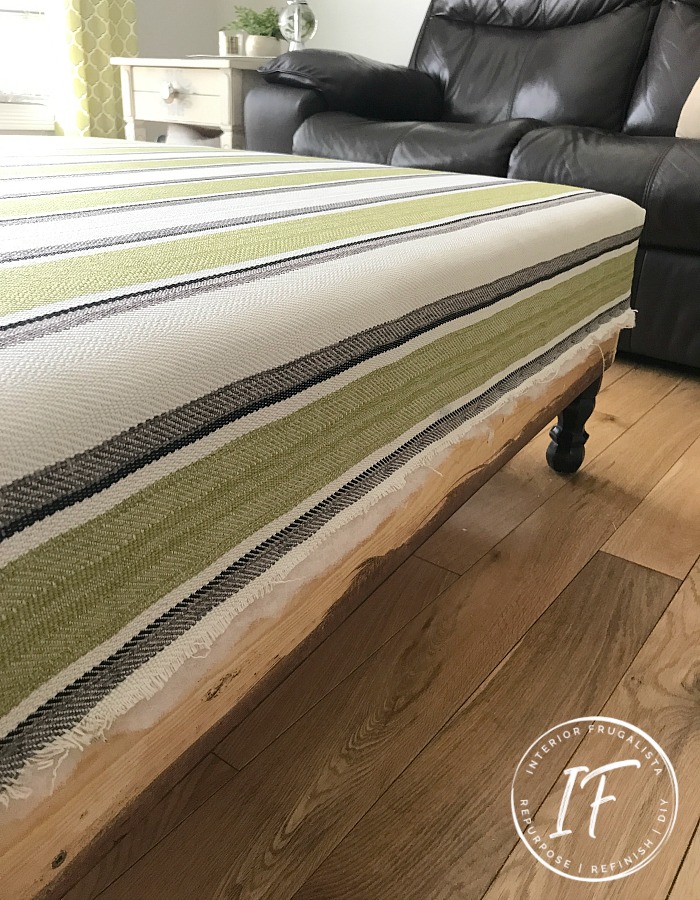
With an upholstery staple gun, staple the fabric onto the wood frame but be sure the staples are no higher than 3 1/2-inches from the bottom of the frame.
Start from the center of each side and work your way outwards. Repeat on the opposite side, checking to make sure the fabric is not being pulled too tight where it distorts the stripes. Cut the excess fabric below the staples.
Now we're ready to pretty up the bottom of the ottoman with decorative trim.
How To Install Decorative Trim On DIY Ottoman
We'll first install the 1-inch decorative rope trim along the bottom edge of the ottoman. You want to miter the corners at a 45º angle either with a miter box kit or compound miter saw. Attach the trim with wood glue, clamp in place, and let cure overnight.
The corners may be a bit sharp so it's a good idea to smooth them out with a sheet of sandpaper. If there are any gaps in your mitered joints, fill them in wood filler and sand lightly once dry. We'll come back later to stain over the repairs after the baseboard trim is installed below.
Oak Baseboard Trim Installation
We used an oak 3 1/2-inch baseboard trim to dress up the base and here's how we installed it.
- Like the rope trim, miter the corners at a 45º angle.
- Butt the oak trim directly above the rope trim and nail it in place with either 1-inch finishing nails or a brad nail gun.
- Countersink the nails slightly and fill the nail holes with wood filler as well as any gaps in the corner joints.
- Once the wood filler is dry, sand it smoothly along with the joints so there are no sharp edges.
- Now you're ready to use a small foam brush and stain over the wood filler on both the rope trim and baseboard trim. If necessary, tape some cardboard (from a cereal box) over the fabric to avoid any oops.
- Cover the nail holes with a dark wood filler stick.
It may seem like a heck of a lot of steps to make this ottoman but trust me it's easier than it looks and not time-consuming. The longest part is waiting for glue to cure and stain to dry. It's worth the time and effort because you can build your ottoman for a fraction of the cost of buying one.
If you have any questions about building this upholstered ottoman, please leave them in the comment section below or the Contact Me tab at the top. I love hearing from you!
If you enjoyed this DIY Upholstered Ottoman tutorial, I'd be so thankful if you shared it with a friend and pinned it to your DIY Furniture or Upholstered Ottomans board on Pinterest.

I share my projects at these inspiring link parties.


I love your woodworking skills, Marie! You create the loveliest pieces! I am so envious!
ReplyDeleteThank you Gail, I ditto the sentiment right backatcha! I'm so envious of your amazing crafting abilities. Have a good Memorial Day weekend. xo
DeleteMarie again you are the furniture whisper. Love this. It is a beauty. Have a great weekend.
ReplyDeleteHugs,
Kris
Thanks so much, Kris. I'm so pleased with the new size for our living room. Have a great Memorial Day Weekend!
DeleteWow! Looks great! Hard to believe it's homemade. It looks like it came from a high-end furniture store.
ReplyDeleteThat's a huge compliment, Lisa, thank you so much!
DeleteWow! This is a fantastic tutorial and you make it look so easy to make. I love the fabric you used too - so pretty! Pinning this for later.
ReplyDeleteThank you so much, I'm glad you like the tutorial because they are always a bit of a challenge to write. Appreciate the pin too!
DeleteWow Marie, you guys rocked this one out of the park. That looks like it comes straight out of a high end home decor boutique, trimmings and all. The only ottoman I've ever managed to make was with plastic bottles ;-) Yours is beautiful
ReplyDeleteYou just made my day, Michelle! Thank you so much for your sweet comments because it affirmed that we accomplished our goal of making it looks less umm homemade.
DeleteMy Gosh Marie!! Your ottoman is just impressive! I am in awe with your skills!!!
ReplyDeleteThank you very much, Maya, your sweet comment made my day! xo
DeleteThank you, Marilyn! xo
ReplyDeleteI just love this! An upholstered ottoman was one of the first things my husband and I ever built! There was one in the JCPenney catalog that was way out of my price range, so we recreated it! Our plans were very similar to this! I love the moulding addition, that puts it over the top! Found this post through your 2020 highlight post! Thank you for sharing at our link party!
ReplyDeleteI love hearing stories from others who saw something they loved but was out of their price range and recreated it themselves for a fraction of the price. Isn't it so rewarding? Thanks for sharing, Jenn!
DeleteMarie you've so inspired me! Thanks for the great easy instructions!
ReplyDeleteThat makes me very happy, Barbara! If you decide to build an ottoman I'd love to see it. Happy building 👍🏻
DeleteOver the past couple of days my husband and I made a slightly larger version (think twin sized memory foam mattress,$100, since, at present, the price of foam is ridiculous) of your ottoman. Your directions were precise and so easy to follow. I love my new ottoman and can't thank you enough for sharing yours with us. I'd love for you to see how it turned out but don't know how to attach a picture to this post.
ReplyDeleteCongratulations on your new ottoman build! I'm so glad to hear you found our instructions easy to follow. I would love to see a photo of your ottoman. If you scroll to the top of the blog where it says "contact me", you can email me directly from there. Enjoy your new ottoman!
DeleteMaria, amazing work! You have a real talent! And thank you for sharing your instructions!
ReplyDeleteThank you very much Elizabeth, I hope you found the instructions helpful! ~Marie 🙂
DeleteHow much was the overall cost to make it?
ReplyDeleteIt cost us around $100 Canadian to make. We built it a few years ago so prices have likely gone up. The most expensive part was the upholstery foam.
Delete