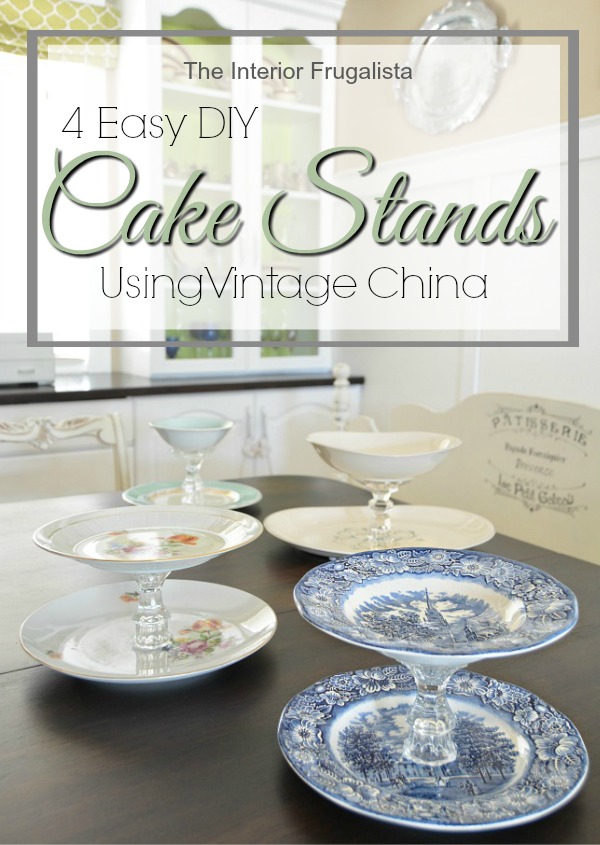
4 Easy DIY Vintage China Cake Stands
Do you have a dining hutch filled with mismatched china? The ones you don't use because there are five dinner plates and eight bowls. But you don't have the heart to get rid of them because, well they were Grandma's.
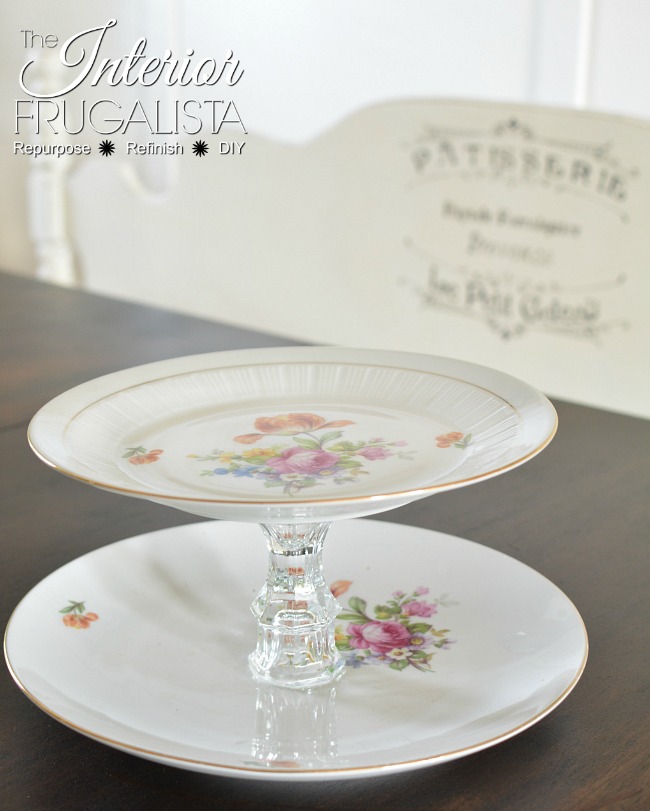
They are not honoring Grandma by collecting dust on a shelf or in a box in the storage room. But there is a way that mismatched china can be repurposed and used at your next family gathering! Today I'm sharing how easy it is to turn them into lovely DIY vintage china cake stands in four different styles.
4 Easy DIY Tiered Cake Stands With Vintage China
These are so lovely that even Grandma would be proud to see her mismatched china displayed so beautifully on the Thanksgiving dessert table or Christmas buffet. However, they don't have to be used as tiered cake stands, they also make wonderful jewelry holders in a bedroom too!
But if Grandma's china has sentimental value with other members of your family, you could surprise them by making these for gifts.
While I wasn't fortunate enough to have an inherited set of mismatched china to make the vintage china cake stands, I'm using four different china patterns found at the thrift store.
1) Liberty Blue English Transferware Cake Stand
This cake stand is made with a Liberty Blue English Transferware Independence Hall salad plate and Old North Church bowl.
2) Kahla German Democratic Republic Cake Stand
This cake stand is made with a German Democratic Republic Kahla gold-rimmed porcelain dinner plate for the base and a matching salad plate on the top.
3) Whitehall English Johnson Bros. Snowhite Ironstone Cake Stand
This cake stand is made with a pretty soft green Whitehall English Johnson Bros. Snowhite Ironstone plate and bowl. This could be used for fresh fruit on the bottom with fruit dip in the bowl. Or crackers on the plate with a cheeseball or antipasto in the bowl.
4) English Johnson Bros. Cake Stand
Despite an extensive internet search, I do not know the name of the pattern of the oval platter and matching serving bowl used to make the English Johnson Bros. cake stand pictured below.
If you recognize the pattern, I would be so grateful if you could share the name in the comments section at the bottom of the post.
What You'll Need To Make Them
Even if you don't have mismatched china or dinnerware available, these cake stands are so inexpensive to make. You can see in the photo below that the GDR set below cost me a whopping $1 each.
I find pretty blue and white English transferware pieces all the time at thrift stores. Even if they aren't the same pattern, they still pair beautifully together.
This post contains affiliate links so you can see what products I used or recommend for this project. As an Amazon Associate, I earn a small commission from any qualifying purchases at no extra cost to you. Thank you for your support!
Supply List
Glass Candlestick (dollar store)
Vintage Dinner Plates, Salad Plates, Bowls, or Small Platters
E6000 Glue
Alternative Cake Stand Pedestal Base Idea
Rather than glass candlesticks, alternatively, you could put Grandma's mismatched wine glasses to good use as a pedestal base.
How To Make Vintage China Cake Stands
Once you've gathered all the vintage dinnerware you'd like to use, assembling the vintage china cake stands is quite easy.
Step One
Start with the largest plate or platter and a glass candlestick. Run a bead of E6000 glue along the bottom of a glass candlestick. Place the candlestick (or wine glass) in the center of the plate and press firmly for a good bond.
The glue starts to get tacky in about two minutes and sets in about ten minutes. Allow the glue to cure for at least 24 hours.
NOTE: It's a matter of personal choice which direction the candlesticks or wine glasses face when gluing them onto the dishes.
Step Two
Run a bead of E6000 glue along the top of the candlestick attached to the bottom plate. Center the candlestick on the bottom of a smaller matching plate or bowl. Again, press firmly to ensure a good bond and let the glue cure for another 24 hours.
Helpful Tips
- Remove any oozing glue with a cotton swab.
- The glue takes between 24-72 hours to completely cure. Keep this in mind before holding the cake stand by the stem.
- Err on the side of caution and do not use the cake stands for at least 72 hours.
That's all there is to it, I told you they were easy to make! The most time-consuming part of making the vintage china cake stands is waiting for the glue to cure.
Are the vintage china cake stands dishwasher safe?
The vintage china cake stands are not dishwasher safe. I also would not recommend immersing them in dishwater either. Instead, wipe them with a warm soapy dishcloth.
...and perhaps getting over the guilt of messing with Grandma's china!
The guilt will soon pass when you set out the pretty tiered cake stands at your next family gathering and they recognize Grandma's dishes. Surely conversation will ensue reminiscing about the family gatherings long since passed where the china was used.
You can also make gorgeous cake stands with silver plates and platters like this DIY Parisian cake stand or these repurposed silver platter cake stands. But if you've got a wedding or large gathering coming up, here's another idea for a 4-tier rustic wood cake stand that can be dismantled.
Thanks for stopping by the Interior Frugalista today! I hope you were inspired by these DIY vintage china cake stand ideas.
Almost all of our DIY ideas have step-by-step tutorials so why not get your budget DIY on and subscribe. You can also find us on Pinterest, Facebook, Instagram, and YouTube.
If you have any questions, please leave them in the comment section below or the Contact Me tab at the top to drop me an email. I love hearing from you!
If you enjoyed this two-tier DIY cake stand using vintage china, I'd be so thankful if you shared it with a friend and pinned it to your favorite board on Pinterest.
I share my projects at these inspiring link parties.


Comments
Post a Comment
Don't be shy, I love reading your comments and reply to every single one! If you want to be notified when I reply back to you, click the "Notify Me" button below the comment box.