China Cabinet Hack to Kitchen Island and Pantry
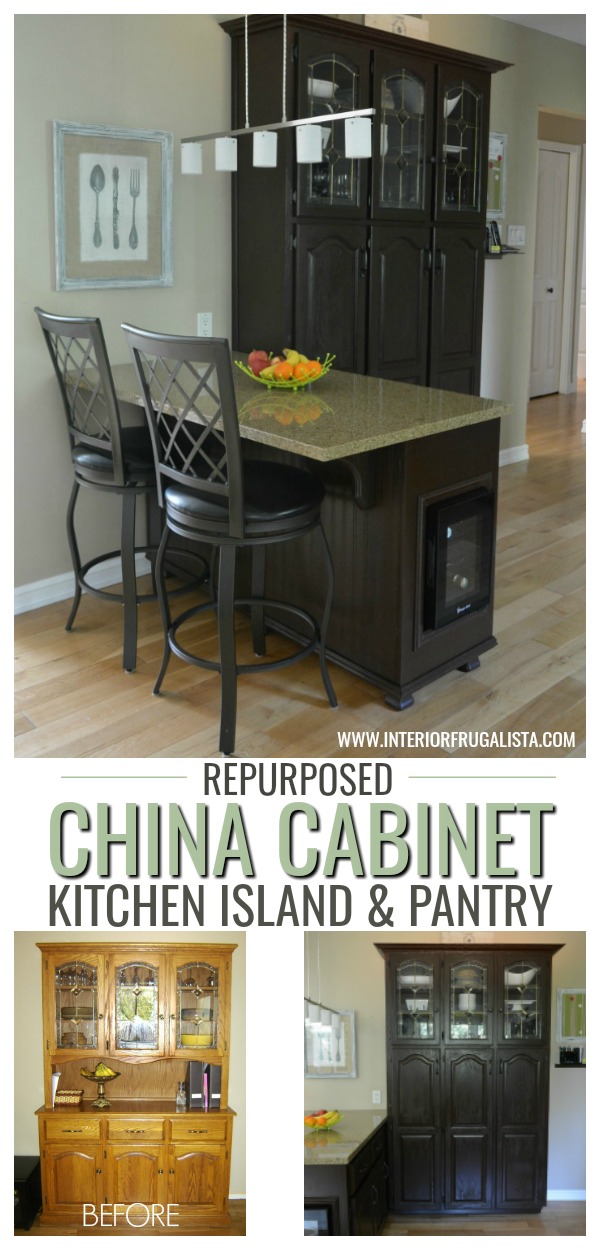
A China Cabinet Hack - how to turn a china cabinet into a small kitchen island and narrow pantry. A clever budget-friendly solution for a small kitchen that adds additional food storage, counter space, and seating.
Repurposed China Cabinet Kitchen Island AND Pantry
In an attempt to update our small kitchen on budget, we refreshed the golden oak kitchen cabinets by painting the uppers white and the lower cabinets stained a dark walnut. You can see that makeover here in our how to paint kitchen cabinets for a lasting finish post.
While it made a huge difference in updating our dark and dated kitchen we still had the problem with lack of food storage, counter space, and somewhere to sit.
If money were no object, our preference would be to blow out the wall between our kitchen and living room and reconfigure the cabinetry. Being a load-bearing wall the cost is way over our budget.
This is where our china cabinet hutch came into play.
It has sentimental value because it was a Christmas gift when our son was a baby and has grown with our family. But it is taking up valuable real estate in our kitchen while not offering any function.
One morning while enjoying my coffee it dawned on me, what if we separated the top and bottom half and made them into something useful?
What I saw was the lower half repurposed into a small island to offer more food prep counter space plus provide seating in our small kitchen.
Then I imagined the upper half being reconfigured into a narrow pantry unit that offered more food storage while also being a focal point in the room.
Once that seed was planted in my brain, there was no turning back.
This post contains affiliate links so you can see what products I used or recommend for this project. As an Amazon Associate, I earn a small commission from qualifying purchases at no extra cost to you.
Before we get into the nitty-gritty of the dining hutch hack, I should mention that we are self-taught DIYers and not trained professionals. This step-by-step tutorial is based on our building knowledge only. However, if you are a do-it-yourselfer like us, you'll find these steps helpful if you plan on making a version of our repurposed dining hutch.
Almost all of the DIY projects shared here at Interior Frugalista have step-by-step tutorials so why not get your budget DIY on and subscribe. You can also follow us on Pinterest, Facebook, Instagram, and YouTube.
Let's start with how we repurposed the hutch into the narrow kitchen pantry unit.
How To Repurpose A Dining Hutch Into A Kitchen Pantry
In order to turn the top of the dining hutch into a kitchen pantry unit, we needed to build a base cabinet for it to sit on. We built three storage cubbies that align with the three glass doors on the hutch with melamine.
We built a 2 x 4 box for a kicker plate along the bottom and attached it to the pantry carcass with wood screws. We also ordered three tall custom oak doors to match the profile of the china cabinet doors for the bottom half of the pantry unit.
The exterior sides of the melamine pantry carcass is faced with an oak veneer. The original crown molding on the hutch is replaced with a much larger crown trim. All the oak is stained a dark walnut to match the lower cabinets in the kitchen.
Repurposed China Cabinet Kitchen Pantry Interior
You can get a good idea of how we built the lower half of the pantry in the photo below. The original oak back on the upper half of the hutch remains to dress up behind the glass doors.
The lower half of the pantry does not have a back. Essentially we built a melamine rectangular box with two sides, a top and bottom, two dividers, and a kick plate underneath.
We added metal brackets to each storage compartment for handy adjustable shelving (pictured below).
Now let's move on to the kitchen island.
How To Repurpose A Dining Hutch Into A Small Kitchen Island
Turning the bottom of the dining hutch into a small kitchen island was much easier. All we did was add feet to the base to raise it.
Instead of raising it to counter height, we raised it to table height. Why? Being vertically challenged it will be more comfortable for food prep.
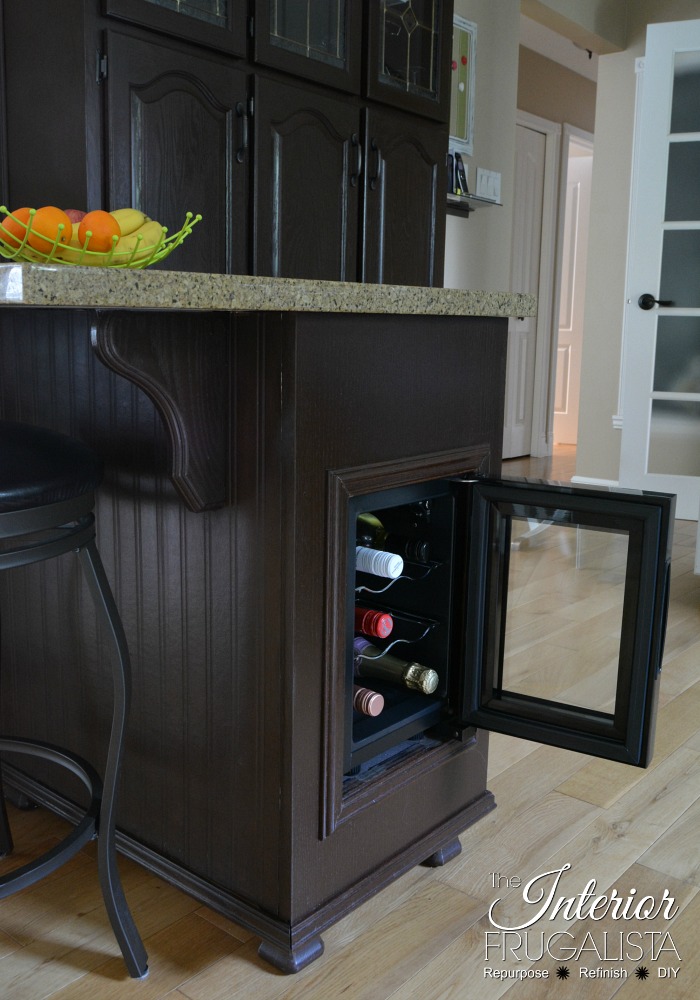
We found a small 6 bottle wine fridge that fits perfectly without losing the much-needed drawer storage.
We cut an opening on the side of the island to accommodate the fridge. I'm not 100% certain that was a good choice instead of just removing a cabinet door and having it face into the kitchen.
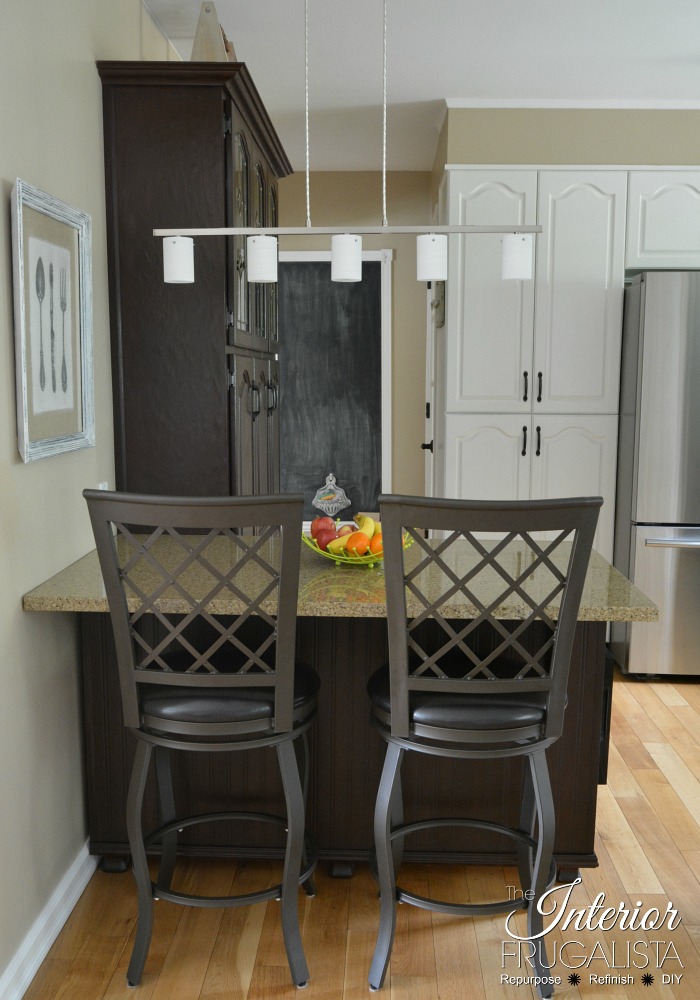
Small wood corbels are inset on the back of the cabinet to support the new countertop. We found the perfect size off-cut granite slab that matches our kitchen counters. We chose a simple square profile along the edge.
We also found two bronze lattice back swivel bar stools with leather seats.
The electrical box for the light fixture was relocated above the island for plugging in small kitchen appliances.
I found the perfect 5 pendant brushed nickel light fixture with frosted glass at Home Depot. It provides just the right amount of task lighting for food prep and reading the paper.
I'm so glad I stood by the kitchen window sipping coffee while staring at our old dining hutch that morning. We could not be happier that my crazy out-of-the-box idea was realized and on a small budget. It's the perfect solution for our small kitchen.
Thanks for stopping by the Interior Frugalista today! I hope you were inspired by this dining hutch hack. If you have any questions, please leave them in the comment section below or the Contact Me tab at the top to drop me an email. I love hearing from you!
If you enjoyed this DIY kitchen island and pantry project, I'd be so thankful if you shared it with a friend and pinned it to your Repurposed Furniture or Small Kitchen Ideas board on Pinterest.

UPDATE FEBRUARY 2021
After living with the two-tone kitchen cabinets for a few years we decided to lighten and brighten our kitchen by painting all the cabinetry white. We also modified the built-in pantry and small kitchen island. You can see those changes in our affordable kitchen refresh post.
I share my projects at these inspiring link parties.


You are very clever and creative, Marie. I love the pantry unit in particular.
ReplyDeleteThanks Susan! Just wait until you see the project we're working on now - should be ready to post in a couple of weeks.
ReplyDeleteWhat a clever idea, I would never have thought to do this. I love it!!!!
ReplyDeleteThank you so much! I'm so pleased to have the extra pantry storage and have a spot in our small kitchen now to read the paper and enjoy our morning coffee.
DeleteThis is Terri Hughes, I am the one that said this was a clever idea. I don't know why it didn't show my name. Very nice job!
DeleteHey Terri, so nice to see that it was you who left the sweet comment earlier! xo
ReplyDeleteMarie, genius idea!! It truly just takes a few minutes of imagination (or maybe a day or two in my case!) to repurpose a piece you love. That turned out to be not only BEAUTIFUL, but so handy and you were able to keep the hutch with so many memories!! My boyfriend (we are in our early 70's so too funny saying boyfriend!!lol!!) is not much of a repurpos-er, but I always have been and most times he thinks I'm nuts, but in the end, he says "great idea"...most of the time!!?! ANYWAY, loved the finished pantry and island!!
ReplyDeleteThanks Karolyn, I'm glad you like how we repurposed our hold hutch. It's one of the best ideas we've had for our home as far as function. I seem to recall Mr. Frugalista thought it was a silly idea at first too. But as most often happens, like your boyfriend, he realized how great it would be for our small kitchen.
DeleteMarie, now that you have painted the cabinets are you planning to paint the pantry/island also?
ReplyDeleteSheila
You know it! LOL Coming soon (fingers crossed).
DeleteThat is such a clever reuse of the hutch Marie!! It really works well next to the china cabinet. And you know we can always use more storage.
ReplyDeleteIt is one of the best budget home improvements we made to this old house. I love having the extra storage FINALLY, it only took us almost 20 years! Having a little island is also great for so many reasons too. I'm glad you like the innovative repurpose of our old china cabinet, Mary.
Deletethis is amazing, I had to share on my group too!
ReplyDeleteThank you so much, I'm glad you like it. I so appreciate the share to your group too! xo Hope you're having a lovely Sunday.
DeleteWell aren't you a clever bunny it look awesome.
ReplyDeleteThanks Anita, it is one of the best DIY projects we've done in this house and works perfect for our small kitchen. Psssst, as we speak, the island is undergoing another makeover. After living with it for a couple years we're modifying it to be even better.
DeleteI love it looks so amazing and do you have a YouTube video on these projects I would love to do the same
ReplyDeleteI'm glad you like this repurpose idea! Unfortunately, there is no video tutorial on YouTube for this project as I didn't have adequate equipment or the skill set back when this project was completed.
Delete