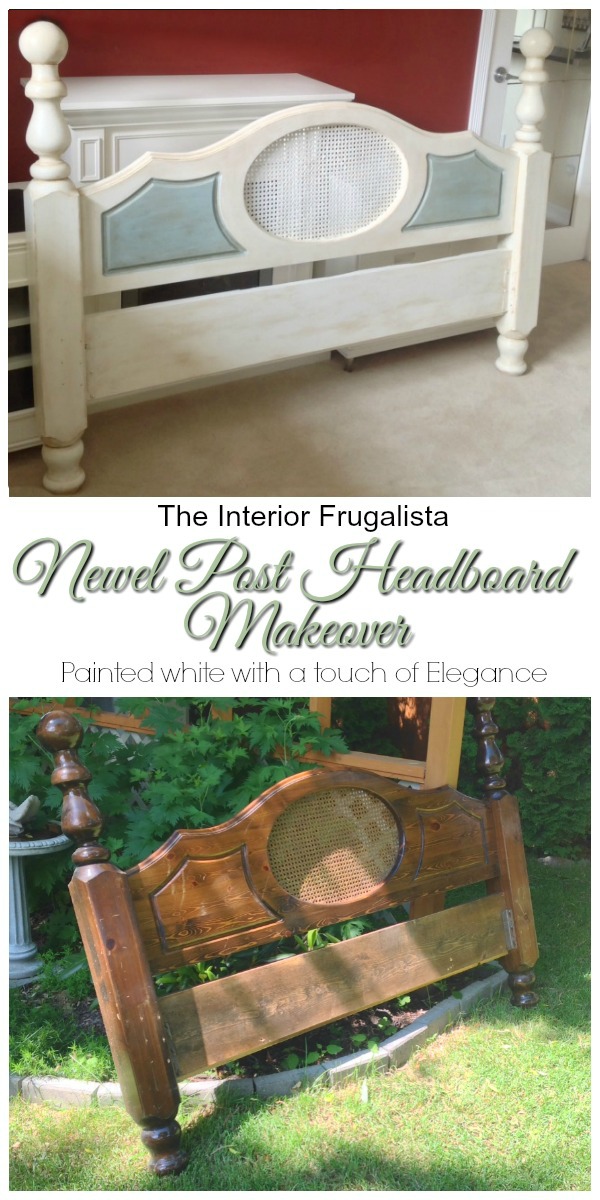
A Vintage Newel Post Headboard With A Touch Of Elegance
Today I'm sharing how to transform a vintage newel post headboard with a little touch of elegance. Such a quick and easy furniture makeover taking that old headboard that has seen its better days from drab to fab!
During a recent trip to the Habitat ReStore, I found a solid wood headboard with cane detail tucked behind several others in a back room. Mr. Frugalista gave me that are you really sure you want this look because he could see we were going to have to work hard to retrieve it from the stash.
Secondhand Newel Post Headboard Makeover
When I purchased the headboard, the two men behind the counter shook their heads when they saw that I was driving a Ford Taurus SEDAN.
I gave them that "oh yeah, watch me" look, hiked that heavy headboard under my arm, and marched straight towards my sedan. At 5'3" I'm vertically challenged so imagine this thing practically dragging across the parking lot as they stood and watched.
Not looking back, I opened the trunk, pulled the back seats down, and after a little head-scratching managed to shove the headboard into the trunk. Albeit with half of it sticking out the back end. Nothing a little red flag and some bungee cords couldn't fix to get me on the freeway towards home.
I'm happy to report it did get home safe and sound, despite the strange looks I got from passersby. Never underestimate the determination of a middle-aged woman on a mission! 😉
Anyway, pictured below is that heavy newel post headboard before the makeover. The cane was in perfect condition but as you can see, the wood had seen its better days.
But what a difference paint made to update that old secondhand vintage headboard! Any furniture with a cane is always a popular selling feature when upcycling furniture. My cane-back farmhouse chairs sold very quickly and so I knew this headboard would too.
What You'll Need To Make It
For this newel post headboard makeover, I am using products from Country Chic Paint.
This post contains affiliate links so you can see what products I used or recommended for this project. As an Amazon Associate, I earn a small commission from any qualifying purchases at no extra cost to you. Thank you for your support!
Supply List
Vintage Newel Post Headboard
White Vanilla Frosting Chalk-Style Paint
Blue/Green Elegance Chalk-Style Paint
Clear and Brown Antiquing Wax
Here's How I Made It
Step 1 - Prepping The Headboard For Paint
Taking the steps to prep furniture for paint will provide a lasting finish. Even though some paint brands say you can skip this step, I always err on the side of caution, especially when selling my pieces. I share my process in my how-to-prep furniture for chalk paint post.
Step 2 - Painting The Headboard
What a difference painting the vintage headboard made after just one coat of white vanilla frosting chalk-style paint. It only took two coats to completely cover the dark wood. For a beautiful smooth finish, lightly sand between each coat with 220-grit sandpaper.
Even the oval cane insert came out beautifully after two coats of white chalk-style paint.
Now, this is where the touch of elegance comes in. Next, I painted the recessed parts of the headboard in a gorgeous blue/green paint color named Elegance. It's one of my favorite colors in the Country Chic Paint line.
Step 3 - Aged Headboard Patina
For this headboard makeover, I chose not to distress the paint for a shabby chic finish. Instead, I gave the headboard an aged patina with brown antiquing wax. The wax will dry rock solid after a 30-day cure time and will protect the paint.
To avoid staining the white paint, I recommend you apply clear wax first with a small wax brush. While the wax is still wet, brush on the brown antiquing wax and then buff it with a lint-free rag to a matte finish.
You can see in the photo above how it deepened the Elegance paint color and aged the white paint with a vintage charm.
The sweet woman who purchased this headboard also bought the greek key pine bedside table that I also recently gave a makeover. It paired beautifully with the headboard and she'll be putting both in her guest room.
Oh, did I mention that along with this headboard fitting into the trunk of my Ford Taurus Sedan that day, I also squeezed two more thrift store headboards into my trunk? You can see those headboard transformations in my outdoor garden bench for two and dining room headboard bench makeover posts.
Thanks for stopping by the Interior Frugalista today! I hope you were inspired by this vintage newel post headboard makeover.
Almost all of our DIY ideas have step-by-step tutorials so why not get your budget DIY on and subscribe. You can also find us on Pinterest, Facebook, and YouTube.
If you have any questions, please leave them in the comment section below or the Contact Me tab at the top to drop me an email. I love hearing from you!
If you enjoyed this vintage newel post headboard with a touch of elegance, I'd be so thankful if you shared it with a friend and pinned it to your favorite board on Pinterest.
I share my projects at these inspiring link parties.


Comments
Post a Comment
Don't be shy, I love reading your comments and reply to every single one! If you want to be notified when I reply back to you, click the "Notify Me" button below the comment box.