Chalk Painted Kitchen Cabinets
Selling your home but your kitchen cabinets are outdated? Today I'm sharing a way to give them a facelift without spending a lot of money so the kitchen shows well to potential buyers. Instead of refacing the doors, consider chalk-painted kitchen cabinets, a much quicker, less expensive, and easier alternative and I'll show you how.
With this option, there is no need to remove the cabinet doors, strip the old finish, or prime. Plus, because chalk paint dries quickly, you can have a small kitchen refreshed within a couple of days!
Update Kitchen Cabinets With Chalk Paint
The difference between original kitchen cabinets looking tired and dated and the same kitchen cabinets presented with a clean and refreshed look can be a deal breaker when showing your home.
As a former real estate home stager, I can attest that the appearance of your kitchen and bathroom(s) will make a big difference in the value of your home. So giving your kitchen a facelift with a little elbow grease on a small budget, even though it's still an original kitchen, is well worth the effort!
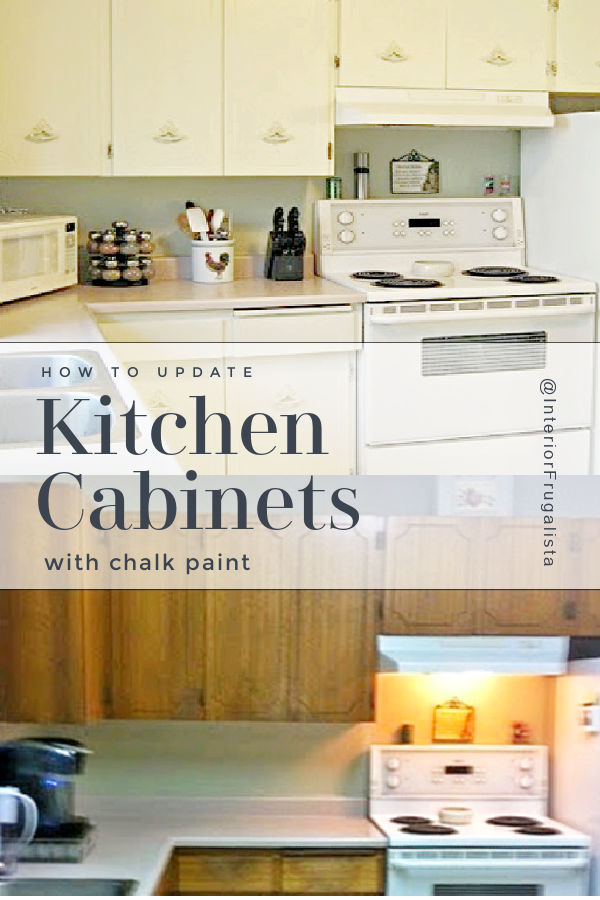
This is a family member's kitchen who was getting her home ready to list on the market. She completed the kitchen makeover herself after I consulted her on how to paint kitchen cabinets with chalk paint. I figured I should share the information I taught her with you as well, using her kitchen as an example.
Oh, and I am happy to report that her home sold very quickly!
Why is it quicker to paint kitchen cabinets with chalk paint?
As mentioned earlier, what makes painting kitchen cabinets with chalk paint much quicker is that you don't have to remove the doors nor do you have to sand them first. Unlike the golden oak kitchen cabinet transformation in my home followed by the second affordable kitchen makeover with latex paint.
Also, chalk paint dries very quickly so by the time you finish painting the last cabinet, you can turn around and start painting the second coat from the point where you began. If you have a small kitchen, it could mean you'll have all the cabinets painted the same day!
Chalk paint goes a long way and it took under two quarts to paint this entire kitchen. But a rule of thumb to keep in mind is that one quart covers approximately 120 square feet. For this kitchen cabinet facelift, we used chalk-style paint from the Country Chic Paint line.
What You'll Need
This post contains affiliate links so you can see what products I used or recommend for this project. As an Amazon Associate, I earn a small commission from any qualifying purchases at no extra cost to you. Thank you for your support!
Supply List
Cleaner/Degreaser
150-grit and 220-grit Sandpaper
Clear Shellac Primer (optional)
Vanilla Frosting Chalk Style Paint
Small Foam Roller
Tough Coat
Top Coat Applicator
Chalk Painted Kitchen Cabinets Before and After
Let's take a look at some before and after photos of the chalk-painted kitchen cabinets.
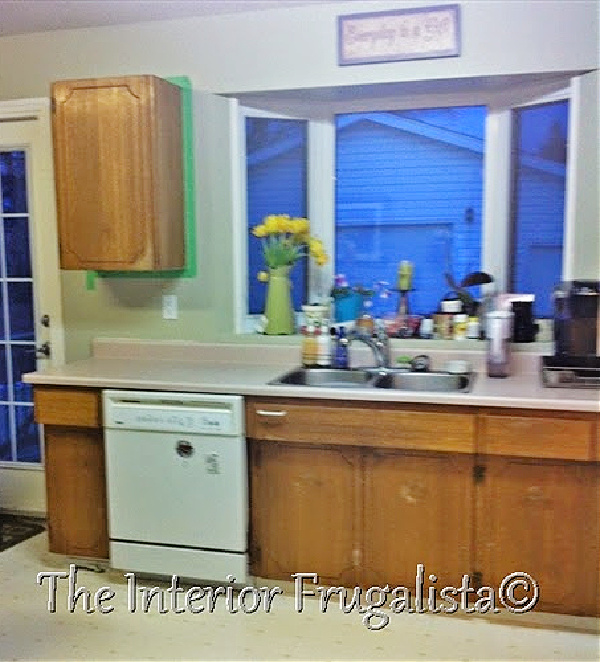
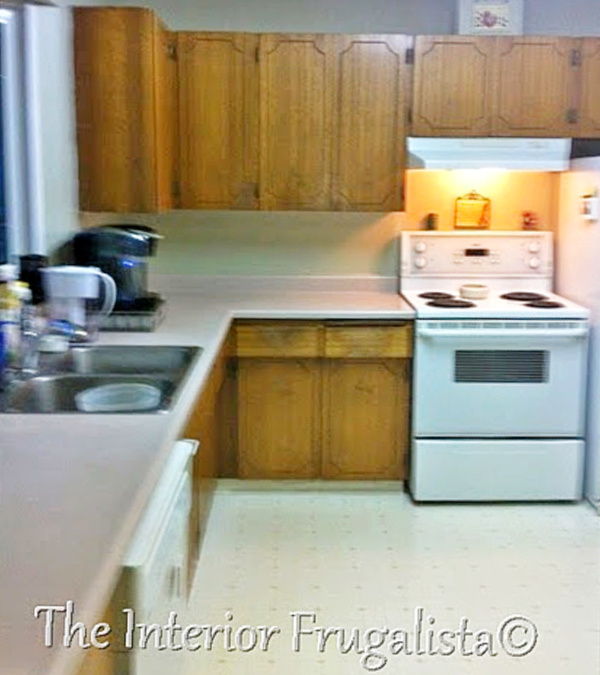
Before we begin, I should point out that the kitchen makeover was completed seven years ago and the photos are not to my normal standard. While the photos sent to me were not of the best quality, you can still see how painting the cabinets made a big difference to the overall look of the kitchen.
As a potential buyer, when walking into her kitchen, instead of being drawn to the new french doors leading to a lovely deck, or the sun-filled bay window, your eyes are immediately drawn to the dated original cabinets.
It's kind of like when you see someone wearing a gorgeous outfit and then you look down at their feet and their wearing old beat-up shoes. Such a letdown!
Again, I apologize for the blurry and poor quality photos. I wish I had been able to set up my camera equipment to take them myself.
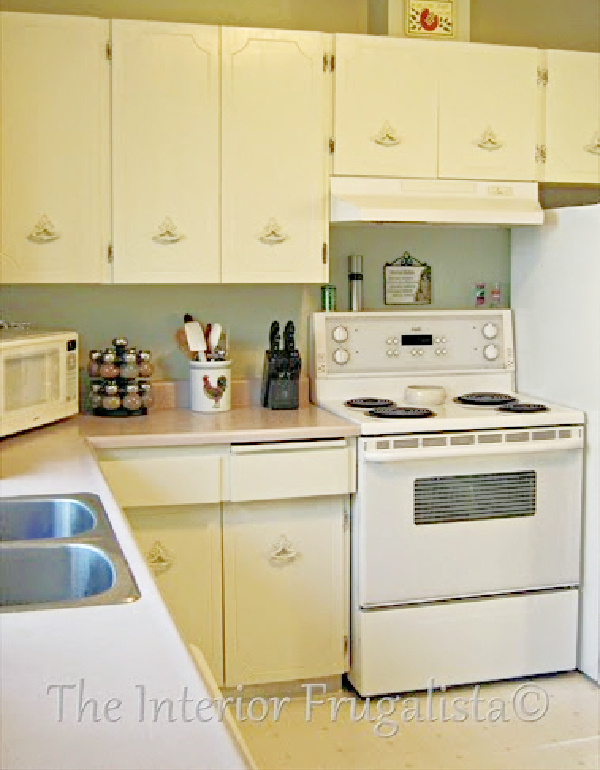
Here is that same bank of cabinets after, painted a warm white with chalk-style paint.
Here are the original kitchen cabinets from another angle before the makeover.
Wouldn't you agree that they are showing so much better now that they are painted white?
I should mention that before the exterior cabinets were painted, the interiors were painted with a fresh coat of white Behr Premium Plus Ultra Satin Enamel Paint And Primer. Potential buyers WILL open your cupboards so it's important that they look fresh and clean inside too.
How To Paint Kitchen Cabinets With Chalk Paint
Step 1 - Clean Kitchen Cabinets
There is no need to remove the cabinet doors when using chalk paint but you will need to remove the handles. To save money, instead of replacing them, they can be updated with paint as well! Set them aside with the screws and we'll talk more about that further down in the post.
Next, the doors will need a good cleaning to remove any dirt and grease. My preference is 1 part white vinegar, 2 parts warm water, and a drop of blue Dawn dish soap. However, a cleaner/degreaser TSP cleaner is fine too. Just make sure you wipe the cabinets again to remove any residue with warm water.
Step 2 - Prep Kitchen Cabinets For Chalk Paint
If you plan on replacing the cabinet hardware, you'll need to fill the holes. You can do this with wood plugs and wood filler. Another option is to place a piece of tape over the hole on the inside of the cabinet door and fill it with a non-shrinking wood filler. This is a good time to also fill any gouges and scratches on the doors.
You'll want to protect the walls and backsplash around the kitchen cabinets with painter's tape and protect the countertops with a drop cloth.
As I mentioned earlier, with chalk paint you do not need to sand the kitchen cabinets to the natural wood. Once the wood filler is dry, give the paint some bite by lightly scuffing the doors and door frames with 150-grit sandpaper in the direction of the wood grain. Then wipe them down with a lint-free rag.
Earlier I mentioned you do not have to prime kitchen cabinets before painting them with chalk paint. However, there is one exception to the rule and that is if your cabinets are mahogany, cherry, or walnut and you plan on painting them a light color, especially white.
Why? Because the tannins in mahogany, cherry, and walnut wood are prone to bleeding through the paint and can cause pink or yellowish spots to appear through the light paint color. If you plan on painting your cabinets in a medium to dark color, then you can skip this step. Otherwise, you will need to apply one coat of clear shellac or stain-blocking primer.
Priming and painting the kitchen cabinets will go much quicker if you roll it on with a small foam roller. Thankfully the shellac or a water-based primer dries quickly so by the time you finish priming the last cabinet, you can start painting the first coat where you began.
Step 3 - How To Paint Kitchen Cabinets
For this kitchen, we used a warm white color called Vanilla Frosting from Country Chic Paint. It's a beautiful warm antique white color and it took under two quarts to paint two coats on all the kitchen cabinets.
Tips For Painting With Chalk Paint
- Do not roll or brush the chalk paint on too thick, it is better to apply a few thin coats for a lasting finish.
- Just like the primer, chalk paint dries quickly so by the time you've finished painting the last kitchen cabinet, the first will be ready for a second coat.
- Lightly sand the first coat with 220-grit sandpaper for a nice smooth finish.
- Before applying the second coat, wipe the dust particles with a damp lint-free rag.
- Most often two coats of chalk paint will provide adequate coverage but you may need a thin third coat to touch up any imperfections in some areas.
Step 4 - How To Protect The Chalk Painted Kitchen Cabinets
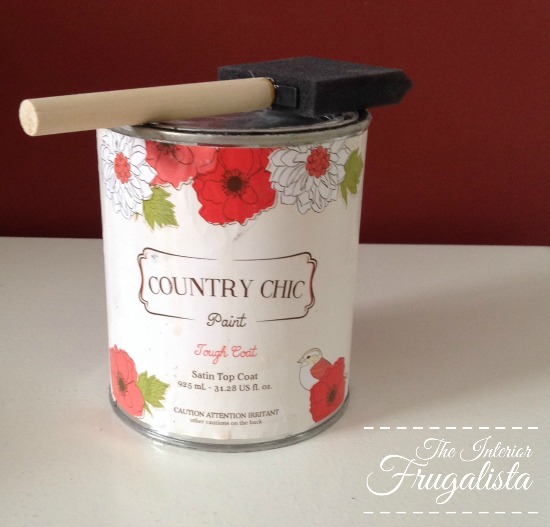
Because kitchen cabinets get so much wear and tear, you'll need to apply a water-based protective top coat for chalk-style paint like the Tough Coat by Country Chic Paint we used.
Tips For Applying Protective Top Coat
- Allow the last coat of paint to dry for at least 24 hours before applying Tough Coat.
- Do not shake the can or you will encourage air bubbles.
- It's very important that you thoroughly stir the can before and every so often during application.
- It's also important that you don't go over the same area twice.
- You can roll it on with a small foam roller or apply it with a foam brush or pad.
- Use light pressure on the roller or brush when applying the top coat.
- You will need two coats for a durable protective finish.
- Note that it takes one week for Tough Coat to cure so be gentle opening and closing the kitchen cabinets.
Step 5 - How To Update Original Kitchen Cabinet Hardware
If your kitchen cabinet hardware is in good condition but looking a little dated, instead of replacing them, save yourself some money and paint them instead. Yes, you can chalk paint metal! But, like the kitchen cabinet doors, you'll need to give them a good clean first.
In the photo below you can see what the original hardware looked like on the kitchen cabinets. Then after one coat of chalk-style paint in the same color as the painted cabinets.
The top row in the photo below is what the hardware looks like after two coats of chalk-style paint. The hardware on the bottom row is lightly distressed with 220-grit sandpaper if you want a time-worn look.
To protect the painted hardware, I applied clear wax, also from Country Chic Paint with a clean lint-free rag. Alternatively, you could use two coats of a clear spray can top coat.
The total cost for this kitchen cabinet update after factoring in the interior cabinet paint, primer, chalk paint, top coat, and supplies was under $300.00. A small investment when you consider it could be the difference between a potential buyer walking away or wanting to see more of your home.
Thanks for stopping by the Interior Frugalista today! I hope you were inspired by this easy, budget-friendly idea for giving your kitchen a facelift with chalk-painted kitchen cabinets.
Almost all of our DIY ideas have step-by-step tutorials so why not get your budget DIY on and subscribe. You can also find us on Pinterest, Facebook, Instagram, and YouTube.
If you have any questions, please leave them in the comment section below or the Contact Me tab at the top to drop me an email. I love hearing from you!
If you enjoyed these tips on how to paint kitchen cabinets with chalk paint, I'd be so thankful if you shared them with a friend, especially if they plan on listing their home, and pin it to your favorite board on Pinterest.
I share my projects at these inspiring link parties.





Comments
Post a Comment
Don't be shy, I love reading your comments and reply to every single one! If you want to be notified when I reply back to you, click the "Notify Me" button below the comment box.