4 Helpful Tips To Creating A Hallway Gallery Wall
Do you want to create a gallery wall in your home but not quite sure how to do it? Then this post is for you because here I'll show you how to create a budget-friendly gallery wall using elements found around the home PLUS four helpful tips on how to hang a gallery wall. My rule for creating the gallery wall was that all the elements had to be DIYed or found from things around our home.
Since moving to this house, I've struggled with how to decorate the wall at the end of our long narrow hallway. For a few years, I had a large mirror hanging there in hopes that it would make the hall look larger. But who wants to watch themselves walking down the hallway en route to the powder room?
Tired of the mirror I then hung a trio of watercolor prints vertically down the wall. It was alright but actually emphasized the narrow depth of this space.
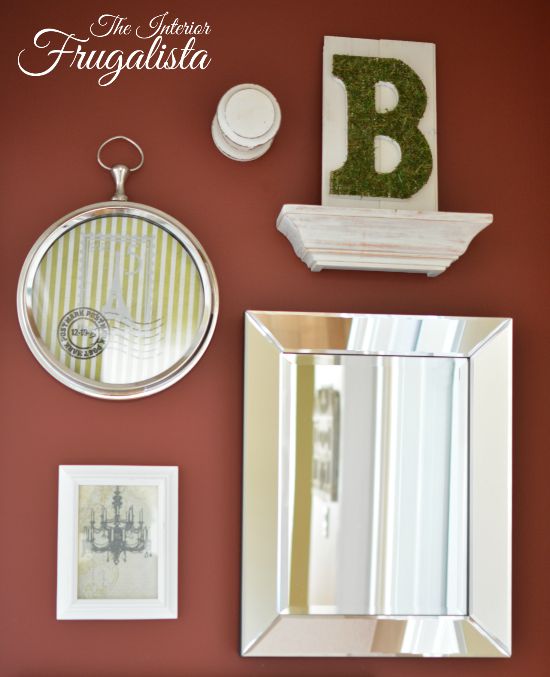
My last attempt was painting the wall a red to echo the feature wall in our front entrance - both having a sightline from our living room. Once the wall was painted I decided to fill the space both vertically and horizontally with a gallery wall and I couldn't be more happy with the results.
This post contains affiliate links so you can see what products I used or recommend for this project. At no cost to you, we receive a small commission if you make a purchase.
Here is what the wall looked like before I began...
To create the monogram, I simply covered a wood letter with self-adhesive moss. Next, I made a farmhouse style wood back for the monogram with cedar tongue and groove boards, leftover from another project. Simply cut the boards to size and glue them together with wood glue. Once the glue is dry, paint them with white chalk paint. Glue the moss-covered wood letter onto the sign with a hot glue gun. Easy peasy!

I'm pleased with how I finally succeeded in transforming a rather blah hallway wall into one with interesting character and charm. I love how the elements pop against the brick red painted wall.
If you've been following the blog you may remember my Mom's Stool Makeover. Now that she's gone it has even more sentimental value and I love that I finally found the perfect spot to showcase HER stool.
Here are some other DIY Wall Decor Ideas you might like and a link to some DIY Wall Mount Organization ideas.
Hang the craft paper back onto the wall with painters tape and check it with a level to ensure it's hanging nice and straight.
A no-measure way to do this is run a piece of tape on the back of each element. Mark a dot on the tape at the top of each picture hanger. Remove the tape and place it over the outline of each element, again using your level to make sure the tape is straight.
Add nails or drywall anchors where necessary and take down the sheet of craft paper. Hang up your art and that's it!
I hope this has inspired you to create a budget-friendly gallery wall with items you already have around the home. I hope you found my tutorial on a no-measure method of hanging a gallery wall helpful too.
If you have any questions about creating a gallery wall, please leave them in the comment section below or press the Contact Me button at the top of the blog to drop me an email. I love hearing from you!
I share my projects at these inspiring link parties.
Four Helpful Tips To Creating A Hallway Gallery Wall
You'll find the tips on how to hang a gallery wall further down in this post.Since moving to this house, I've struggled with how to decorate the wall at the end of our long narrow hallway. For a few years, I had a large mirror hanging there in hopes that it would make the hall look larger. But who wants to watch themselves walking down the hallway en route to the powder room?
Tired of the mirror I then hung a trio of watercolor prints vertically down the wall. It was alright but actually emphasized the narrow depth of this space.
My last attempt was painting the wall a red to echo the feature wall in our front entrance - both having a sightline from our living room. Once the wall was painted I decided to fill the space both vertically and horizontally with a gallery wall and I couldn't be more happy with the results.
This post contains affiliate links so you can see what products I used or recommend for this project. At no cost to you, we receive a small commission if you make a purchase.
Creating A Gallery Wall With Budget-Friendly DIY Elements
Here is what the wall looked like before I began...
Element 1 - A Repurposed Clock Frame
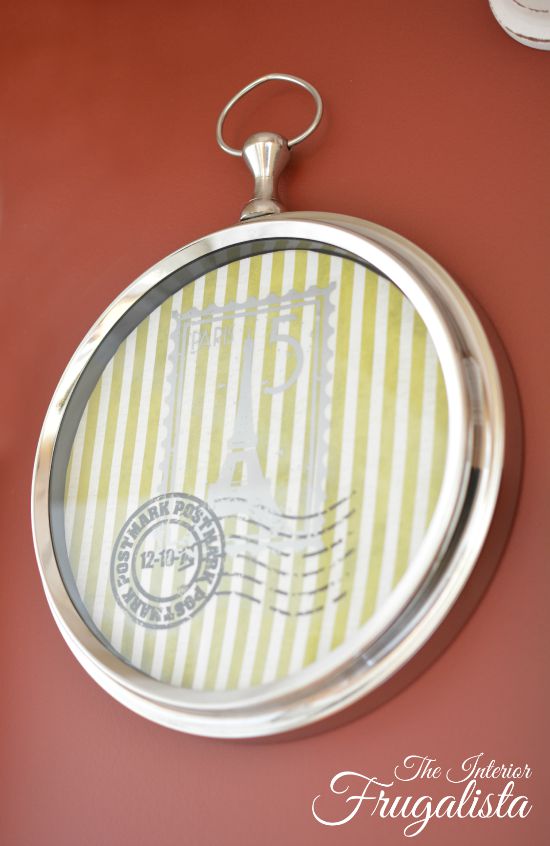
The first DIY element for our gallery wall is the frame of a wall clock that broke a few years ago. I removed the broken mechanisms and attached a sheet of striped scrapbook paper onto the clock face with double-sided tape. I stuck a French Postal Graphic decal that I had in my stash to the paper and voila - instant art!Element 2 - Farmhouse Style Moss Monogram
I wanted to incorporate a monogram of the initial of our last name(s) in the collage. I say names because I kept my maiden name when we married but both of our last names start with the letter B.To create the monogram, I simply covered a wood letter with self-adhesive moss. Next, I made a farmhouse style wood back for the monogram with cedar tongue and groove boards, leftover from another project. Simply cut the boards to size and glue them together with wood glue. Once the glue is dry, paint them with white chalk paint. Glue the moss-covered wood letter onto the sign with a hot glue gun. Easy peasy!
Element 3 - Farmhouse style plate shelves
The two farmhouse style floating ledge shelves on the gallery wall were thrift store finds that I simply whitewashed with chalk paint and distressed with sandpaper. I switch up the decor on these for the seasons.Element 4 - Wooden Finial
When I saw the large decorative wooden finial at Michaels, I knew it would be perfectly incorporated into the gallery wall. It is the only item I purchased.Element Five - Metal Fleur De Lis Framed Art
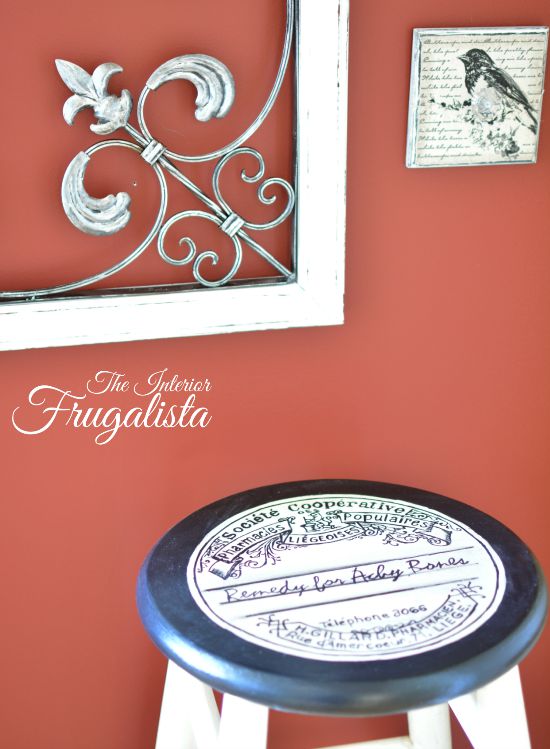
Several weeks ago I won the bid on this Fleur De Lis metal art at a local online auction. The frame was dark wood and the metal a brushed antique gold. To better suit our gallery wall, I painted the frame with white chalk paint and distressed with sandpaper. Then I rubbed silver gilding wax with my finger over the gold metal filigree.Element Six - Framed Scrapbook Paper
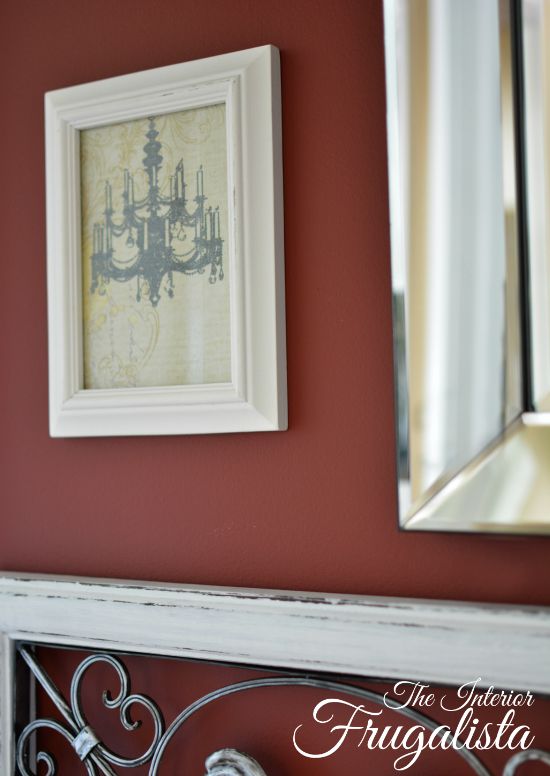
I had the small white wood frame in my stash and I simply added pretty Chandelier felted scrapbook paper inside and voilà, more instant artwork!
Element Seven - Small French Plaques With Glass Knobs
The two small fabric decoupaged frames with pretty glass knobs were hanging in our bedroom. The edges of the frames were stark black and so I gave them a quick wash with white chalk paint.Element Eight - Beveled Mirror
Last but not least, a silver beveled mirror was added to the mix. I know I said earlier that I disliked having a mirror hanging at the end of the hall but hung off-center it isn't reflecting our every move as we walk down the hall.I'm pleased with how I finally succeeded in transforming a rather blah hallway wall into one with interesting character and charm. I love how the elements pop against the brick red painted wall.
If you've been following the blog you may remember my Mom's Stool Makeover. Now that she's gone it has even more sentimental value and I love that I finally found the perfect spot to showcase HER stool.
Here are some other DIY Wall Decor Ideas you might like and a link to some DIY Wall Mount Organization ideas.
4 Helpful Tips To Creating A Gallery Wall
If creating a gallery wall seems daunting, here I'm sharing four helpful tips for a NO Measure gallery wall. This is a measuring tape free approach to hanging multiple elements in a gallery wall and all you need to hang it is a level.Gallery Wall Tip 1
Tape craft paper together to fit the space of your gallery wall. In our case, it was the entire back wall of our hallway. Tape it together and lay it on the floor.Gallery Wall Tip 2
Layout the elements for your gallery wall onto the craft paper. A rule of thumb is to create a symmetrical configuration by lining up the edges of all the elements on each side to form a square or rectangular shape. Don't worry about empty spaces on the inside of the shape because you can fill them with smaller objects.Gallery Wall Tip 3
Once you are happy with the placement of your elements, draw an outline around each one with a pencil.Hang the craft paper back onto the wall with painters tape and check it with a level to ensure it's hanging nice and straight.
Gallery Wall Tip 4
Measure where the hooks are on the back of each element and mark it on your outlines.A no-measure way to do this is run a piece of tape on the back of each element. Mark a dot on the tape at the top of each picture hanger. Remove the tape and place it over the outline of each element, again using your level to make sure the tape is straight.
Add nails or drywall anchors where necessary and take down the sheet of craft paper. Hang up your art and that's it!
I hope this has inspired you to create a budget-friendly gallery wall with items you already have around the home. I hope you found my tutorial on a no-measure method of hanging a gallery wall helpful too.
If you have any questions about creating a gallery wall, please leave them in the comment section below or press the Contact Me button at the top of the blog to drop me an email. I love hearing from you!
I share my projects at these inspiring link parties.


Comments
Post a Comment
Don't be shy, I love reading your comments and reply to every single one! If you want to be notified when I reply back to you, click the "Notify Me" button below the comment box.