DIY Suspended Clothes Drying Rod
Do you hang your laundry indoors to dry, especially in the winter? Maybe not the entire load but the more delicate clothing and linens that need to be air-dried. Today I'm sharing a handy idea for drying clothes in a basement laundry room.
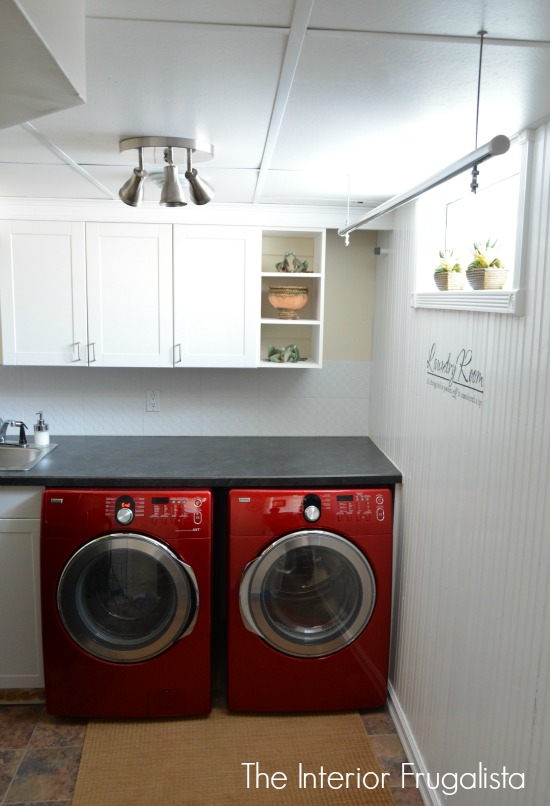
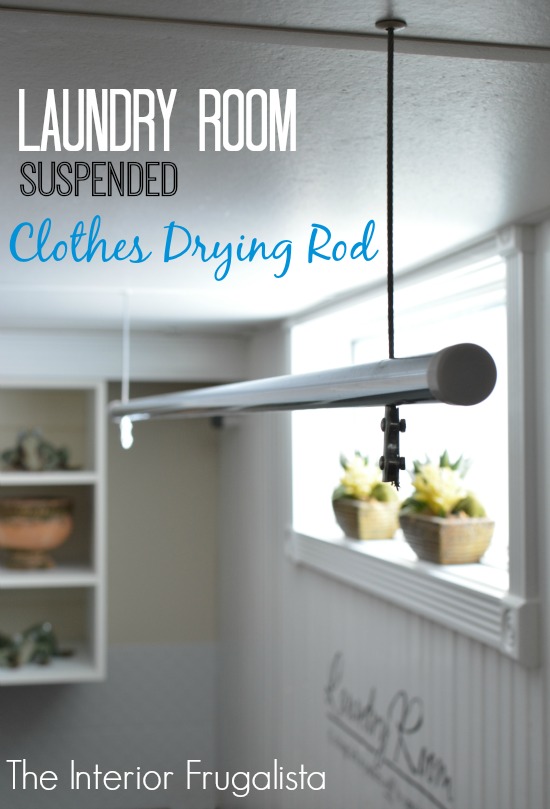
When you have a small footprint in your laundry room with no floor space for a collapsible drying rack, this is a great option! It's an extremely handy DIY suspended clothes drying rod for a suspended ceiling and in sleek chrome, it looks good too.
Handy DIY Basement Laundry Room Drying Rod
We hang almost all of our laundry to extend the longevity of clothing, avoid shrinkage, and save money on electrical bills. With our cold winter climate, hanging laundry outdoors isn't an option so having this suspended drying rod is so handy.
Aside from the washer, it is the most used item in our laundry room and came in handy earlier this week to hang holiday table linens to dry.
Handy Indoor Air Dry Laundry Tip
Next time you purchase a pair of pants, ask if you can keep the plastic hanger. They are perfect for hanging linens, scarves, and pants to dry. More times than not the store clerks are happy to throw them in the bag.
What You'll Need To Make It
These are the items you will need to make the clothes drying rod.
This post contains affiliate links so you can see what products I used or recommend for this project. As an Amazon Associate, I earn a small commission from any qualifying purchases at no extra cost to you. Thank you for your support!
Supply List
1/8 inch Aircraft Cable
1/8 inch Aircraft Cable Thimble
Aircraft Cable Double Wire Rope Clamp
Chrome Closet Rod
Chrome Closet Rod Plastic End Caps
3-inch Hex Head Lag Bolt
3/8 inch Plastic Hole Cover
Suspended Clothes Drying Rod Instructions
We'll begin with three close-up pictorials to demonstrate how it is put together followed by detailed instructions.
 |
| PICTORIAL 1 |
 |
| PICTORIAL 2 |
 |
| PICTORIAL 3 |
Hex Head Lag Bolt
Screw a 3-inch hex head lag bolt into the floor joists where you want the rod to hang on each end (see Pictorial 3).
Chrome Closet Rod
- Measure the chrome closet rod the same length as to where the lag bolts are mounted in the ceiling and mark a dot on the rod with a marker.
- Add 2 inches from your marks on each end and draw a line around the rod.
- Cut the chrome rod with a hacksaw on each line that you marked.
- Drill a 3/8 inch diameter hole in the chrome rod on the dot marks.
- Attach a plastic end cap on each end of the rod (see Pictorial 1).
Aircraft Cable
- If you have a suspended ceiling, mark the ceiling tile where the aircraft cable will hang.
- Poke a hole large enough to accommodate the aircraft cable with an Awl.
- Feed the aircraft cable through the hole in the chrome rod.
- On the strand of aircraft cable below the rod feed the double wire rope clamp through and tighten the screws to secure (see Pictorial 1).
Plastic Hole Cover
Now feed the plastic hole cover through the aircraft cable on the top of the rod, and then through the hole you made in the ceiling tile (see Pictorial 2).
Aircraft Cable Thimble
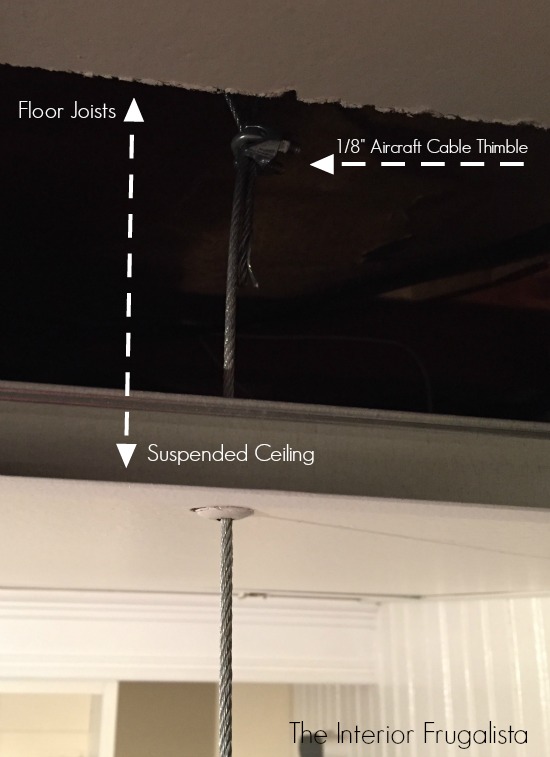
- Feed the aircraft cable thimble through the aircraft cable (see Pictorial 3).
- Make a loop with the aircraft cable around the lag bolt and through the aircraft cable thimble (see Pictorial 3).
- Figure out the desired length you want the rod to hang (ours is hanging 7-inches from the ceiling tile to the top of the chrome closet rod).
- Tighten the screws on the aircraft cable thimble to secure (see Pictorial 3).
- Cut the excess aircraft cable, with as clean of a cut as you can so clothing doesn't catch on it. You may want to file the ends so they are smooth.
- Push the head of the plastic hole cover through the ceiling tile so the end cap sits flush with the tile and use E6000 glue to secure it in place (see Pictorial 1).
What I like most about our basement laundry room clothes drying rod is that when in use, it doesn't interfere with the function of the room.
In the picture above, can you see an empty void to the right of the open shelving? The gas meter used to be there before the county came and moved it outside AFTER we completed our laundry room makeover on a $500 budget.
We later fixed that gas meter void by reconfiguring the appliances and the cabinetry to make the room more functional in Phase Two of our basement laundry room makeover.
One of the downsides of hanging laundry is the assumption that it will need to be ironed. This.Gal.Does.NOT.Iron so here are some helpful tips to avoid the dreaded iron when you don't have a steam setting on your dryer.
Tip To Avoid Ironing Clothes Hung To Air Dry
- Place air-dried clothing in the dryer on the low heat or air fluff setting.
- Place a wet tea towel in the dryer for linen and cotton fabrics that tend to wrinkle.
- Set the timed cycle to 5-10 minutes.
- Remove items while still warm and fold.
Now that we have a spot to air dry laundry, here's another DIY idea for under the laundry room sink (or any sink in your home for that matter). No more crawling on your hands and knees to find the items at the back of the cabinet with this handy DIY under sink sliding shelf.
Did you catch the Ultimate Cleaning & Organization Resource blog hop earlier this week? It has loads of ideas for bathroom & kitchen organization as well as helpful cleaning tips for your home.
Thanks for stopping by the Interior Frugalista today! I hope you were inspired by this idea for suspended clothes drying rod in a basement laundry room.
Almost all of our DIY ideas have step-by-step tutorials so why not get your budget DIY on and subscribe. You can also find us on Pinterest, Facebook, Instagram, and YouTube.
If you have any questions, please leave them in the comment section below or the Contact Me tab at the top to drop me an email. I love hearing from you!
If you enjoyed this laundry room idea, I'd be so thankful if you shared it with a friend and pinned it to your favorite board on Pinterest.
I share my projects at these inspiring link parties.


Such easy and helpful directions. Thank you so much for this! I'm going to put these up in my basement for a clothes drying area and it will work perfectly for my situation.
ReplyDeleteI'm glad you found the instructions helpful and enjoy your new clothes drying rod!
Delete