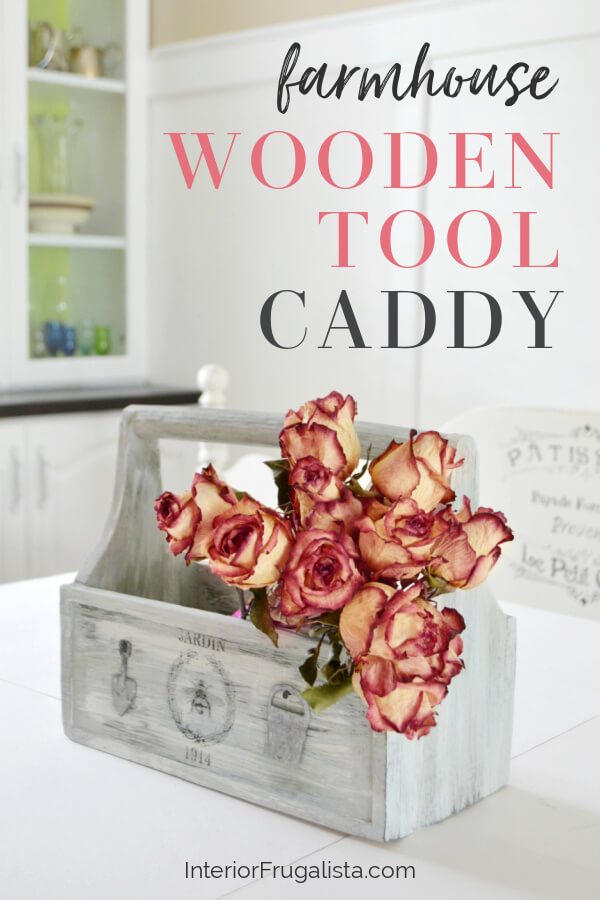
Handmade Wooden Garden Caddy With Farmhouse Style
How to upcycle a handmade wooden garden caddy with farmhouse style. When I saw this handmade caddy at the thrift store, I couldn't resist bringing it home. Someone put a lot of time and love into making it and I appreciate their handiwork.
I almost passed on buying it because I didn't like the SPA block-style raised letters. But I love a challenge more. I figured the woodcraft letters glued to the front could easily be removed. Boy was I wrong, they are actually hand-carved.
Handmade Wooden Caddy Makeover
This is what the wood thrift store caddy looked like when I bought it. The primitive hand-hewn wood handle is what sealed the deal for me.
It most likely was a high school shop class project. But in my mind, I'm picturing an older retired fellow hunched over his workbench in his little backyard workshop making this for his daughter.
After bringing it home I seriously considered cleaning it up and leaving it as-is for rolled towels and pretty hand soaps in our bathroom. As much as I appreciated the work put into hand carving the letters, I decided the word SPA had to go.
In keeping with the ever-so-popular farmhouse trend, goodbye spa caddy - hello farmhouse caddy! Now instead of being limited to bathroom decor, it can be used for multiple purposes in any room in the house.
Uses For Old Wooden Caddies?
Other than their intended purpose as a tool caddy, they can be used for so much more. Here are just a few ideas for how to use old wooden caddies.
- Table Centerpiece - set glass mason jars inside and fill them with fresh-cut flowers like I did in my antique chair spindle wood caddy.
- Outdoor Planter - line it with plastic and plant your favorite flowers for an outdoor table centerpiece.
- Garden Tool Caddy - keep all your handheld garden tools in one place for a convenient grab-and-go gardening tote.
- Tabletop Herb Garden - fill it with individual pots of fresh herbs and set it on a window sill for an indoor wooden herb caddy.
- Rustic Wedding Decor - they make wonderful rustic wedding table centerpieces filled with flowers. Or you can turn a larger one into a rustic wedding card holder like we did for our daughter's wedding.
- Outdoor Picnic Caddy - set mason jars or small galvanized buckets inside and fill them with cutlery, napkins, and plates for dinners outdoors.
- Craft Room/Home Office Organizer - they make great organizers on a desk or craft table for things like paintbrushes and office supplies.
- Bathroom Caddy - fill it with fluffy rolled towels and bars of scented soap for the bathroom.
- Seasonal Vignettes - place them on a coffee table filled with seasonal decor and flameless candles on timers. Think seashells, starfish, and coral in the summer and small pumpkins with colorful leaves in the fall.
The possibilities are endless for how to use old caddies.
What You'll Need To Make It
This post contains affiliate links so you can see what products I used or recommend for this project. As an Amazon Associate, I earn a small commission from any qualifying purchases at no extra cost to you. Thank you for your support!
For the wood caddy transformation, I used products from the Annie Sloan Chalk Paint line.
Supply List
Pure White Chalk Paint
Graphite (dark gray) Chalk Paint
Chip Brush
French Typography
Miniature Garden Tool Charms
Upholstery Nails
Here's How I Did It
With a little elbow grease, it did not take long to transform the second-hand caddy from spa to farmhouse garden caddy and I'll show you how.
Handmade Caddy Prepped For Paint
I removed the letters by meticulously chiseling them off and sanding the wood smooth. Then I gave the wooden caddy a good scrub with my go-to cleaning solution of 1 part white vinegar to two parts warm water with a drop of Dawn dish soap.
Painting Garden Caddy With Farmhouse Style
After allowing the caddy to completely dry, I painted it with one coat of Pure White chalk paint. What I love about chalk paint is that it dries very quickly.
Next, to give the painted caddy the rustic farmhouse charm, I used graphite (dark gray) chalk paint to dry brush over the white paint.
Dry Brush Paint Technique
To do this dip the tips of an inexpensive chip brush into the paint. Offload the excess paint onto a paper towel so very little remains on the brush. With light pressure, swipe the brush across the grain of the wood with long brush strokes. The key is for the white color to still be visible underneath.
How To Add Typography On The Farmhouse Caddy
Adding the French typography on the front of the painted farmhouse caddy can be done in a couple of different ways. First, I visited the Graphics Fairy website and found this Jardin Grain Sack Printable and saved it on my computer.
For transferring graphics and typography onto painted wood you can either use this glossy paper image transfer technique with an inkjet printer or this graphite paper image transfer technique.
Embellishing Wood Caddy
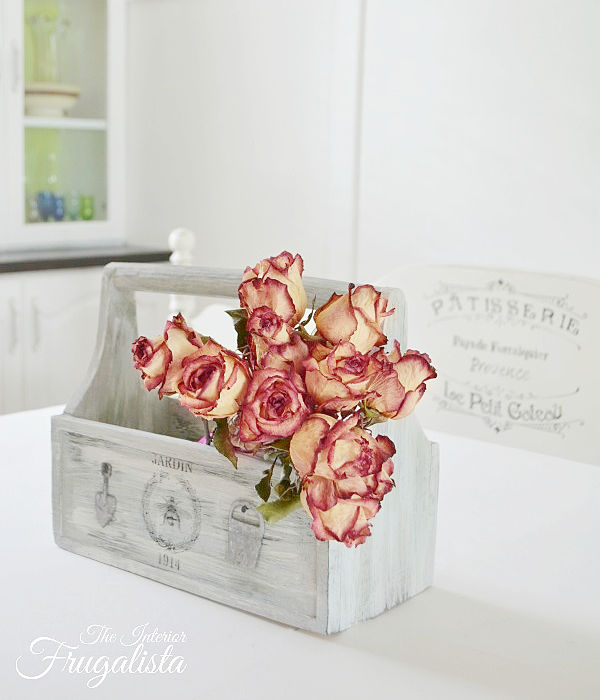
To add more farmhouse charm, I embellished the upcycled caddy with adorable miniature galvanized garden tools. They are simply attached with black upholstery nails.
So what do you think? Would you have kept the carved block letters on the handmade caddy or removed them? I'm happy to report that the upcycled wooden farmhouse garden caddy sold very quickly.
Thanks for stopping by the Interior Frugalista today! I hope you were inspired by this handmade wooden garden caddy with farmhouse style.
Almost all of our DIY ideas have step-by-step tutorials so why not get your budget DIY on and subscribe. You can also find us on Pinterest, Facebook, Instagram, and YouTube.
If you have any questions, please leave them in the comment section below or the Contact Me tab at the top to drop me an email. I love hearing from you!
If you enjoyed this upcycled wooden garden caddy makeover, I'd be so thankful if you shared it with a friend and pinned it to your favorite board on Pinterest.
I share my projects at these inspiring link parties.


What a fun and fabuloua new look!
ReplyDeleteThanks Larissa, while feeling a little remorse about painting it, I'm happy with the results.
DeleteThis is really beautiful Marie. Are those real Rose's? They look awesome with the caddy.
ReplyDeleteThanks Anita, I'm glad you like the makeover! Yes, they are real roses that I dried and use often as props for my makeovers.
DeleteYou did a great job, Marie, so clever. I would have removed the letters, too.
ReplyDeleteSheila
Thanks Sheila, glad you agree the letters needed to come off. I felt it limited the use with them on.
DeleteSo pretty, Marie. Would love for you to share at Meraki link party at https://doodlebuddies.net/2020/08/24/meraki-link-party-2/
ReplyDeletelove
Naush
Thanks for the invite, Naush!
DeleteMarie,
ReplyDeleteOMG, this tool box is adorable. You are so creative. Congratulations, you are being featured on Over The Moon Linky party. I hope you stop by. https://www.eclecticredbarn.com/2020/08/over-moon-linky-party_30.html
Hugs,
Bev
Thanks for making my Monday morning, Bev! I'll see you at the party with some more goodies. xo
DeleteIt turned out beautiful! That really is a pretty handle. Thanks for all your helpful tips on where and how you can display caddies such as this one!
ReplyDeleteThank you so much! I'm happy to hear you enjoyed the tips for displaying caddies.
DeleteWhat a wonderful way to repurpose an old caddy! great job
ReplyDeleteMeagan-Decorative Inspirations
Thank you very much Meagan!
Delete