How To Print On Burlap - Fall Harvest Wall Decor
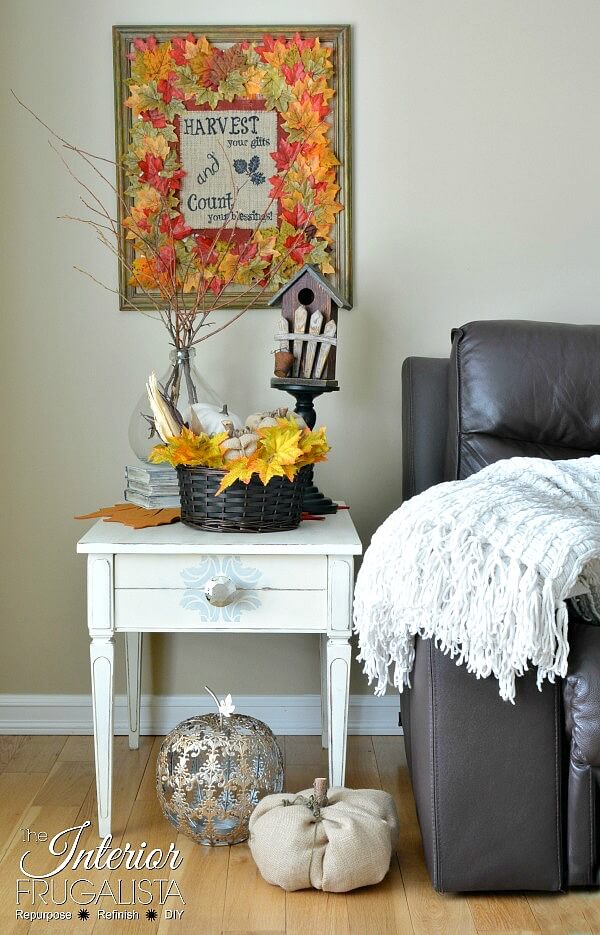
Have you ever printed on burlap? I recently tried it for the first time and I'm surprised at how easy it is. I'm sharing step-by-step instructions on how to print on burlap fabric with a fall harvest wall decor idea to demonstrate.
It's so easy that you'll have your wall decor hanging in just a few short hours and it costs next to nothing to make. The printed sentiment on the burlap fall wall art is perfect to have on display from early September to Thanksgiving. So let's get started.
Print On Burlap DIY Fall Wall Art
I have mine hanging on a wall in our living room but with its large size, it would make an impact propped on a fireplace mantel, dining sideboard, or to welcome guests through autumn in an entry.
I've included a free printable of the harvest graphic further down in the post if you'd like to learn how to print on burlap and make your own version for fall harvest wall decor.
What You'll Need To Make It
The supply list below contains affiliate links so you can see what products I used or recommend for this project. As an Amazon Associate, I earn a small commission from qualifying purchases at no extra cost to you.
Supply List
Large Wood Picture Frame (glass removed)
Burlap Fabric
Color Burlap Ribbon
Artificial Fall Leaves
Freezer Paper
Tool List
Inkjet Printer
Iron
Hot Glue Gun
Here's How I Made It
It may seem like there are a lot of steps in this tutorial but it's because I've broken them into small manageable steps so it is easier to follow. I promise it is fairly easy to make this fall wall art.
Step 1 - Upcycled Picture Frame
We'll begin with the large picture frame. If you don't have one on hand that you're willing to recycle then head to your nearest thrift store for an inexpensive frame. It doesn't need to have glass because we'll be removing it anyway but if that's all you can find, then the glass can always be recycled.
First, give the picture frame a good clean with 1 part vinegar to two parts water with a drop of Dawn dish soap. Let it completely dry and then lightly scuff the finish with 150-grit sandpaper to give the paint some bite.
Now we'll give the picture frame a fall patina with dry brushed layers of paint in autumn colors. You can use latex, chalk style, or acrylic craft paint to change the color of the frame. The colors I'm using are olive green, orange, dark yellow, tomato red, and raw umber craft paint.
Pro-Tip Dry Brush Technique
- To dry brush layers of paint, dip just the tip of an inexpensive chip brush into the paint and blot the brush on a paper towel to remove the excess paint.
- The key is to have very little paint on the brush - hence the term dry brush.
- With light pressure, swipe the color in random brush strokes across the frame, leaving a lot of the base color underneath still showing through.
- Repeat this step with every color.
Step 2 - Burlap Picture Frame Backing
Now we're going to create a lovely burlap backing for the picture frame.
- Cut either a sheet of burlap or recycle a burlap table runner like I did.
- Cut it about four inches larger than the backing that came with the picture frame.
- Starting at the top fold the burlap over to the back of the cardboard and attach it with a hot glue gun.
- Stretch the burlap taut and fold it over the bottom of the cardboard and attach it with hot glue.
- Continue on each side then place the cardboard backing back in the picture frame.
- My picture frame didn't have clips so I ran masking tape along the back to hold it in place but a bead of hot glue also works.
Step 3 - How To Print On Burlap
Now we're going to print on a smaller piece of burlap to place over the picture frame backing. As mentioned earlier, I created a printable of the Harvest Your Gifts And Count Your Blessings graphic if you'd like to use it. Just click on the image below for your unwatermarked free download.
To print the graphic, follow the steps below.
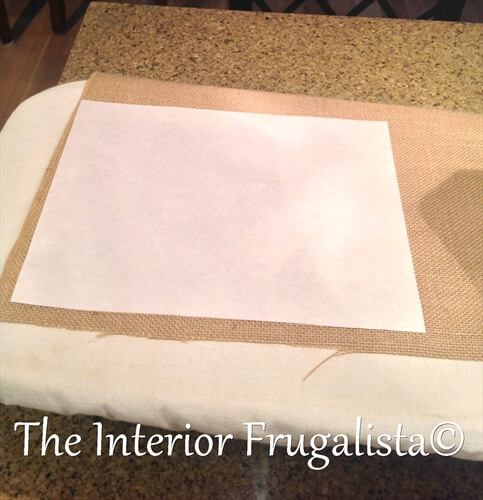
First, you'll need freezer paper to prep the burlap for running through your printer. Cut the freezer paper the same size as regular letter size bond paper.
Cut a piece of burlap fabric to measure 9 x 12-inches. Iron any wrinkles in the burlap fabric with the steam setting.
Lay the shiny side of your freezer paper on the burlap and line it up straight with the grain of the fabric.
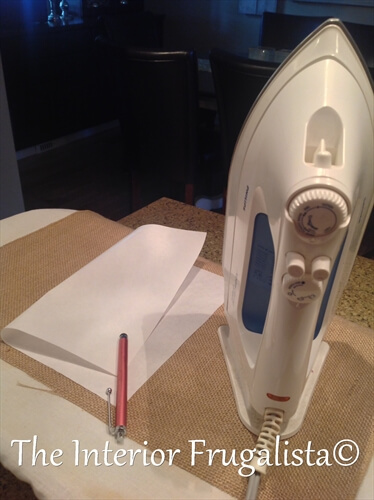
Switch your iron settings to high heat with NO Steam and press onto the matte side of the freezer paper until you get a good bond, especially on the corners.
Trim the burlap the same letter size as your freezer paper.
Important Printer Tip
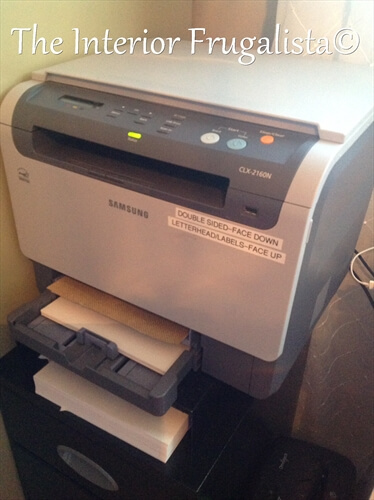
It is best if you print the graphic using an Inkjet printer because the freezer paper will heat in a laser printer and could get stuck inside. I took a risk and printed mine with a laser printer and didn't have a problem. Do it at your own risk!
Change your printer settings to the best quality to get a crisp print. Place the burlap into the manual feed of your printer and help guide it as it begins feeding into the machine.
You can see in the photo below that my print is very light. You'll get a much darker print with an inkjet printer. Make sure to let the ink dry for at least two hours before handling the burlap or it may smudge.
Because mine printed so lightly, I went over it with a black Sharpie marker. But my recommendation is to use an inkjet printer in the best quality print setting.
Carefully peel the freezer paper from the burlap.
If you are still feeling a bit nervous about this step I found an excellent video tutorial that you might find helpful.
Step 4 - Burlap Border
This step is completely optional but I added a colorful border around the graphic with a color burlap ribbon that I had on hand. I've included links to other options in the supply list towards the top of the post.
Lay three vertical strips of burlap ribbon behind the printed graphic and secure with dabs of hot glue or fabric glue.
Fray the edges of the burlap ribbon by pulling one strand from the outside edge of the ribbon along all four sides. Repeat until you have about six strands or more removed.
Set the printed burlap fabric on the center of the burlap-wrapped picture frame backing and secure it with a hot glue gun or fabric glue.
Step 5 - Faux Fall Leaves
This step is also completely optional but I layered colorful faux fall leaves around the perimeter of the printed burlap and secure them with a hot glue gun. Alternatively, real wax leaves would be lovely too.
That's it, we're done. See, I told you it was easy to print on burlap!
If you are like me, you'll have way too much fun printing on burlap so I thought I'd share another printed burlap hello pumpkin burlap wall decor idea with you. Since we're on the subject of burlap crafts here's another unique burlap pumpkin art idea and a french script burlap pumpkin craft.
Thanks for stopping by the Interior Frugalista today! I hope you were inspired by this Fall Harvest Printed Burlap Wall Decor idea.
Almost all of our DIY ideas have step-by-step tutorials so why not get your budget DIY on and subscribe. You can also find us on Pinterest, Facebook, Instagram, and YouTube.
If you have any questions, please leave them in the comment section below or the Contact Me tab at the top to drop me an email. I love hearing from you!
If you enjoyed this printing on burlap tutorial and the fall harvest burlap framed wall decor idea, I'd be so thankful if you shared it with a friend and pinned it to your favorite Pinterest board.
I share my projects at these inspiring link parties.


Comments
Post a Comment
Don't be shy, I love reading your comments and reply to every single one! If you want to be notified when I reply back to you, click the "Notify Me" button below the comment box.