A Vintage Student Desk that went all glam
I've said it before and I'll say it again (at the risk of sounding a little cuckoo) sometimes these furniture pieces speak to me. Some speak louder than others like this vintage student desk. The plan going in was to paint the desk a masculine blue for a boy's room and the desktop and drawer pulls with black chalkboard paint.
I had the paint cans ready and a vision embedded in my head and then this happened...
Evidently, this little desk wanted to be soft and feminine with a dose of glam. Perhaps because someone made a previous attempt at painting her red and then abandoned her halfway through.
Before I get into the details of this student desk makeover, today is Furniture Fixer Uppers day, one of my favorite days of the month.
Six talented and creative bloggers come together to breathe new life into six furniture pieces that had seen better days. You will find links to my friend's furniture makeovers at the bottom of this post.
In case you missed last months challenge, I transformed an Antique Wash Stand and turned it into a coffee station for our dining room.
I've included affiliate links so you can see what products I used or recommend to complete this project. See my disclosure policy page.
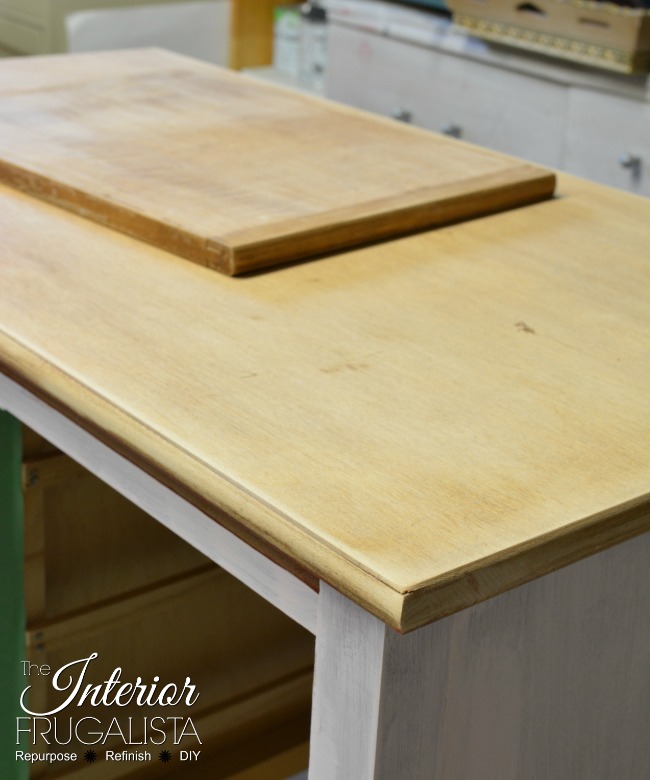
Enamel paint is glossy and smooth and so that meant sanding was involved for the chalk paint to have some bite. While I had the sandpaper out I decided to try and salvage the wood top and the slide-out shelf. But first, the glossy lacquer finish had to be removed with paint stripper.
Note: I normally prefer using a low to odorless paint stripper like EZ Strip but I was all out and didn't feel like getting out of paint-splattered yoga pants and putting on lipstick to go get some.
To remove any stubborn remaining bits of old finish I used an orbital sander.
If you've been following me then you know I'm on a mission to use up all the paint in the workshop before buying any new paint. So I created my own custom light pink color by adding a 50:50 ratio of Vintage Cupcake (Country Chic Paint) and Linen White (Rustoleum Chalked Paint).
This is after the first coat of pink...
But if I were to be completely honest, these two paint brands did not marry well together despite both being water-based paint. I couldn't go over the same area twice without the paint lifting, it wasn't self-leveling so you could see the brush strokes (despite using a high-quality synthetic brush), and it took several coats to get full coverage. Don't get me wrong, I love both brands but perhaps it's a good idea to stick to the same brand when mixing paint colors.
I went over the pencil marks with a Sharpie Metallic Gold pen. It's hard to see the gold letters in the photo below but in person, they stand out much better.
For a little surprise, I added the same butterflies to the pull-out shelf.
Tips: It is best to wait at least 1 hour after painting a piece before applying Clear Coat. The satin finish is a thick product and therefore it is helpful to dip just the tips of a brush in water first to help the product glide on smoothly. Only one thin coat is necessary for a protective water-resistant finish but I prefer applying another thin coat, waiting an hour between coats.
Tips: It is best to wait 3-4 days before applying gator hide over the VooDoo Gel Stain finish. Apply three very thin layers with a foam brush and wait for 2-hours between coats. If applying gator hide over a painted finish, wait 1-2 days before applying.
It's perfect for lining the drawers. After cutting three pieces to fit the drawers, I brushed Mod Podge both on the back of the paper and the bottom of the drawers. Once the paper was dry, I applied a thin coat of Mod Podge directly onto the top of the paper for a protective finish.
All I did was unify them with the same paint and stain.
Mustn't forget an apple for the teacher.
When these furniture pieces speak, I've learned to toss my vision and expectations out the window and just go with the flow.
And I'm so glad I did.
If you like the Vintage Student Desk that went all glam, please share it with a friend and/or save it on Pinterest.
I had the paint cans ready and a vision embedded in my head and then this happened...
Glam Girl Pink Vintage Student Desk
Evidently, this little desk wanted to be soft and feminine with a dose of glam. Perhaps because someone made a previous attempt at painting her red and then abandoned her halfway through.
Before I get into the details of this student desk makeover, today is Furniture Fixer Uppers day, one of my favorite days of the month.
Six talented and creative bloggers come together to breathe new life into six furniture pieces that had seen better days. You will find links to my friend's furniture makeovers at the bottom of this post.
In case you missed last months challenge, I transformed an Antique Wash Stand and turned it into a coffee station for our dining room.
I've included affiliate links so you can see what products I used or recommend to complete this project. See my disclosure policy page.
Materials List
- Low Odor Paint Stripper
- Light Pink Chalk Paint
- High-Quality Synthetic Paint Brush
- Up In Smoke Gel Stain
- Foam Brush
- Gator Hide Protective Clear Coat
- DecoArt Americana Decor Bright Gold Metallics
- Sharpie Metallic Gold Pen
- Graphite Paper
- Printer
- Orbital Sander
- 150 and 220 Grit Sandpaper
Prepping and sanding
When I first saw the desk I assumed it had been chalk painted with a clear wax finish but soon realized it was painted with red enamel paint. The makeover had been abandoned halfway through because the back and one side remained the original wood.Enamel paint is glossy and smooth and so that meant sanding was involved for the chalk paint to have some bite. While I had the sandpaper out I decided to try and salvage the wood top and the slide-out shelf. But first, the glossy lacquer finish had to be removed with paint stripper.
Note: I normally prefer using a low to odorless paint stripper like EZ Strip but I was all out and didn't feel like getting out of paint-splattered yoga pants and putting on lipstick to go get some.
To remove any stubborn remaining bits of old finish I used an orbital sander.
Changing the plan and painting it pink, what?
During the sanding process, I kept getting visions of the desk painted soft pink. No matter how much I tried shaking the idea, PINK PINK PINK kept popping into my head. Alrighty, pink it is but all I had on hand was about an eighth of a can.If you've been following me then you know I'm on a mission to use up all the paint in the workshop before buying any new paint. So I created my own custom light pink color by adding a 50:50 ratio of Vintage Cupcake (Country Chic Paint) and Linen White (Rustoleum Chalked Paint).
This is after the first coat of pink...
But if I were to be completely honest, these two paint brands did not marry well together despite both being water-based paint. I couldn't go over the same area twice without the paint lifting, it wasn't self-leveling so you could see the brush strokes (despite using a high-quality synthetic brush), and it took several coats to get full coverage. Don't get me wrong, I love both brands but perhaps it's a good idea to stick to the same brand when mixing paint colors.
Going all voodoo on the stained top
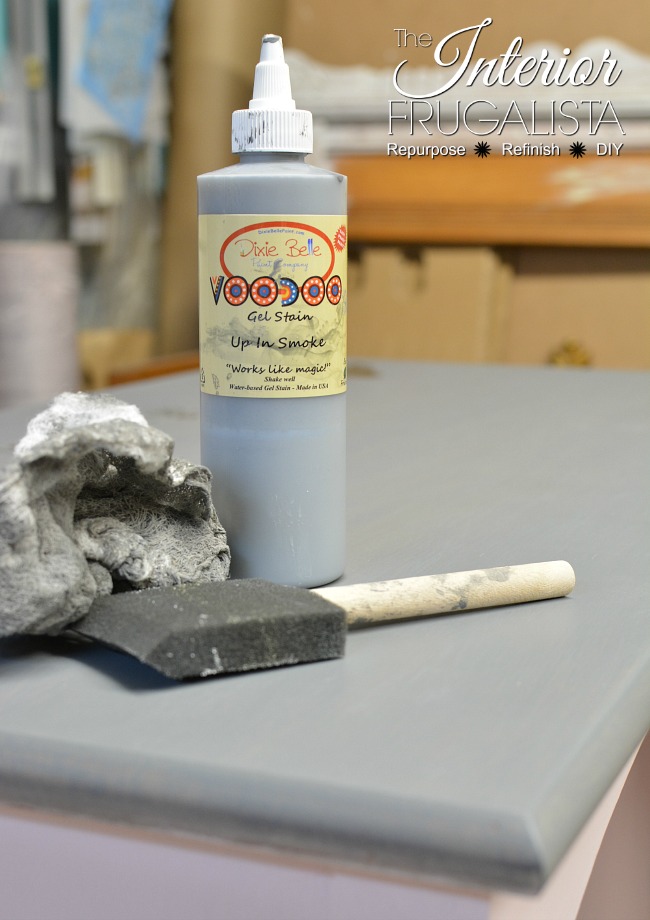
I stained the top of the desk and slide-out shelf with VooDoo Gel Stain in the color Up In Smoke by Dixie Belle Paint Company. Applied with a foam brush and wiped with a cheesecloth rag.Going all glam with metallic gold
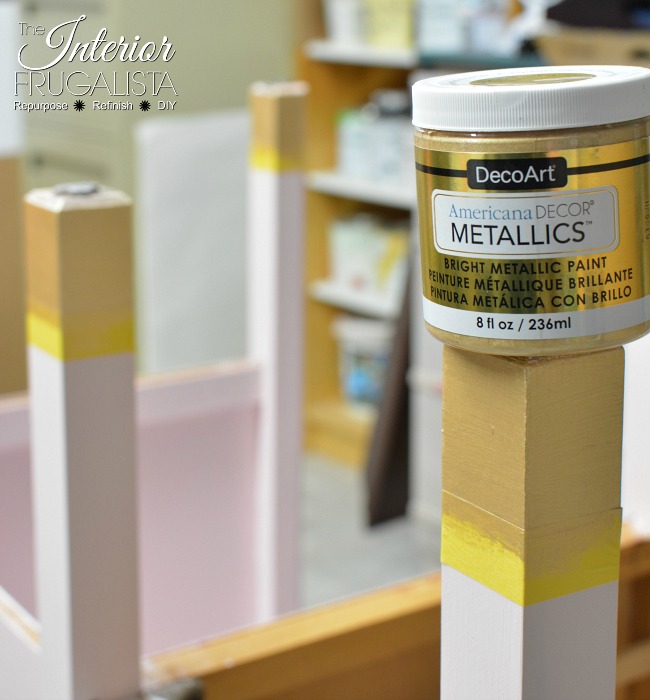
Now that it was painted pink with a soft gray top, this diva desk was screaming for pops of bright metallic gold. So I dipped the legs and painted the original pulls using DecoArt Americana Bright Metallic Gold.Inspiring words sealed in gold
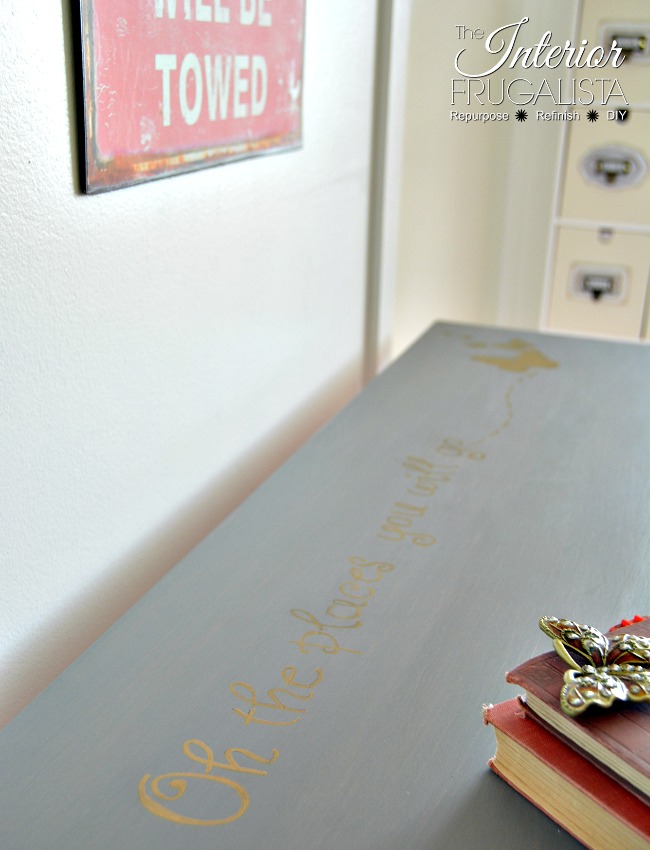
I couldn't stop there, in PicMonkey I created a graphic with the saying, "Oh the places you will go" to transfer onto the top of the desk. I enlarged the graphic to print on three sheets of paper, roughly 34-inches wide, in Blockposter.com. Once printed and the sheets taped together, I simply traced the graphic with pen and graphite paper lined up underneath.I went over the pencil marks with a Sharpie Metallic Gold pen. It's hard to see the gold letters in the photo below but in person, they stand out much better.
For a little surprise, I added the same butterflies to the pull-out shelf.
Protecting the finishes
I used three Dixie Belle Paint Company products to protect the finishes on this piece for two reasons. First, because I had the products on hand thanks to Dixie Belle so kindly sending them to me last year to try on this Vintage Waterfall Dresser. Second, because being a piece of furniture for a child, I wanted a tougher protective finish.Best Dang Wax
The sides, front, back, and drawer fronts as well as the gold-painted pulls and dipped feet were protected with Best Dang Wax and applied with a lint-free rag.Satin Clear Coat
Under the desk where little feet will probably rub along the back and sides, I used Clear Coat Satin Finish, which is a non-yellowing and a self-leveling protective finish.Tips: It is best to wait at least 1 hour after painting a piece before applying Clear Coat. The satin finish is a thick product and therefore it is helpful to dip just the tips of a brush in water first to help the product glide on smoothly. Only one thin coat is necessary for a protective water-resistant finish but I prefer applying another thin coat, waiting an hour between coats.
Gator Hide
Chances are the young lady who gets this desk may bring her favorite beverage to enjoy while doing homework or creating masterpieces. For that reason, I wanted a water-repellent finish on the desktop and pull out shelf.Tips: It is best to wait 3-4 days before applying gator hide over the VooDoo Gel Stain finish. Apply three very thin layers with a foam brush and wait for 2-hours between coats. If applying gator hide over a painted finish, wait 1-2 days before applying.
Polka dot drawers
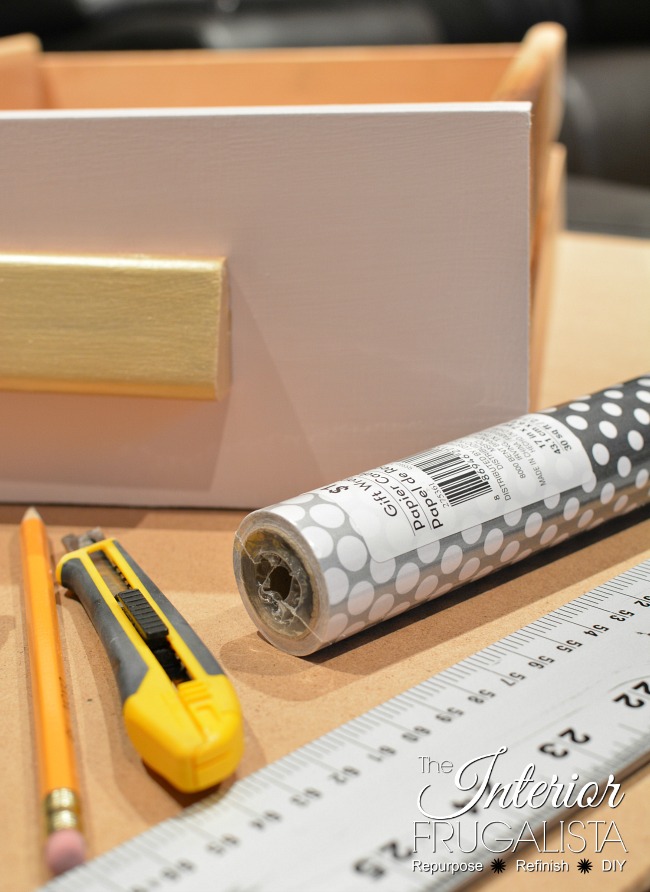
What young diva doesn't like polka dots, right? I found this black & white wrapping paper for just over a $1 per roll.It's perfect for lining the drawers. After cutting three pieces to fit the drawers, I brushed Mod Podge both on the back of the paper and the bottom of the drawers. Once the paper was dry, I applied a thin coat of Mod Podge directly onto the top of the paper for a protective finish.
Adding a ladder back chair
Every desk needs a chair and Mr. Frugalista found this tall narrow ladder back chair that fit perfectly with the desk.All I did was unify them with the same paint and stain.
Mustn't forget an apple for the teacher.
When these furniture pieces speak, I've learned to toss my vision and expectations out the window and just go with the flow.
And I'm so glad I did.
If you like the Vintage Student Desk that went all glam, please share it with a friend and/or save it on Pinterest.
I'm so excited to see what my talented Furniture Fixer Upper friends did with these furniture pieces.
PRESS THE LINKS BELOW TO SEE THE AFTER PHOTOS
The Interior Frugalista (moi)
You will find this project linked to these inspiring link parties.








Comments
Post a Comment
Don't be shy, I love reading your comments and reply to every single one! If you want to be notified when I reply back to you, click the "Notify Me" button below the comment box.