DIY Chalkboard Message Center Repurposed Cabinet Doors
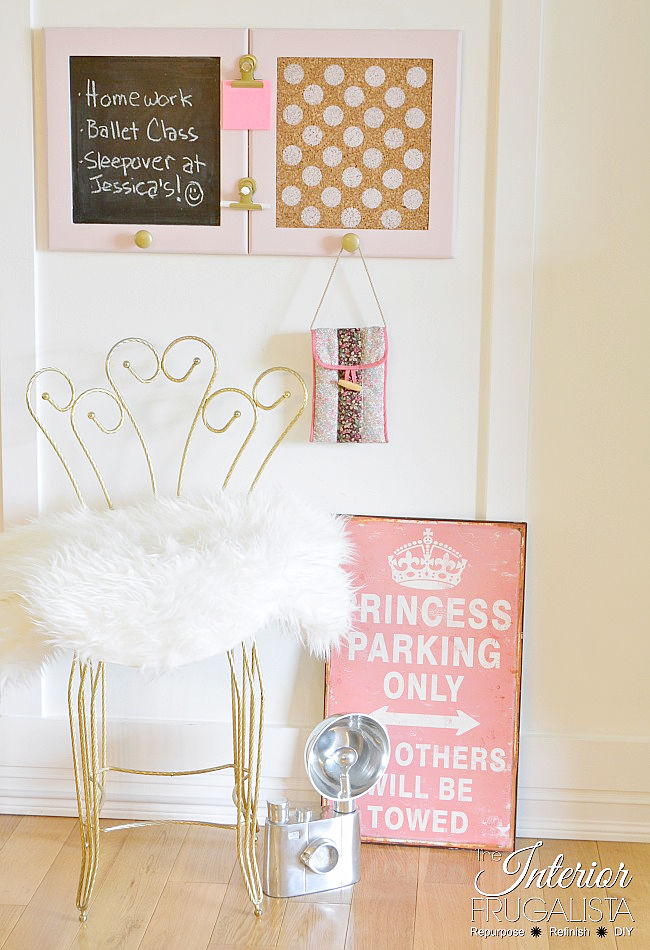
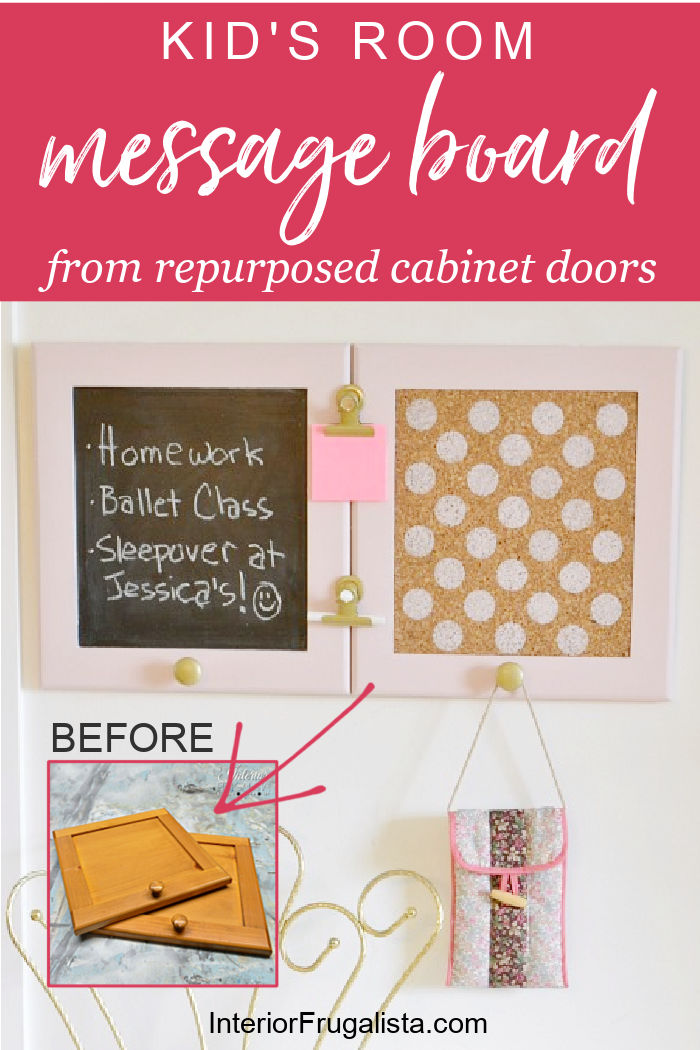
It's time for another Thrifty Chicks challenge and this month the theme is Chalkboards. For my project, I made a DIY chalkboard message center from repurposed cabinet doors and it's a perfect example of why I don't throw anything out.
Last year in an attempt to declutter the workshop, we dismantled a wooden corner media cabinet that we intended to do something with one day. One day turned into months and then into years and the likelihood of doing anything with it was slim.
But, I'm so glad we kept the components of the dismantled cabinet because the doors were the perfect salvage for making a handy chalkboard/corkboard message center for a child's bedroom.
In this case, fit for a princess!
DIY Message Board From Repurposed Cabinet Doors
If you haven't heard of our Thrifty Chicks team, on the second Wednesday of every month my creative junk-loving friends and I come together to transform, upcycle, or repurpose a junk find based on a theme.
Our previous challenge was to repurpose a license plate and I turned mine into kid's room license plate art for my grandson's bedroom. You'll find our talented group's chalkboard projects this month at the bottom of the post. Please be sure to check them out before you go.
What You'll Need To Make It
This post contains affiliate links so you can see what products I used or recommended for this project. As an Amazon Associate, I earn a small commission from any qualifying purchases at no extra cost to you. Thank you for your support!
Supply List
Small Cabinet Doors (salvaged)
Cork Sheets
Polka Dot Stencil
Clear Chalk Paint Wax
E6000 Glue
Flat Metal Brackets
Bulldog Metal Clips
Black Chalkboard Paint
Pure Gold Rustoleum Metallic Spray Paint
Rustoleum Matte Clear Coat
Mini Round Craft Mirrors
D-Ring Picture Hooks
These are the salvaged cabinet doors from the dismantled corner media cabinet. I'm so glad I kept the wooden knobs because they'll also be used for this project.
I painted the message board in a feminine pink so it can be paired with the pink vintage student desk makeover I recently finished.
Here's How I Made It
The cabinet doors are painted with a leftover custom pink chalk paint from the wooden student desk. Pictured below is after the first coat of paint and it only took two coats for complete coverage.
After the paint dried overnight, I protected it with clear wax for chalk paint that I had on hand. It is applied with a small wax brush and buffed with a lint-free rag to a matte finish.
Turning A Cabinet Door Into A Chalkboard
The recessed part of one of the cabinet doors is painted with two coats of black chalkboard paint. It's important you wait the recommended drying time between coats for a lasting chalkboard finish.
Homemade Chalkboard Tip
Another option for making chalkboards is painting a smooth board with flat latex paint or chalk paint in any color. These paints dry much faster between coats if you want to speed up the project.
How To Avoid Ghost Writing On A New Chalkboard
Before using a brand new chalkboard they should be seasoned first to avoid any permanent ghostwriting. to do this simply rub the side of a stick of chalk along the board both vertically and horizontally and wipe it off with a clean rag.
How To Turn A Cabinet Door Into A Corkboard
For the other repurposed cabinet door on the DIY message board, cut a sheet of cork to fit inside the recessed area of the door.
Considering I'm making this for a girl's room, I embellished the cork message board with fun pink polka dots using a stencil (see supply list).
Once the stenciled polka dots were dry, the corkboard is attached to the cabinet door with E6000 glue. Set heavy objects on top and let the glue cure for several hours or overnight.
Joining Repurposed Cabinet Doors Into A Message Center
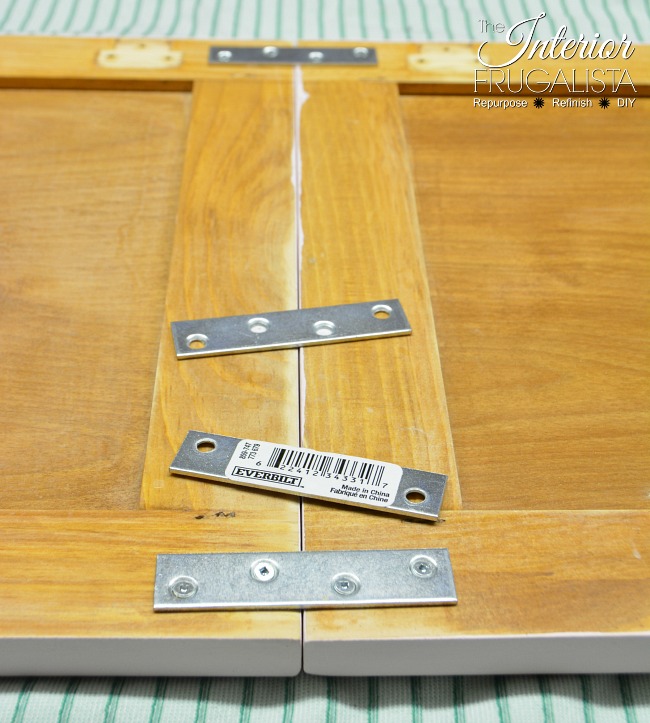
To join the two cabinet doors together, attach metal brackets in four places on the back as pictured below - easy peasy!
Embellishing Repurposed Cabinet Doors Message Center
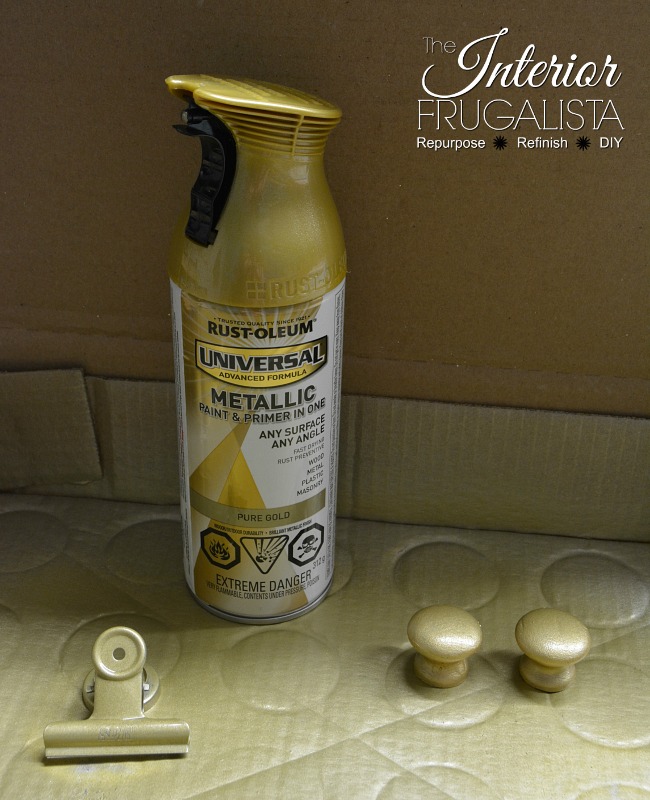
Now we'll add some gold bling to the message board fitting for a girl's room. The original wooden cabinet door knobs and two silver bulldog clips were spray painted a pure gold color. Once dry, they are protected with two coats of matte Rustoleum Clear Coat.
To add a little more bling to the gold-painted bulldog clips, I attached round mirrored beads with E6000 glue.
The bulldog clips are attached to the middle of the message board with wood screws. One clip for holding a stick of chalk for the chalkboard and the other to hold a sticky notepad.
Last but not least, to hang the message board on a wall, two D-ring picture hangers are attached to the back of the frame.
Handy No Measure Picture Hanging Tip
I'm sure you can relate to how challenging it is to hang any kind of wall decor that has double picture hooks. Getting those nails in just the right spot on the wall, no less getting them perfectly level, can be a pain. This amazing no-measure picture hanging tip is going to rock your world!
The takeaway from this project is before throwing anything out, take a good look at it first because you never know if the parts can be repurposed into something new down the road. I'm so thankful that I saved all the dismantled parts of the corner media cabinet.
So what do you think? Thanks for stopping by the Interior Frugalista today! I hope you were inspired by this handy idea for a repurposed cabinet doors message center for a child's bedroom.
Almost all of our DIY ideas have step-by-step tutorials so why not get your budget DIY on and subscribe. You can also find us on Pinterest, Facebook, and YouTube.
If you have any questions, please leave them in the comment section below or the Contact Me tab at the top to drop me an email. I love hearing from you!
If you enjoyed this DIY message board from repurposed cabinets, I'd be so thankful if you shared it with a friend and pinned it to your favorite board on Pinterest.
I invite you to click on the links below to visit our talented group members' chalkboard projects. If you don't have time today, you can bookmark the page by pressing the pink heart icon on the right to come back later.
How To Make A Chalkboard From A Mirror | Shoppe No. 5
Giving Vintage Jugs A Modern Look With Chalkboard Paint | Adirondack Girl At Heart
DIY Chalkboard Scoreboard | Just The Woods
Chalkboard Wall In The Pantry | by Lora Bloomquist Create & Ponder
Kid's Room Message Board Repurposed Cabinet Doors | Interior Frugalista (that's me)
Chalkboards In Any Color | Little Vintage Cottage
Quick & Easy Cookie Sheet Chalkboard | Thrifty Rebel Vintage
I share my projects at these inspiring link parties.


Comments
Post a Comment
Don't be shy, I love reading your comments and reply to every single one! If you want to be notified when I reply back to you, click the "Notify Me" button below the comment box.