Large DIY Chalkboard - No Power Tools Required
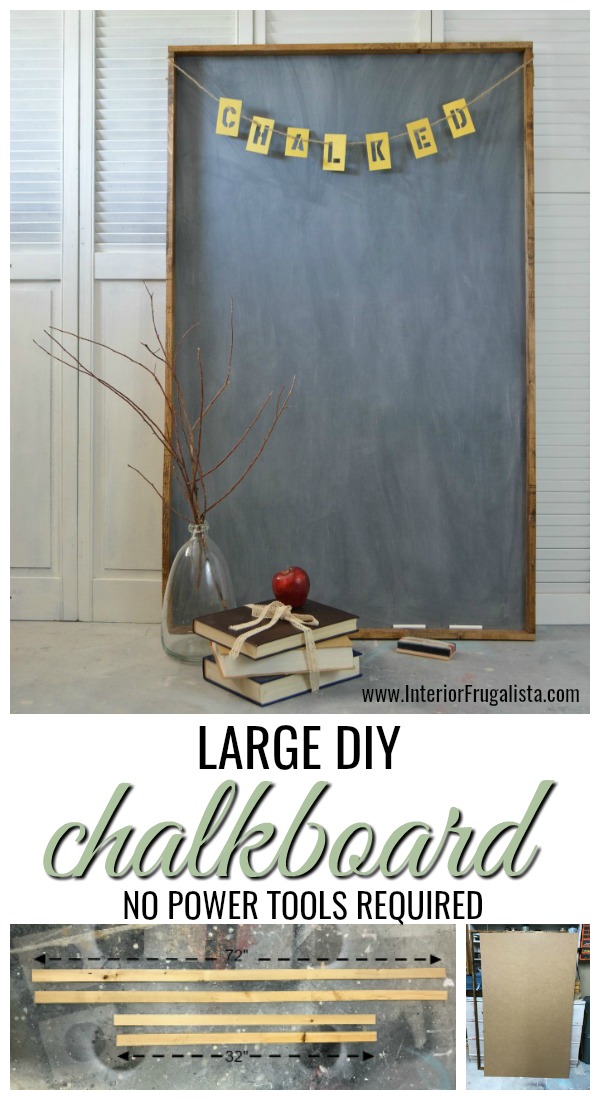
Today I'm sharing how to make a large chalkboard without using power tools. Yup, I went all old school on this one with a hammer and nails and I'm not going to lie, it hurt a little.
Only because I'm out of practice. If I can take the quick and easy route with power tools, I'm on it. But our small compressor is on the fritz and to pull out the one that requires herculean strength for a handful of brad nails was way too much work for this old gal.
I realize not everyone has access to or likes using power tools so this is a way to make a custom chalkboard without. It doesn't matter whether you have a garage or workshop, this project can be made on your living room floor or dining table if you have bad knees like me.
I love chalkboards so much so that I created a dedicated Pinterest board for them here Chalkboard Everything.
I've made many over the years by repurposing picture frames, silver platters & charger plates, dated artwork, old signs, and cabinet doors.
Heck, I've even painted a chalkboard on our kitchen wall. But I wanted a larger chalkboard for a prop to use with my furniture makeover photos.
I've included a Materials List towards the bottom of this post. It contains affiliate links for your convenience so you can see what products I used or recommend to make this project. What that means is that if you click on one of the product links and make a purchase, I may receive a small portion of any sales at no additional cost to you, which supports the costs of running this site. See my full disclosure policy.
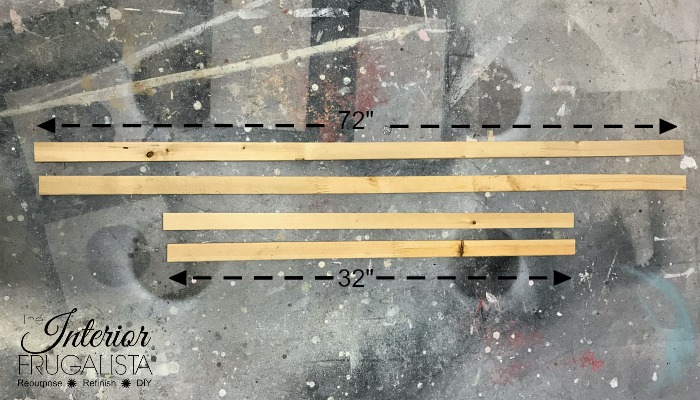
I used 1" x 2" Furring Strips to build this simple and rustic chalkboard frame.
Confession: I used a miter saw to cut the wood - why wouldn't I when the thing was sitting a foot away from me. But you could use a good old fashion saw if you don't have access to a miter saw OR better yet, have the home improvement store cut the boards to size for you.
Before assembly, I stained the wood with Minwax Wood Finish in the color Provincial, applied with a clean rag.
If they won't cut it for you, measure and mark with a pencil line onto the hardboard sheet. Using a straight edge and a utility knife with a sharp blade, scribe the hardboard until it snaps. It'll take a few scribes to get through the board.
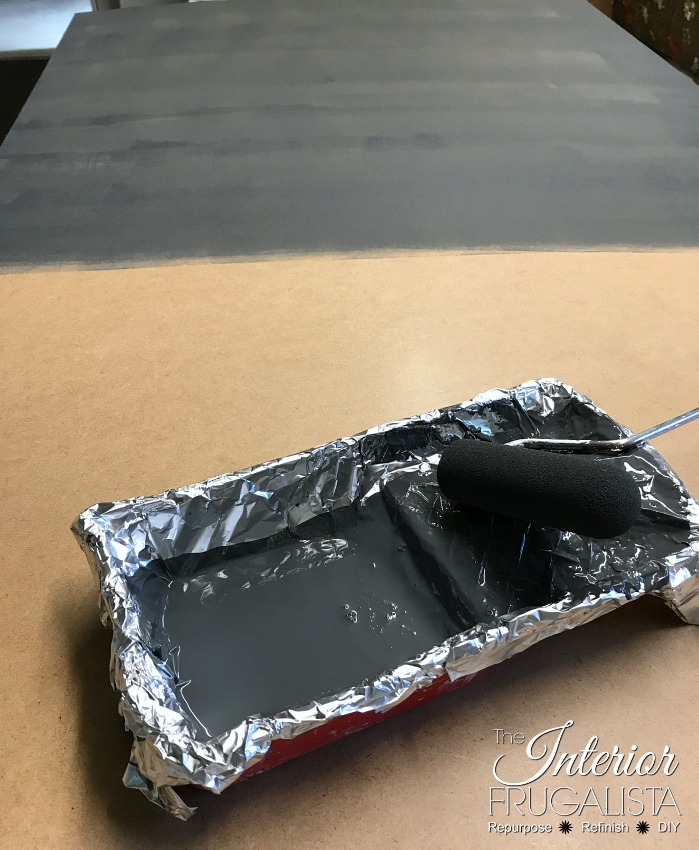
I rolled the chalk paint on with a small 4-inch foam roller and let it dry about 45 minutes to an hour between coats. It took three coats for full coverage.
That's it!
I'm so glad to FINALLY have that oversized chalkboard I've been wanting for photo staging.
Hand Saw (if home improvement store can't cut the lumber to size)
Gorilla Wood Glue
Corner Clamps
Provincial Minwax Wood Finish
Hammer
1-inch Brown Nails
3/4-inch Finishing Nails
Hardboard
Utility Knife and Straight Edge (if home improvement store can't cut the hardboard to size)
Graphite Chalk Paint or Chalkboard Paint
4-inch Foam Roller
Items on the list without a link can be found at The Interior Frugalista SHOP on Amazon.
If you found my Large DIY Chalkboard inspiring, please share it with a friend and/or save it on Pinterest.
Only because I'm out of practice. If I can take the quick and easy route with power tools, I'm on it. But our small compressor is on the fritz and to pull out the one that requires herculean strength for a handful of brad nails was way too much work for this old gal.
I realize not everyone has access to or likes using power tools so this is a way to make a custom chalkboard without. It doesn't matter whether you have a garage or workshop, this project can be made on your living room floor or dining table if you have bad knees like me.
Large DIY Chalkboard - No Power Tools Required
I love chalkboards so much so that I created a dedicated Pinterest board for them here Chalkboard Everything.
I've made many over the years by repurposing picture frames, silver platters & charger plates, dated artwork, old signs, and cabinet doors.
Heck, I've even painted a chalkboard on our kitchen wall. But I wanted a larger chalkboard for a prop to use with my furniture makeover photos.
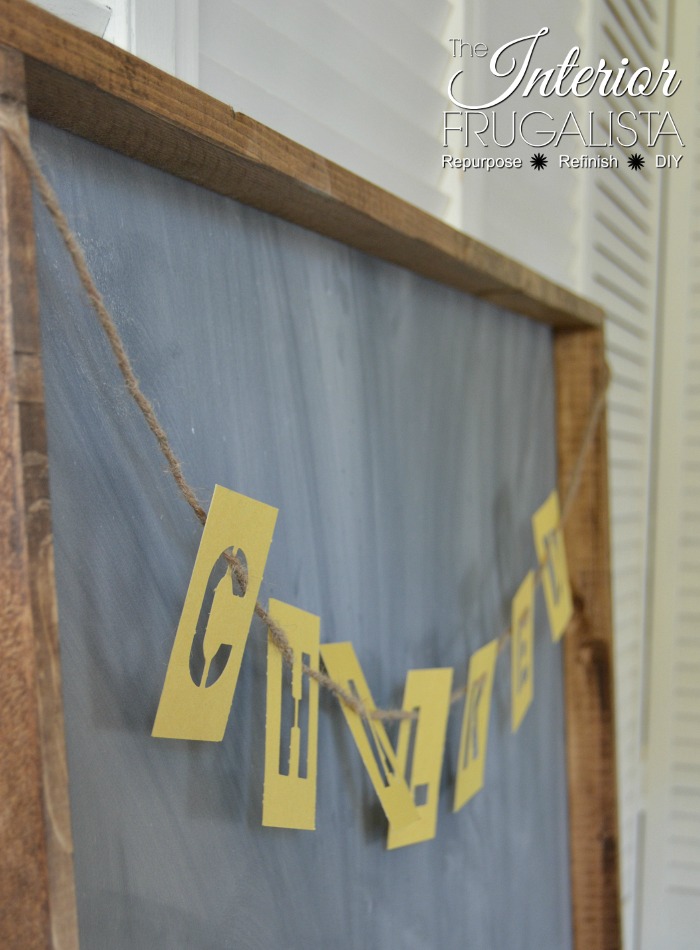
This Large DIY Chalkboard is so easy to make in just a few short hours. It would be even faster if you didn't have to wait for the paint to dry.
I've included a Materials List towards the bottom of this post. It contains affiliate links for your convenience so you can see what products I used or recommend to make this project. What that means is that if you click on one of the product links and make a purchase, I may receive a small portion of any sales at no additional cost to you, which supports the costs of running this site. See my full disclosure policy.
So here's how I did it...
Lumber for the chalkboard frame

I used 1" x 2" Furring Strips to build this simple and rustic chalkboard frame.
Confession: I used a miter saw to cut the wood - why wouldn't I when the thing was sitting a foot away from me. But you could use a good old fashion saw if you don't have access to a miter saw OR better yet, have the home improvement store cut the boards to size for you.
Before assembly, I stained the wood with Minwax Wood Finish in the color Provincial, applied with a clean rag.
Chalkboard Frame Assembly
I built the frame with simple butt joints. First I dabbed some wood glue on the ends of the uprights and joined them with corner clamps. With a good old fashion hammer, I tacked two brown 1-inch nails into each joint.Chalkboard cut to size
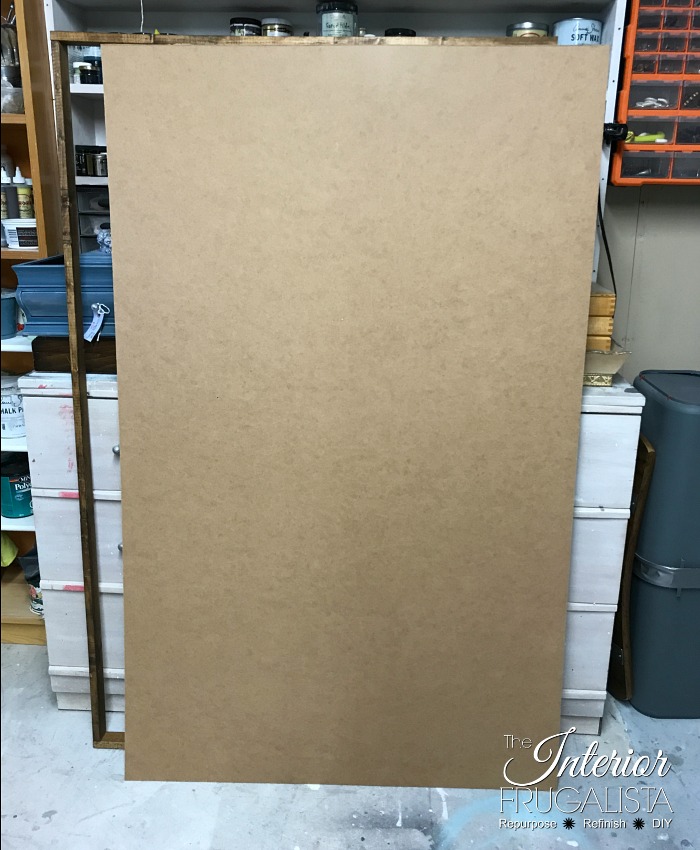
Making the chalkboard is easy. All you need is a sheet of hardboard - they come in 4' x 8' sheets. Ask the home improvement store to cut the board to size for you. Bonus, the offcuts can be used for future chalkboards - they make great gifts!If they won't cut it for you, measure and mark with a pencil line onto the hardboard sheet. Using a straight edge and a utility knife with a sharp blade, scribe the hardboard until it snaps. It'll take a few scribes to get through the board.
Create the chalkboard with paint
Did you know you can use flat paint to make a chalkboard? What I like about using it over readymade chalkboard paint is the quick drying time between coats. For mine, I used Annie Sloan Chalk Paint in the color Graphite, because I had it on hand.I rolled the chalk paint on with a small 4-inch foam roller and let it dry about 45 minutes to an hour between coats. It took three coats for full coverage.
Season the chalkboard
Before using a brand new chalkboard it is important that you season it first. To do this you simply rub the side of a stick of chalk all over the board both vertically and horizontally. With a paper towel or clean rag rub the chalk into the pores of the paint in a circular motion. Clean the board with either a chalkboard brush or clean rag.Chalkboard Assembly
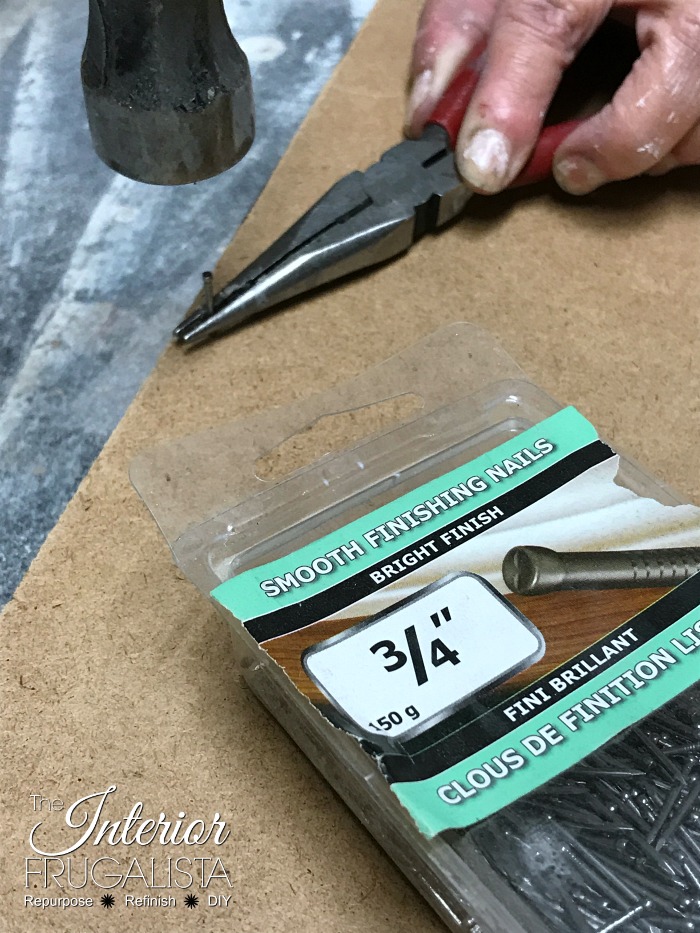
Lay the chalkboard frame with the good side facing towards the floor/surface you're working on. Lay the painted side of the hardboard facing down on top of the frame. With 3/4-inch finishing nails, secure the chalkboard to the frame.TIP: Save your finger's and use needle nose pliers to hold the short nails while you hammer them in place.
That's it!
I'm so glad to FINALLY have that oversized chalkboard I've been wanting for photo staging.
Materials List
1" x 2" furring strips lumberHand Saw (if home improvement store can't cut the lumber to size)
Gorilla Wood Glue
Corner Clamps
Provincial Minwax Wood Finish
Hammer
1-inch Brown Nails
3/4-inch Finishing Nails
Hardboard
Utility Knife and Straight Edge (if home improvement store can't cut the hardboard to size)
Graphite Chalk Paint or Chalkboard Paint
4-inch Foam Roller
Items on the list without a link can be found at The Interior Frugalista SHOP on Amazon.
If you found my Large DIY Chalkboard inspiring, please share it with a friend and/or save it on Pinterest.
So what camp do you fall under? I'd rather build this chalkboard with power tools OR I prefer going old school without power tools?
I share my projects at these fabulous Link Parties.






How thick was your hard board? 1/8 or 3/16
ReplyDeleteI no longer have the chalkboard so I can't measure it but either is fine.
Delete