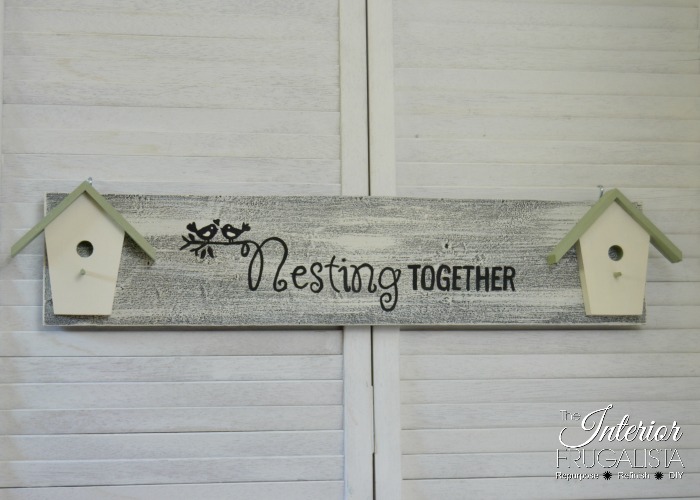
Adorable Nesting Together Birdhouse Sign
The inspiration for the adorable nesting together birdhouse sign came from a $4 wooden birdhouse hanger found at Goodwill. My first thought was to paint the wooden birdhouses bright colors and use them for their intended purpose but that would be too easy.
DIY Nesting Together Birdhouse Sign
I figured by separating the cute little birdhouse trio, they could inspire at least two projects. And that they did.
First with a much needed sign for our budget-friendly deck makeover as well as this Summer Birdhouse Wreath. Pictured below is the unfinished birdhouse hanger I was thrilled to find at Goodwill.
I also repurposed a wood table riser that was originally a salvaged wooden shutter to make the nesting together birdhouse sign. It was the perfect size for two of the thrift store birdhouses.
The handmade birdhouse sign is just what we needed in the conversation area we were creating on our deck.
The focal point on our deck is our DIY Water Wall feature and I plan on hanging the adorable sign right above it where it will be seen by guests in our little outdoor oasis.
Making this sign is such a quick and easy outdoor decor project that can be made in an afternoon. I think it would make such a cute romantic birthday gift, or a great gift for a bridal shower, wedding, or anniversary as well.
What You'll Need To Make It
The likelihood of you finding a wooden birdhouse hanger like mine is rare but there are other options. You could make mini birdhouse shapes with scrap wood OR you could dismantle dollar store wooden birdhouses and use both the front and back pieces.
This post contains affiliate links so you can see what products I used or recommend for this project. As an Amazon Associate, I earn a small commission from qualifying purchases at no extra cost to you.
Supply List
Wood Board (salvaged)
2 Wooden Birdhouse Shapes
White Paint
Sage Green paint
Wood Glue
Spring Clamps
Black Sharpie Marker OR Paint Pens
Printer
Graphite Paper
Outdoor Clear Coat
D-Ring Picture Hangers
How To Make The DIY Birdhouse Sign
We'll begin the tutorial with the salvaged board used for the sign.
Painting Salvaged Wood Sign
The salvaged board had already been painted black with a layer of white. I wanted my sign to have a lighter background and so I dry brushed two layers of Annie Sloan Chalk Paint in the color Old White over the original paint.
To do this dip just the tips of an inexpensive chip brush into the paint. Dab the brush on a paper towel to remove the excess paint. The key is to have very little paint on the brush; hence the term dry brush.
With light pressure on the brush swipe the paint across the wood in long random brush strokes. You want the original color to peek through from underneath so less is more.
I painted the birdhouses the same old white paint color. Then I painted the roof and perch a sage green color with chalk paint that I had on hand.
Attach Birdhouses To Sign
I placed the birdhouses on each end of the painted board so the roof peaks overhang above the top of the sign. Then I attached them with wood glue, butterfly clamps, and let the glue cure overnight.
What I'd Do Differently
When I came down to the workshop the next morning I realized my big oops. Can you see it in the photo above?
I'd completely forgotten to remove the feet from the salvaged table riser before gluing the birdhouses on. Guess where the screw heads for the feet are? Yup, underneath the birdhouses. 😩
Mr. Frugalista came to the rescue and put the table riser into a vice to hold in place. Then he gently rocked the feet back and forth to loosen the joint. With a small pry bar, he separated the joint enough to cut the screws off with a Dremel tool and metal cutting disc.
Adding Nesting Together Graphic
First, I created a cute graphic in Picmonkey and uploaded it to the Blockposters site. I enlarged it to fit the wooden sign and printed it on regular bond paper. To transfer the graphic onto the sign I used this Image Transfer Technique.
Once the graphic was transferred onto the wood I simply went over the traced graphic with a black marker (a paint pen is fine too). Easy peasy!
I've included a free printable of the graphic if you'd like to use it. Click HERE for an unwatermarked PDF.
Once the ink dried for a couple of hours, I protected the entire sign with two coats of Varathane Outdoor Clear Coat applied with a small foam brush.
Hanging Birdhouse Sign
Once the last coat of clear finish was dry I attached two D-Ring Picture Hangers to the back of the sign and it was ready to hang on the deck.
Pro-Tip For Hanging Signs
Hanging signs (or any art for that matter) that have two hooks can be a real pain trying to get the nails on the wall so it hangs perfectly straight. I've got an amazing No Measure Picture Hanging Method that gets it right every.single.time.
That's it, a cute DIY nesting together outdoor birdhouse sign.
Thanks for stopping by the Interior Frugalista today! I hope you were inspired by this adorable nesting together birdhouse sign.
Almost all of our DIY ideas have step-by-step tutorials so why not get your budget DIY on and subscribe. You can also find us on Pinterest, Facebook, Instagram, and YouTube.
If you have any questions, please leave them in the comment section below or the Contact Me tab at the top to drop me an email. I love hearing from you!
If you enjoyed this DIY outdoor sign idea, I'd be so thankful if you shared it with a friend and pinned it to your DIY Wooden Sign Ideas or Birdhouse Ideas board on Pinterest.
I share my projects at these inspiring link parties.


Loved your birdhouse wreath yesterday and loving your "Nesting" sign today. You got your money's worth out of those 3 birdhouses! Love your creativity.
ReplyDeleteThank you so much, Barb! Yes, that thrift store birdhouse hanger was a sweet find.
DeleteThis is so cute! I definitely need to make one now! I think I'll paint the birdhouses to match the exterior of the house, but I definitely need one of these on the patio. Thank you so much for sharing!
ReplyDeleteAwesome, Amy, I'm glad you like the sign and have fun making yours!
DeleteGood job you have a 'crafty' husband to save the day! I love how these signs turned out, the colours are so pretty!
ReplyDeleteMacgyvoring things IS his wheelhouse. LOL Thanks, I'm glad you like our sign and appreciate the visit 😀
Delete