Deck Privacy Screen From Repurposed Louvered Doors
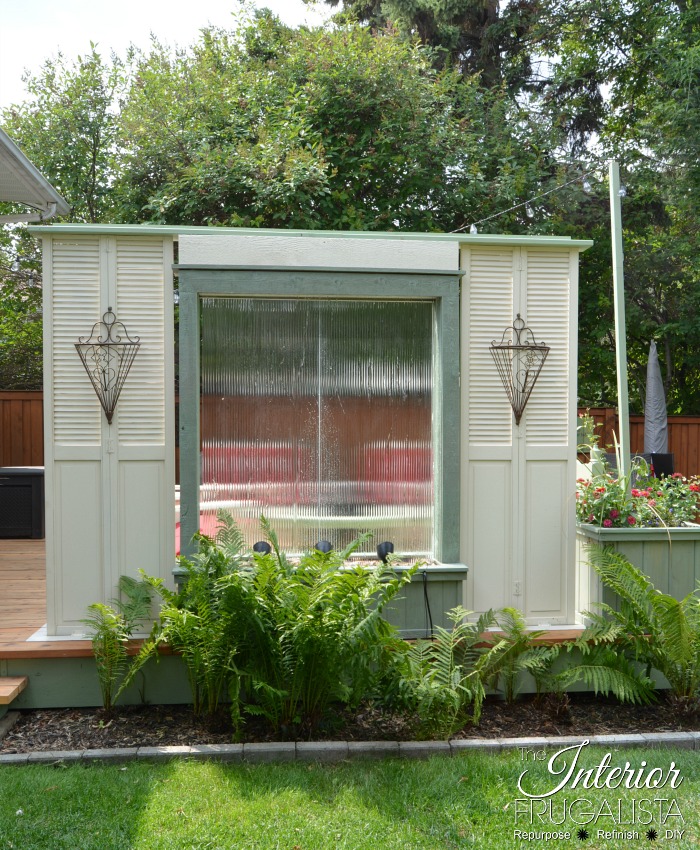
Do you struggle with a lack of privacy on your backyard deck? Do you want privacy without losing the sun like with a pergola? Then you'll love this budget-friendly alternative for a deck privacy screen with repurposed louvered doors.
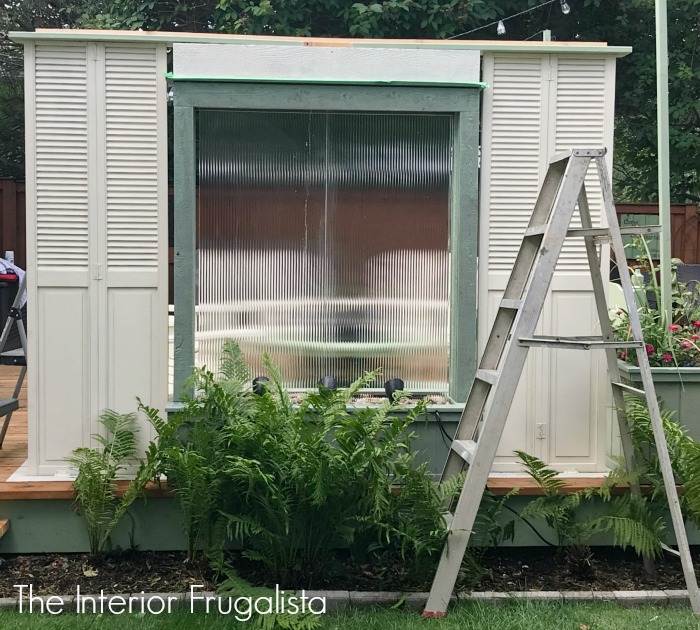
It's a simple build and doesn't require the water feature pictured in the center. However, I do share a link to how to build that too further down in the post. Either way, the privacy wall adds a lovely focal point to a deck.
Repurposed Bi-fold Door Deck Privacy Screen
Depending on which direction you face the louvered doors, you can see out but the neighbors can't see in.
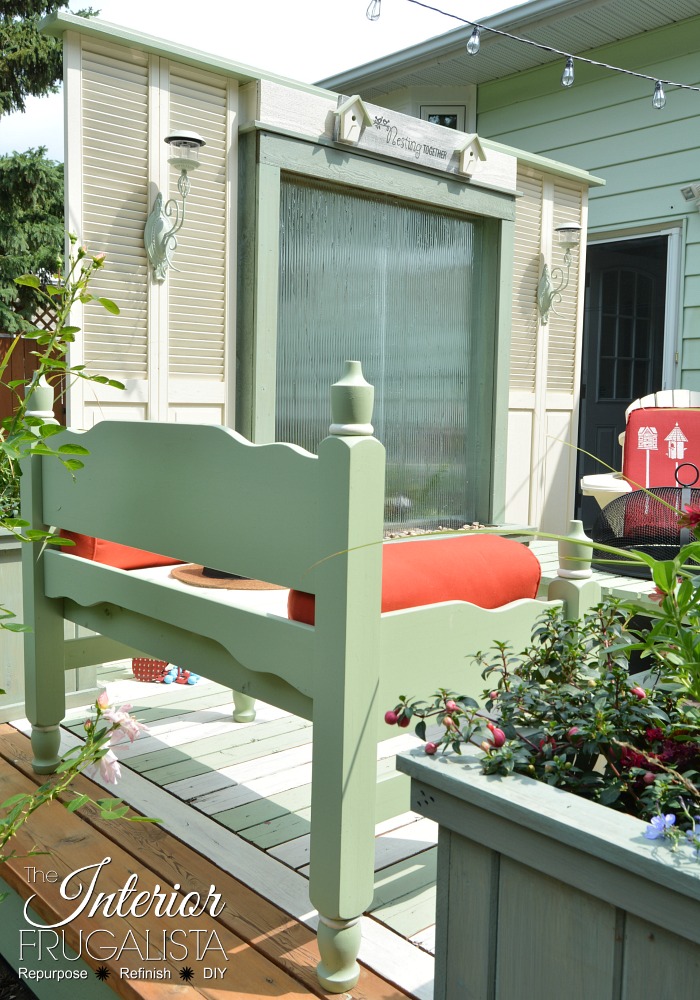
This is what the deck privacy wall looks like from the deck. I've shared links to the DIY solar lights and the birdhouse sign in the deck makeover series recap further down in the post.
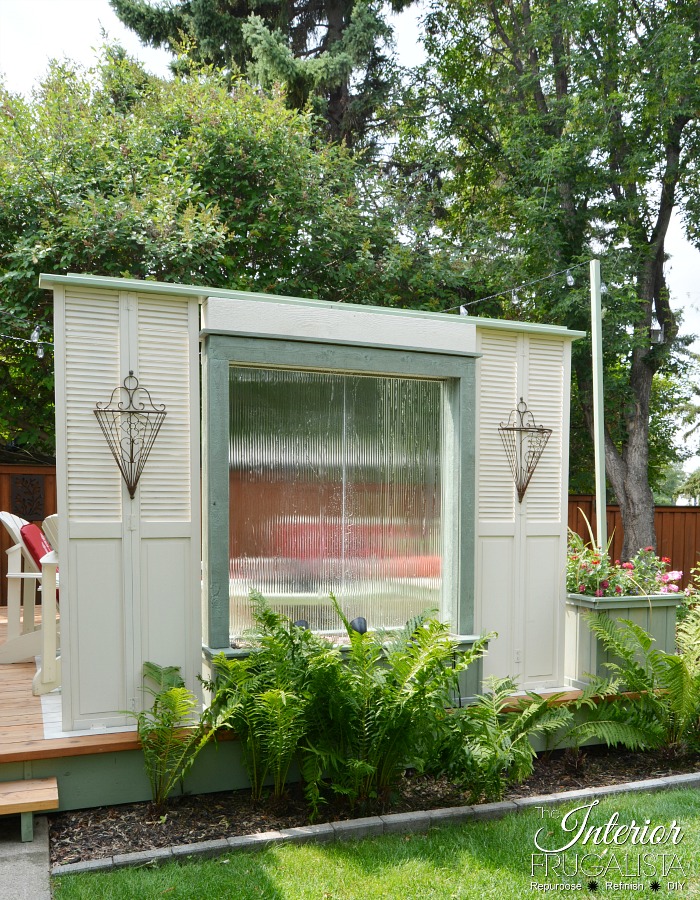
This is the view the neighbor's see on the backside of the privacy screen. It's just as pretty and is illuminated with solar floodlights after dusk.
The repurposed bi-fold door deck screen adds a gorgeous focal point on our deck and gives us the privacy we've been longing for. I've included a link to the repurposed headboard garden bench pictured in the foreground further down in the post too.
I chuckled when I noticed the upcycled metal garden kitty peering through the Adirondack fire bowl screen in the photo below. I've included links to the upcycled metal garden statues further down in the post as well.
Before we get into the nitty-gritty of how to make the deck privacy wall, I should mention that we are self-taught DIYers and not trained professionals. This step-by-step tutorial is based on our building knowledge only. However, if you are a do-it-yourselfer like us, you'll find these steps helpful if you plan on making a version of our deck privacy screen.
Almost all of the DIY projects shared here at Interior Frugalista have step-by-step tutorials so why not get your budget DIY on and subscribe. You can also follow us on Pinterest, Facebook, Instagram, and YouTube.
What You'll Need To Make It
This post contains affiliate links so you can see what products I used or recommend for this project. As an Amazon Associate, I earn a small commission from qualifying purchases at no extra cost to you.
Supply List
- Wood Louvered Bi-Fold Doors (salvaged)
- Najavo White (SC-157) Behr Premium Exterior Wood Solid Stain
- Seafoam Green (SC-132) Behr Premium Exterior Wood Solid Stain
- Drop Cloth/Tarp
- Husky 20-Gallon Air Compressor (alternatives)
- Pneumatic Husky HVLP Gravity Feed Spray Gun (alternatives)
- Power Drill
- 1 1/2-inch Galvanized Wood Screws
- 2 1/2-inch Angle Brackets
- 1 Cedar 1 x 6 Board
- 1 Cedar 1 x 4 Board
Here's How We Made It
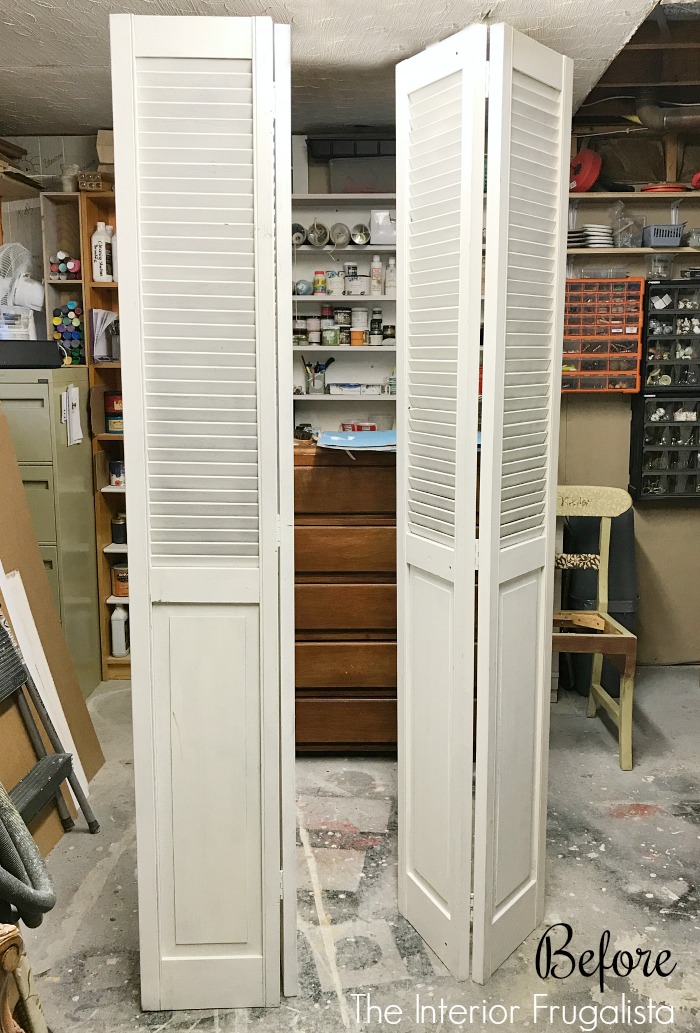
It all started with a couple of solid wood 23-inch bifold louvered doors in our basement. I used them as divider walls in my booth at a local antique mall. I'm to finally found a new purpose for them.
Step 1 - Trimming The Doors
The doors were trimmed to 73-inches high with a skill saw and cutting guide so they are the same height as our DIY Water Wall.
Step 2 - Staining The Doors
The doors are stained with Behr Premium Exterior Wood Solid Stain in the color Najavo White. They were stained with an HVLP Gravity Feed Spray Gun that came with our 20-gallon compressor in a 4:1 ratio just like in our How To Stain Adirondack Chairs The Easy Way tutorial.
When relaxing on the deck with a cold one while waiting for the stain to dry I had a little visitor. It stayed there for a long time.
Step 3 - Mounting Screens Onto Deck
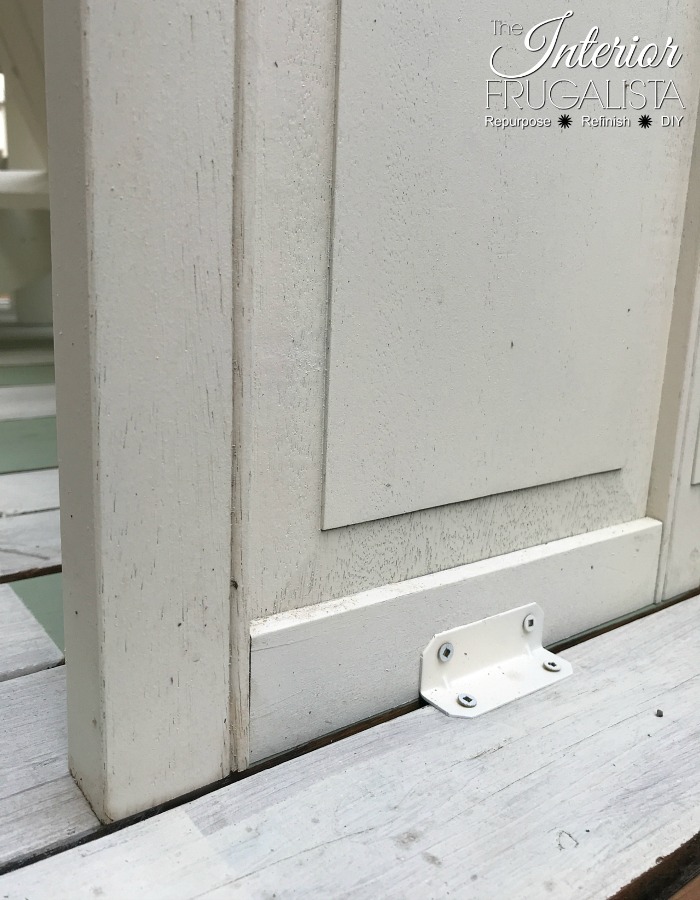
Next, we line the doors up on either side of our water wall and attach them to the deck on the bottom outer edge of the screen with 2 1/2 angle brackets (pictured below). The metal brackets were pre-painted with Rustoleum spray paint in the color Heirloom White, an almost perfect match to the Najavo stain color.
Alternatively, without a water wall, butt up against each set of bi-fold doors along the edge of the deck and attach them the same way with angle brackets.
Step 4 - Capping Top Of Garden Screen
To cap the privacy screen we used a piece of 1 x 6 x 9' cedar and ran it across the span of both bi-fold doors and the water wall. It was attached from the top with 1 1/2-inch galvanized wood screws, with a 2-inch overhang on either end.
Without a water wall in the middle, the instructions are the same. Run the cedar board across the span of all the sets of bifold doors with a 2-inch overhang on either end. Make sure the doors are butted up tight to one another before attaching them from the top with 1 1/2-inch galvanized wood screws.
Now that you have all the doors joined together with a cedar cap, we'll add a simple decorative element on top. Attach another narrower 1 x 4 x 8' cedar board on top.
You can leave the cedar natural so it greys over time or stain the wood to match. We chose to stain ours with Behr Premium Exterior Wood Solid Stain in the color Seafoam Green to match the garden bench on the deck.
Deck Privacy Screen WITH Water Fountain Feature
Should you decide to include a water fountain feature in your deck privacy screen, you can find the instructions for how to build one here in our DIY Outdoor Water Wall post.
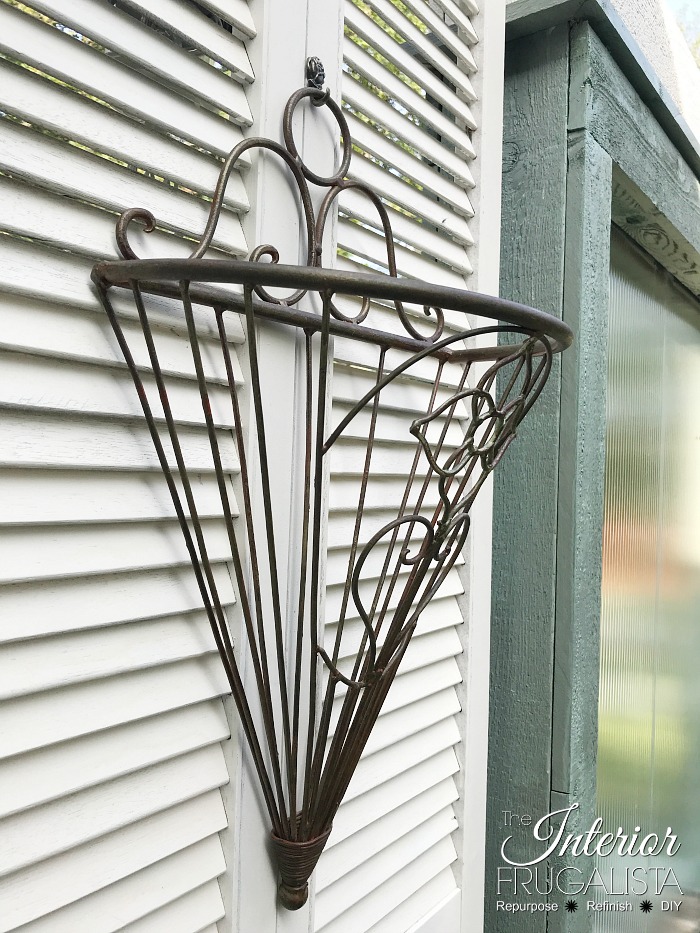
To dress up the backside of the privacy screen I hung bronze metal basket planters that I've had hanging indoors for many years. They'll be so pretty filled with trailing flowers.
This isn't our first garden screen made with salvaged bi-fold doors. A few years ago we built a Louvered Door Garden Fence. It hides our woodpile and other unsightly junk.
Thanks for stopping by the Interior Frugalista today! I hope you were inspired by this privacy screen idea for your deck. If you have any questions, please leave them in the comment section below or the Contact Me tab at the top to drop me an email. I love hearing from you!
If you enjoyed this deck privacy screen idea, I'd be so thankful if you shared it with a friend and pinned it to your DIY Outdoor Living Ideas or Repurposed Door Ideas board on Pinterest.

As promised, here are links to all the DIY projects in our deck makeover series. I hope you find some inspiration here as well.
Deck Makeover Series Recap
- DIY Birdhouse Sign
- Budget-Friendly Deck Restore
- Easy DIY Solar Fence Lights
- Easy DIY Outdoor Rug With Stain
- Easy Way To Stain Adirondack Chairs
- DIY Headboard Garden Bench
- Stenciled Outdoor Cushions
- Upcycled Garden Animal Statues
I share my projects at these inspiring link parties.







Those bi-fold louvered doors really are useful! I really love your painted 'rug' on your deck though!
ReplyDeleteThey sure are and I have another backyard project coming soon using the last of our bi-fold doors. The painted rug was so easy to do and we sure love it! Have a good weekend, Vanessa 😊
DeleteMarie,
ReplyDeleteOMG, I love this project. How clever of you. I am kicking myself right now, because when we moved, I had about 8 sets of old bi-fold doors and I got rid of them. That was a mistake.
Oh well, I well. You always do such clever things. Thanks for sharing at OTM party last week.
Hugs,
Bev
Oh no, Bev! Those old doors can be repurposed into so many things. In fact, I'm repurposing the last set this weekend that I'll be sharing soon on the blog.
DeleteWOW, your privacy screen is gorgeous, Marie! Love everything about your little outdoor deck space... the colors, the accents. So pretty!
ReplyDeleteThank you so much, Julie! We do enjoy spending a lot of time out here during the summer.
DeleteHi Marie!
ReplyDeleteWell, you did it again - another great project! What a serene place you've created for outdoor sitting. It's amazing how much more privacy you gained by adding the doors to each side of the waterfall feature. And that painted "rug"! Love it! Thanks for sharing at Homestyle Gathering! I love having you at the party each week!
>>> Kim
Thank you so much, Kim for your lovely comment, you made my morning!
DeleteThis has to be the coolest outdoor makeover!! Such a great idea and I love the table around your fire pit! Bet you have enjoyed this space to bits!!
ReplyDeleteThank you so much, Sam! Unfortunately, this summer we have hardly spent time out there because of all the rain and cool temperatures. Keeping our finger's crossed that August brings us some summer heat.
DeleteHi Marie, What a beautiful addition to your deck! It is absolutely stunning! This is the first time I have seen your water feature too! I'm pinning it and hope we can do something similar to my mom's cabin area! This would be perfect! Thank you so much for sharing!
ReplyDeleteHugs,
Tee
Thank you Tee, I'm glad you like it! We are quite enjoying our little oasis.
DeleteWith our houses so close together a beautiful privacy screen like yours would be needed! Now you can really relax outdoors.
ReplyDeleteI will need to do a search for what you did with the rest of the bi-fold doors.
It really does pay to hold on to things, doesn't it.
Thanks for sharing this with all of us a the FWF link party.
We are so pleased with our privacy screen and how it also provides a focal point on our deck. Bifold doors have so much repurpose potential. I've got plans for another set to repurpose in our yard this summer.
DeleteY'all seriously amaze me! Love this idea and am pinning it for future use as well as featuring it over at the Farmhouse Friday Link Party. Such a great idea!
ReplyDeleteI'm so glad you like this idea, Cindy! We love our privacy screen and I especially love that this bed head, pajama clad, hot mess mama and sneak out there with my morning java and no one knows I'm out there. Thank you so much for the pin and the feature! xo
DeleteBeautiful project and I am sure you get a lot more use out of the deck now. My neighbors aren't that close but I do need something similar to block the view my dogs can see of their activity and to stop their barking. Now you have me thinking of some great options. Thanks so much for sharing this idea. #HomeMattersParty
ReplyDeleteSo glad our privacy screen has inspired you with options for one on your deck too, Donna. We LOVE our privacy screen and use our deck far more now.
Delete