Umbra Photo Tray Upcycled For Valentine's Day
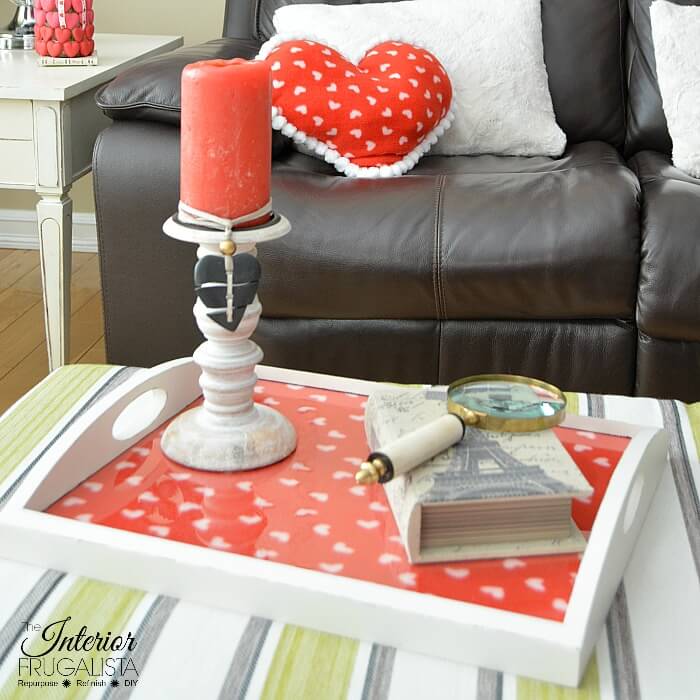
This is a great idea for those without a lot of storage options for seasonal decor. Because this budget-friendly coffee table tray can be used year-round by simply switching what's displayed under the glass for each new season. I'm sharing how to breathe new life into a thrift store Umbra photo tray upcycled for Valentine's Day with farmhouse style.
Budget-Friendly Seasonal Coffee Table Tray Makeover
I see these photo trays often at thrift stores for under $5. They are perfect for a seasonal tray because the back is designed to open easily to display photographs. Making it easy to switch out what is displayed under the glass.
When you live in a small home with limited storage like I do, having home decor that can be used year-round or requires very little storage is key. Case in point, my seasonal pillows can fit inside a small drawer! I use the same pillow forms year-round and just switch out the pillow covers, like these Christmas Ornament Pillows.
By painting the tray a neutral white it will work for every season. By distressing the paint just a little gives it a lovely farmhouse-style charm.
Seasonal Ideas For What To Display Under The Tray Glass
The possibilities are endless for what can be displayed under the glass of your upcycled coffee table tray. Anything from scrapbook paper, wrapping paper, wallpaper, napkins, doilies, or fabric like I did for Valentine's Day.
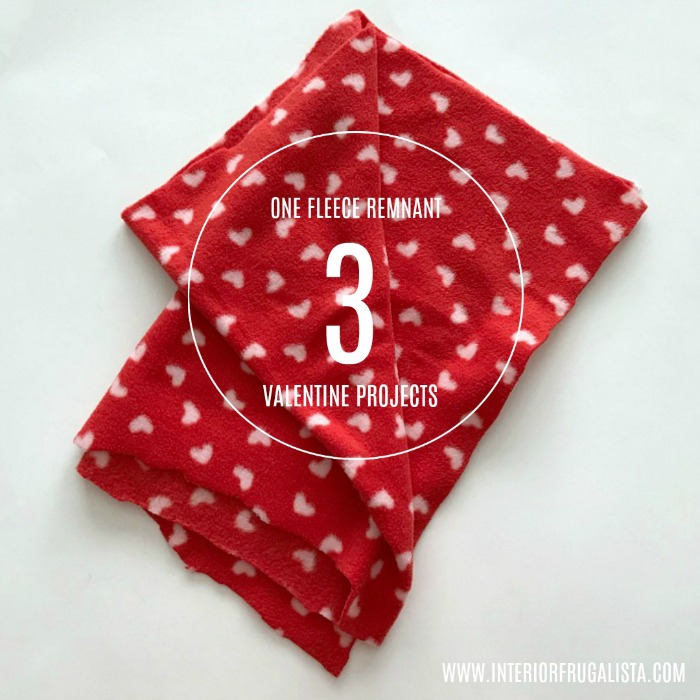
The fabric I displayed under the glass is leftover from the Fleece Valentine Heart Pillow that you can see on the sofa in the photo above.
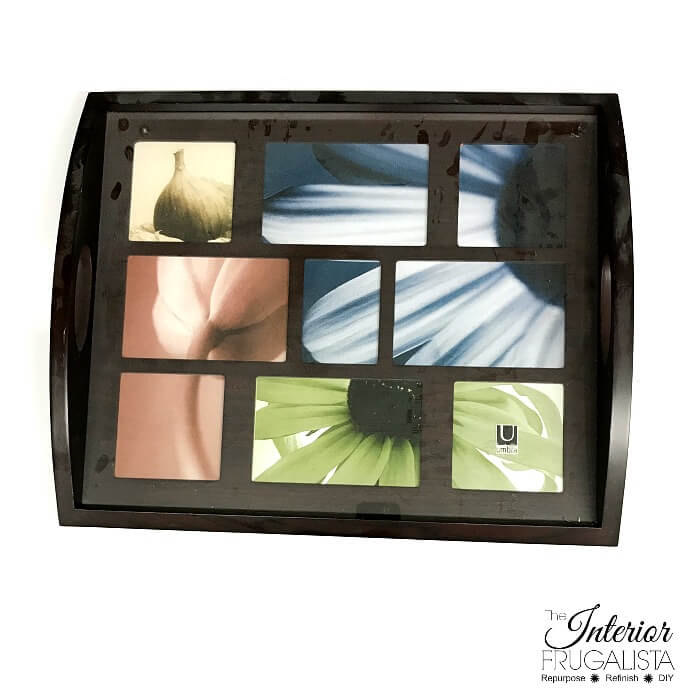
This is what the Umbra photo tray from the thrift store looked like before the makeover.
Whenever I see these trays at the thrift store I always pick them up because with a little elbow grease they make beautiful gifts. Everyone can use a tray, right? Here's one that I upcycled a few years ago with scrapbook paper and turned it into a lovely Coffee Tray With Rustic Charm.
Before we get into the nitty-gritty of how to upcycle the tray, almost all of the DIY projects shared here at Interior Frugalista have step-by-step tutorials so why not get your budget DIY on and subscribe. You can also follow us on Pinterest, Facebook, Instagram, and YouTube.
This post contains affiliate links so you can see what products I used or recommend for this project. As an Amazon Associate, I earn a small commission from qualifying purchases at no extra cost to you.
How To Upcycle A Photo Tray With Farmhouse Style
This post contains affiliate links so you can see what products I used or recommend for this project. As an Amazon Associate, I earn a small commission from qualifying purchases at no extra cost to you.
Step 1 - Prep The Glossy Finish For Paint
There are a few things that need to be done first before we paint the tray. Remove the backing and set aside. Remove the photo mat and discard or save it to use for a future DIY project.
Remove the glass and set it aside. Sometimes the glass cannot be removed because it's glued so I recommend running a piece of painter's tape along the top edge of the glass for easy clean up after it's painted.
For a lasting finish, I suggest you rough up the glossy finish lightly with 150 grit sandpaper to give the paint some bite. Because the tannins in the dark wood are guaranteed to bleed through the white paint, you'll need to prime the tray first with a stain-blocking primer.
Another sand-free option for priming glossy wood is this primer for glossy finishes.
Step 2 - Paint The Photo Tray
Now the tray is ready to be painted with neutral white water-based paint. I used Fusion Mineral Paint in the color Raw Silk. If you notice pink spots coming through the paint then you'll need to add another coat of primer over the spots and repaint.
Once the last coat of chalk paint is dry, distress the paint finish lightly along the edges with 220 grit sandpaper for farmhouse charm like pictured below. Protect the paint with clear wax or white wax, like I did, buffed with a lint-free rag.
Step 3 - Set Seasonal Materials Under The Tray Glass
Now we're ready to replace the photo paper that came with the tray with pretty seasonal fabric, scrapbook paper, or whatever you choose to display for the seasons.
For my heart fleece fabric, all I did is wrap it around a piece of cardboard cut to size and secure it on the back with tape. Easy peasy!
Step 4 - Assemble The Tray
Clean the glass inside and out and make sure the glass is completely dry before inserting your pretty fabric or paper. Set the original tray backing in place and you're ready to use your new tray!
For more DIY heart day inspiration visit my Valentine's Day Ideas page and here for more Upcycled Tray Makeovers inspiration.
Thanks for stopping by the Interior Frugalista today! I hope you were inspired by this seasonal tray makeover. If you have any questions, please leave them in the comment section below or the Contact Me tab at the top to drop me an email. I love hearing from you!
If you enjoyed this upcycled tray idea, I'd be so thankful if you shared it with a friend and pinned it to your Seasonal Home Decor or Upcycled Tray Ideas board on Pinterest.

I share my projects at these inspiring link parties.


Turned out great Marie! I love things that you can use for all seasons/holidays!
ReplyDeleteTania
Thank you Tania! I can't wait to decorate it for Easter soon.
DeleteLove this idea Marie! And I have a stash of tray and tray project to play with. Happy Valentine's to you. :)
ReplyDeleteIt's always fun giving old and dated serving trays a fresh new look. I hope you have fun giving yours makeovers. I know they'll be stunning!
DeleteMarie that is such a sweet idea. I need to find a tray like this to add to my living room. I have been looking everywhere and can't seem to find one at a reasonable price.
ReplyDeleteOh no, that's too bad Mary, they come a dime a dozen over here. I hope you have success on your quest soon. Looking forward to switching my tray to Spring soon!
ReplyDeleteWhat a great idea. I'm here from Snickerdoodle and pinned this for later. :)
ReplyDeleteBlessings,
Babychaser
Thanks for stopping by and the pin! I'm glad you like this space-saving tray idea.
DeleteThis is very nice! It may be time for my son and me to hit the thrift store and see if we can find some furniture to spruce up!
ReplyDeleteFurniture or home decor, the possibilities are endless for a home filled with inexpensive but well made pieces with a custom look! I don't remember the last time I decorated or furnished our home with off the rack pieces.
DeleteLOVE the tray... and the candle charm, too... Did you create that? Thanks for sharing at Homestyle Gathering! Pinned!
ReplyDeleteThank you Julie 😊 The candle charm is a necklace that I wrapped around for added charm to my Valentine vignette.
DeleteWhat a great idea!
ReplyDeleteThank you Randi! Such fun coming up with new ideas to display under the glass for each new season.
DeleteI love this project Marie! I am always looking for things I can change for each season. This is just so perfect! Thanks for inspiration. Have a great week!
ReplyDeleteSo glad you liked this idea, Denise, and found it inspirational! It's such fun to put the creative cap on each season in search of things to display under the glass.
DeleteSo neat! Thanks for sharing at EH&F.
ReplyDeleteThanks Jenn 🙂
DeleteI really like this upcycled tray. It turned out great! Thanks for sharing Marie!
ReplyDeleteGlad you like it, Kasia, thank you!
Delete