How To Paint Arborite Retro Dining Tables
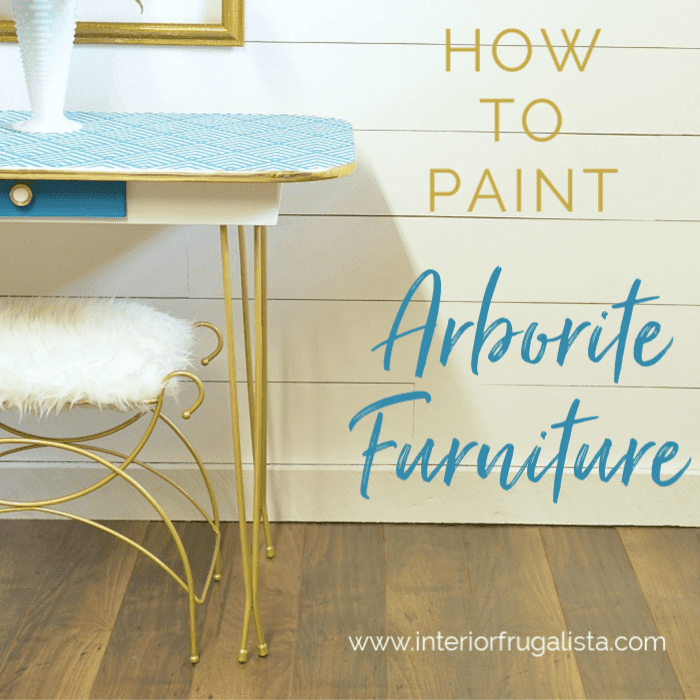
Did you know that you can paint over mid-century modern Arborite furniture? It's totally doable but there are two simple but important steps to doing it right for a long-lasting finish. In this post, I'm sharing the scoop on how to paint Arborite as well as a retro dining table and chair makeover. The mid-century modern dining table is small and has one drawer and I think it would make a great desk or vanity table too.
But first, it's Furniture Fixer Upper Day where six talented furniture painting friends come together once a month to breath new life into a piece of furniture. You can find links to the other makeovers at the bottom of this post. Last month I tried my first attempt at a painting technique that I had been itching to try and I'm pleased with how the Pink Ombre Waterfall Dresser turned out.
This month's furniture piece is a bright bold vintage table that works well with the unique mid-century modern gold metal legs. But I couldn't stop with just a bright color. Remember my Geometric Waterfall Dresser? The stencil I used on that makeover was calling my name and I love how it added a fun playful vibe to this retro table.
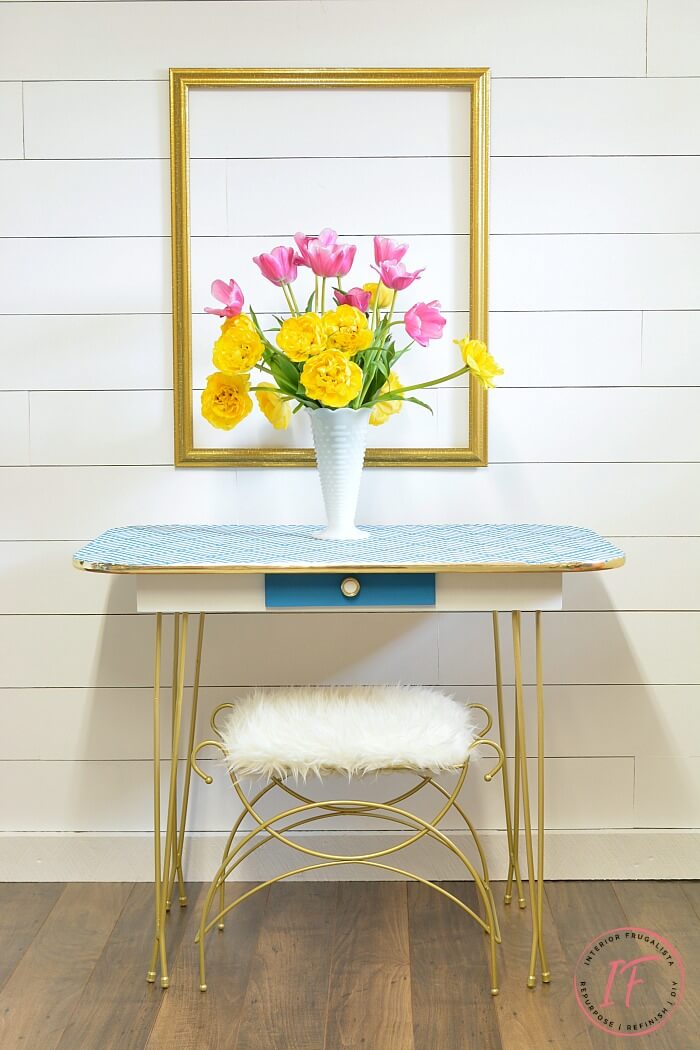
The table is glam on the bottom and party on the top with this fun blue and white geometric pattern.
The legs were showing some wear and so they got freshened up with gold paint.
The inside of the drawer has a little stencil surprise too.
And rather than replacing the original knob like I normally do, I decided to keep the brass knob and paint the wood button in the center white. It plays nicely with the gold trim around the tabletop and the table legs.
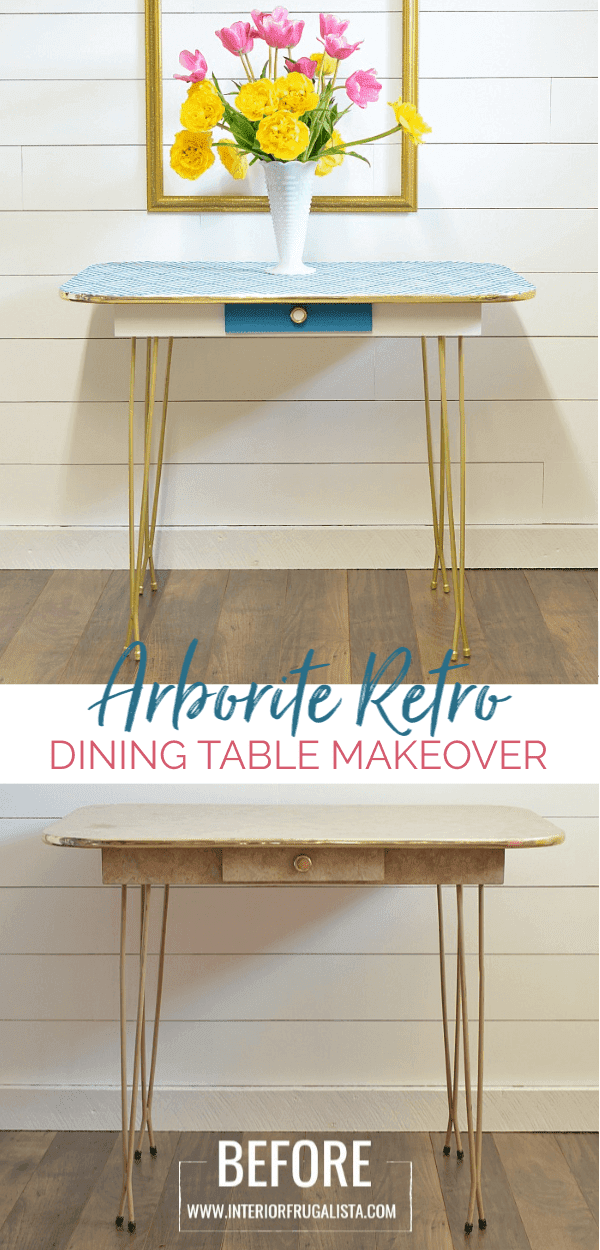
To see where we started, this is what table the looked like before...
And here is the table after the makeover. Big difference, right?
This is what the retro metal chair looked like when we got it...
But with just a few coats of metallic gold spray paint, what a difference.
I love how breathing new life into this old Arborite dining table gives it three different uses. Which one is your favorite?
Leave your answer in the comment section below or press the Contact Me button at the top of the blog to drop me an email. I love hearing from you!
Now let's move onto the tutorial on how to paint retro Arborite tables with a lasting finish. This post contains affiliate links so you can see what products I used or recommend for this project. At no cost to you, we receive a small commission if you make a purchase. post contains affiliate links for your convenience so you can see what products I used or recommend to make this project.
The next three steps for prepping Arborite furniture for paint are the most important for a lasting finish. I'll be the first to admit that these steps are tedious but if you skip them, you will regret it later. Ask me how I know!
Wipe the dust with a damp microfibre cloth and follow with a tack cloth to remove fine particles. Rub your hand over the Arborite to feel if it's rough to the touch. If not, carefully repeat the sanding process because you want to give the next step some bite.
NOW that we've done the necessary dirty work, it's time for the fun part, making the vintage Arborite table pretty with paint.
The table apron and inside the drawer was brushed with three coats of Fluff chalk mineral paint.
The metal legs were showing some wear so I removed them from the table and headed outside. It was the perfect sunny Spring day to refresh the legs with this pure gold spray paint. It's the same paint I used on the retro metal chair.
To stencil the tabletop I poured the same Fluff chalk mineral paint onto a paper plate and dabbed the excess onto a paper towel so very little paint remained on the brush.
I opted not to use the quicker method of stenciling with a stencil roller because the top had only been painted less than 12 hours earlier and I didn't want to risk using stencil adhesive to hold the stencil in place.
Instead, I used delicate surface Frog tape to hold the stencil and pounced with a stencil brush.
Part of me wonders if I should have painted the apron Peacock blue and the drawer front white. What do you think?
I'd love to get your feedback and/or any questions you might have about this makeover. Please leave them in the comment section below or press the Contact Me button at the top of the blog to drop me an email. I love hearing from you!
Please join me to take a look at how my talented friend's transformed these furniture pieces...
Press the links below to see the after photos and tutorials...
Retro Arborite Dining Table Makeover
We'll talk about the retro table makeover first and the Arborite painting tutorial further down in the post.But first, it's Furniture Fixer Upper Day where six talented furniture painting friends come together once a month to breath new life into a piece of furniture. You can find links to the other makeovers at the bottom of this post. Last month I tried my first attempt at a painting technique that I had been itching to try and I'm pleased with how the Pink Ombre Waterfall Dresser turned out.
This month's furniture piece is a bright bold vintage table that works well with the unique mid-century modern gold metal legs. But I couldn't stop with just a bright color. Remember my Geometric Waterfall Dresser? The stencil I used on that makeover was calling my name and I love how it added a fun playful vibe to this retro table.
The table is glam on the bottom and party on the top with this fun blue and white geometric pattern.
The legs were showing some wear and so they got freshened up with gold paint.
The inside of the drawer has a little stencil surprise too.
And rather than replacing the original knob like I normally do, I decided to keep the brass knob and paint the wood button in the center white. It plays nicely with the gold trim around the tabletop and the table legs.
To see where we started, this is what table the looked like before...
And here is the table after the makeover. Big difference, right?
Retro Arborite Table Vanity | Dressing Table
Because of its small size, I thought it would make a lovely vanity or dressing table and so next I paired it with a Glam Vanity Stool. Don't they look like they were meant for each other?Retro Arborite Desk With Metal Chair
Here it is again paired with a retro metal chair to work as a funky desk.This is what the retro metal chair looked like when we got it...
But with just a few coats of metallic gold spray paint, what a difference.
I love how breathing new life into this old Arborite dining table gives it three different uses. Which one is your favorite?
Leave your answer in the comment section below or press the Contact Me button at the top of the blog to drop me an email. I love hearing from you!
Now let's move onto the tutorial on how to paint retro Arborite tables with a lasting finish. This post contains affiliate links so you can see what products I used or recommend for this project. At no cost to you, we receive a small commission if you make a purchase. post contains affiliate links for your convenience so you can see what products I used or recommend to make this project.
Three Steps For Prepping Retro Arborite Dining Tables For Paint
The next three steps for prepping Arborite furniture for paint are the most important for a lasting finish. I'll be the first to admit that these steps are tedious but if you skip them, you will regret it later. Ask me how I know!
Step 1 - Clean the retro table
Remove any dirt, grime, and grease with a mixture of warm water, 1/4 cup of vinegar and a drop of Dawn dish soap. Another option is this cleaner but I ran out and have it on my shopping list.Step 2 - Give the paint some bite
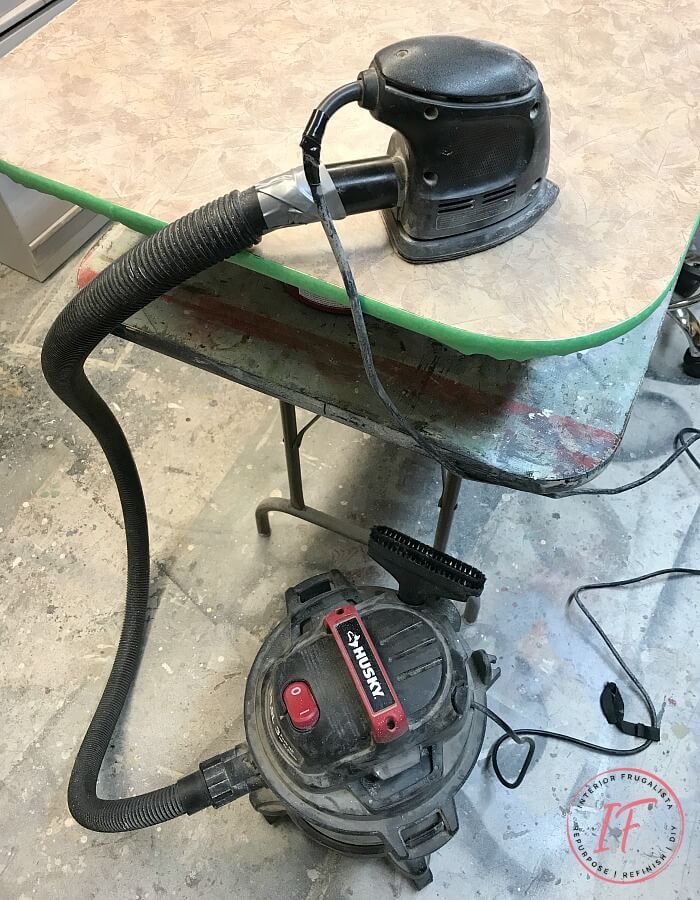
Sand the Arborite to rough up the smooth surface. I used a mouse sander with an 80-grit sanding pad but you must be careful not to sand beneath the veneer.Wipe the dust with a damp microfibre cloth and follow with a tack cloth to remove fine particles. Rub your hand over the Arborite to feel if it's rough to the touch. If not, carefully repeat the sanding process because you want to give the next step some bite.
Tip for dust free sanding when you work indoors
If you paint indoors like I do, here's a great dust free sanding tip that I learned from my fellow Furniture Fixer Upper pal Kandice at Just The Woods. Connect the end of your sander to the hose of your shop vacuum and hold them together with duct tape. Genius!Step 3 - Prime the arborite retro table
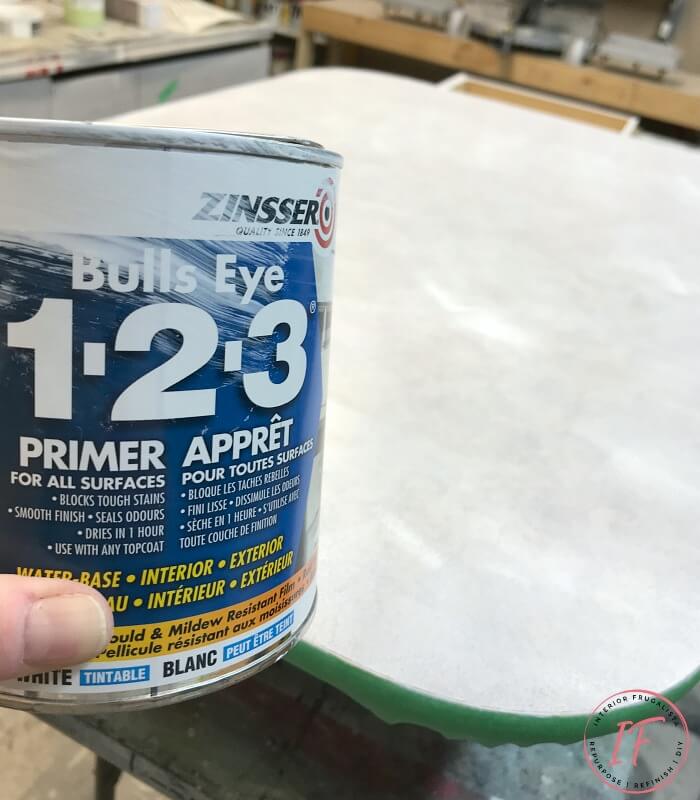
This step is key for a lasting finish. Prime the roughed up Arborite with two coats of primer, rolled and not brushed, with a foam roller. Wait about an hour between coats and be sure to lightly sand with 220-grit sandpaper for a smooth finish.NOW that we've done the necessary dirty work, it's time for the fun part, making the vintage Arborite table pretty with paint.
How To Paint Retro Arborite Dining Tables
For this retro dining table, I decided to go bright and bold and keep the retro vibe going with a fun stencil.Painting the retro dining table
I painted three coats of Peacock blue chalk mineral paint over the primed surface with a small foam roller. I waited an hour between coats and lightly sanded the paint with 220-grit sandpaper followed by a wipe with a tack cloth.The table apron and inside the drawer was brushed with three coats of Fluff chalk mineral paint.
The metal legs were showing some wear so I removed them from the table and headed outside. It was the perfect sunny Spring day to refresh the legs with this pure gold spray paint. It's the same paint I used on the retro metal chair.
Stenciling the retro dining tabletop
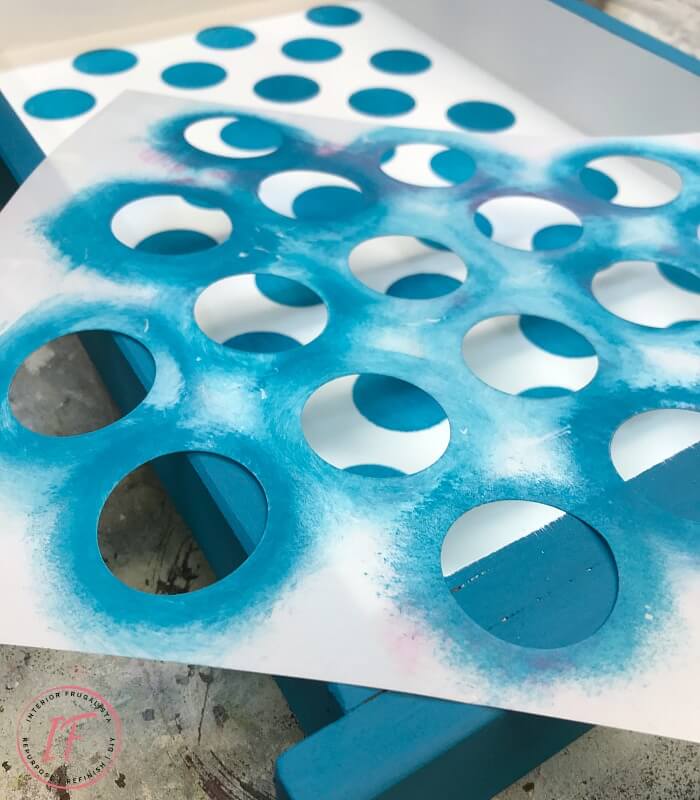
Like I mentioned earlier, I couldn't stop at the bright Peacock blue paint color and decided to add some retro fun with this geometric wall stencil.To stencil the tabletop I poured the same Fluff chalk mineral paint onto a paper plate and dabbed the excess onto a paper towel so very little paint remained on the brush.
I opted not to use the quicker method of stenciling with a stencil roller because the top had only been painted less than 12 hours earlier and I didn't want to risk using stencil adhesive to hold the stencil in place.
Instead, I used delicate surface Frog tape to hold the stencil and pounced with a stencil brush.
Don't forget the drawers
The outside of the drawer was painted the same Peacock blue and the inside the Fluff white. I added a surprise to the bottom of the draw with this polka dot stencil.Protect the painted retro dining table
The chalk mineral paint I used does not require a topcoat because it will cure rock hard within 30 days. But for things like tabletops, chairs, and the the top of cabinets, I always protect the paint with three thin coats of this matte water-repellent clear coat. This will give the table a rock hard finish after 48 hours.Part of me wonders if I should have painted the apron Peacock blue and the drawer front white. What do you think?
I'd love to get your feedback and/or any questions you might have about this makeover. Please leave them in the comment section below or press the Contact Me button at the top of the blog to drop me an email. I love hearing from you!
Please join me to take a look at how my talented friend's transformed these furniture pieces...
Press the links below to see the after photos and tutorials...
- Girl In The Garage
- Confessions Of A Serial DIYer
- Petticoat Junktion
- Prodigal Pieces
- Just The Woods
- The Interior Frugalista (that's me)










Shazaam! You not only updated it, but it's simply beautiful, Marie.
ReplyDeleteThank you very much, Larissa! xo
DeleteThe legs on this table just crack me up, looking like they need a potty break. It would make me smile every time I walked into the room to see it. AND I love the dots inside the drawer as they go perfectly with this sweet table that has such character.
ReplyDeleteOMG, I never would have thought of that but now that you mentioned it, I'll never look at those legs the same way again! LOL Now I'm even happier that I gave this table a fun playful vibe.
DeleteGorgeous makeover and kudos for being 'brave' enough to paint one of these Marie! Love the color and stencilling you added... and those legs! :O Pinned!
ReplyDeleteWhen I saw the table online and those legs, I just had to have it. Originally I was going to do a polka dot stencil on the top too but chickened out. Secretly, I kind of wish I did.
DeleteIt looks so fun and fresh, Marie!! I love the addition of the stencil on the top! XOXO
ReplyDeleteThank you Christy! I was going to go with polka dots on the top too but chickened out. I would definitely use this as a fun vanity table or office desk.
DeleteI think it is perfect just as is. The drawer has that nice pop of color. But don't talk to me about stencils, at least for another few months. ;)
ReplyDeleteHa ha ha, Mary, I thought of you and your stencil debacle when I was doing this makeover and praying it would go smoothly. Your wall hanging turned out gorgeous so the hair pulling was worth it in the end, right?
DeleteI totally LOVE this table and think the stencil graphics are perfect. Also love the combo of colors. You truly had a great vision for this table and it came together beautifully. One of my all-time favs.
ReplyDeleteOh wow, I'll take that "all-time fav"! Thank you so much Susie 😊 My original plan was to stencil the top with polka dots but chickened out. If I were keeping the table, I definitely would've went with the polka dots.
DeleteThis is such a cute table Marie. Love the legs too funny and cute. Congrats on the feature in Country Sampler Garden edition. I will look for that when it comes out. Have a great week.
ReplyDeleteHugs,
Kris
Thank you Kris, we're pretty excited about the feature! Glad you like my funky little table 😊
ReplyDeleteThis turned out so fun and retro! I love the gold and turquoise together, Marie. xo
ReplyDeleteThank you so much Jen, it was a fun piece to work on!
DeleteThis comment has been removed by a blog administrator.
ReplyDeleteIn all honesty, I would never even have looked twice at that little table before you waved your magic wand Marie. What a beautiful transformation. Now those dainty little legs look beautiful and the gold, blue and white combo is so striking.
ReplyDeleteThank you Michelle! Someone said the legs look like they need a potty break and now everytime I look at them I have to chuckle. Do you see it? If I were keeping this table I would use it as a funky desk!
DeleteThis is just beautiful, Marie!
ReplyDeleteThank you very much, Mary Beth! It was fun giving this retro table a new look.
DeleteThose table legs remind me of very dainty crossed lady legs. Absolutely perfect for a vanity table. The polka dots inside the drawers give it the extra little bit of pop. Love it Marie.
ReplyDeleteLeanna, another comment I received was that the legs looked like they needed a potty break. I laughed. I'll take your dainty cross lady legs and after this description, I'm totally convinced this table should be used as a vanity! Thanks for erasing the potty legs image from my mind. LOL
DeleteThanks Marilyn, appreciate it!
ReplyDeleteLovely! And thanks for the instructions too. Quick question... After discussing both the two coats of primer and the three coats of peacock blue, you mention sanding with 220 grit. Are you sanding in between each coat for, respectively, the primer and the peacock blue, of just after the final coat? Thanks for all you do!
ReplyDeleteYes, I always do a light sand between primer and paint coats with 220 grit sandpaper for a smooth finish. But I especially sanded over the stencilled layer to knock back any raised bits and to distress the stencil pattern a little. If you don't want distressing, use less pressure or a higher grit sandpaper. Hope this helps!
Delete