Repurposed Bookcase Dollhouse Roof and Wood Floors
We're making progress on our fixer-upper home, a repurposed IKEA Billy Bookcase Dollhouse. Today I'm sharing how we added a pitched dollhouse roof, real miniature hardwood floors, and a stenciled black and white checkerboard dollhouse kitchen floor.
Dollhouse Bookcase Pitched Roof and Wood Flooring
Everything, including the dollhouse, is handmade from repurposed thrift store finds and DIY projects. It even has a DIY dollhouse fireplace with a realistic flickering flame!
The motivation for the dollhouse is that eventually, I'll be gifting it to my sweet granddaughter. She is only eight months old so I have some time to work on it. To follow the dollhouse series visit our dollhouse page.
We'll begin with a quick recap of where we started with this IKEA Billy Bookcase from our local Salvation Army store for $14.99.
This is what it looked like after the completion of phase one. So much prettier painted white but still looking rather plain.
This is what it looks like now, after adding a new pitched roof and realistic flooring. We still have a long way to go but it definitely is looking like a dollhouse now.
Let's take a closer look at the new whitewashed hardwood floors.
Here is a close-up of the new stenciled black and white checkerboard kitchen floors.
The second bedroom floors are made with decoupage scrapbook paper. I haven't decided yet if this will be a child's room or a dressing room for Barbie.
Here's how we did it, starting with how we made the interior walls. The tutorial contains affiliate links so you can see what products I used or recommend for this project. As an Amazon Associate, I earn a small commission from qualifying purchases at no extra cost to you.
Dollhouse Bookcase Repurposed Shelving Walls
We removed two of the shelves from the bookcase and cut them to size for the interior dollhouse walls.
The walls were attached to the bookcase with particleboard screws. Once the screw holes were filled, the bookcase was lightly sanded with 150 grit sandpaper to give the paint some bite.
Next, the dollhouse was painted with two coats of primer to give the paint some bite. Once dry, it was painted with two coats of pure white Behr Premium Plus paint.
Dollhouse Bookcase DIY Pitched Roof
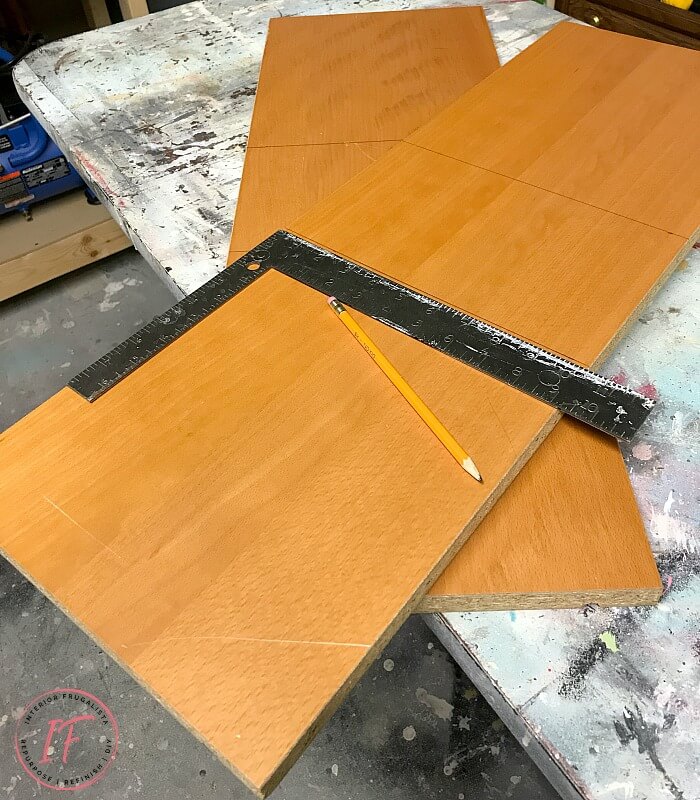
I didn't want to leave the top of the bookcase flat so we added a pitched roof. To build the 4/12 pitched roof we used a sheet of 3/4-inch pine plywood and attached it much the same way we did the interior walls. To dress it up we added 1-inch decorative trim.
You may be wondering why we didn't use the two extra shelves to form the peaked roof so we'd have a ceiling and attic space as a fourth floor on the dollhouse. I did consider that option but the height of the attic would have been too tall for a small child to reach.
Dollhouse Bookcase Real Miniature Hardwood Floors
To make real wood miniature hardwood floors in the living room, dining room, and master bedroom, I used jumbo craft sticks.
The rounded ends were marked with a small square and pencil then cut with sharp multi-purpose scissors and glued to the dollhouse with Gorilla Wood Glue.
I'm not going to lie, this was a lot of work but so worth it. An alternative to real wood floors would be to decoupage with plank wood scrapbook paper.
Much like you would with the real thing, I sanded the floors with a mouse sander and a 150 grit sanding pad to smooth the ridges and uneven boards. With a lint-free rag, I stained the floors with Espresso Gel Stain.
I swore I took a photo of the stained hardwood floors but apparently, I either deleted it by accident or my memory ain't what it used to be. It's probably the latter.
While I liked the dark espresso finish it just felt a little too dark so once the stain dried I gave the floors a whitewash with chalk paint. To do that I mixed a 1:1 ratio of water and pure white chalk paint.
I brushed the whitewash over the stained floors with a chip brush. Before I dried I removed the excess paint with a lint-free rag. It took two coats of whitewash to get a finish I was happy with.
Stenciled Black and White Checkerboard Dollhouse Kitchen Floor
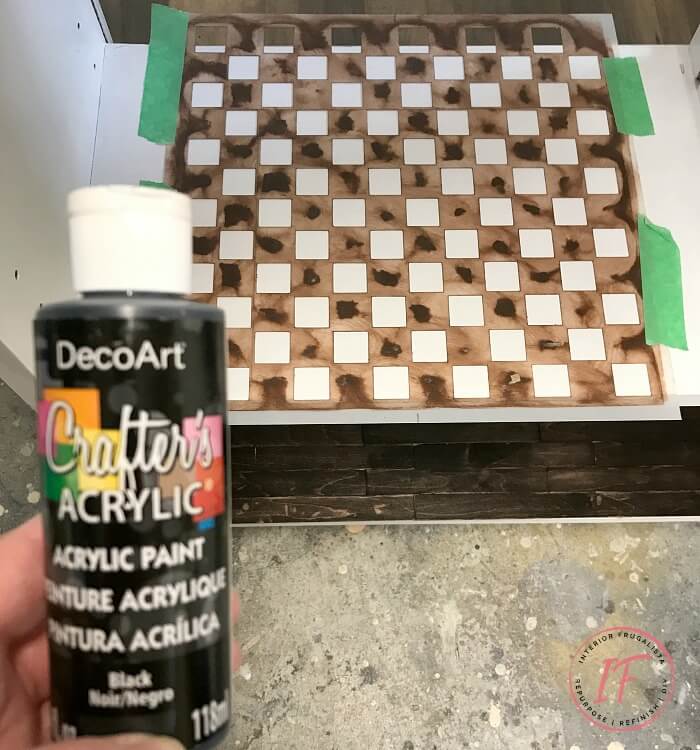
The plan was to decoupage black and white checkerboard scrapbook paper onto the kitchen floor but unfortunately, I couldn't find any. But I did have a checkerboard stencil in my stash and used black acrylic craft paint to stencil it on instead.
Decoupage Scrapbook Paper Dollhouse Bedroom Floor
I did manage to find a pretty scrapbook paper that I liked for the second bedroom floor.
To install it, instead of measuring, I set the paper upside down and made a crease with my hand where the paper needed trimming. Then I used a paper cutter to get nice straight cuts.
Next, I brushed Mod Podge onto both the floor and the back of the paper and removed any wrinkles with a decoupage brayer.
Now that the walls, roof, and flooring are complete, next time I'll be installing real wood baseboards, a front door, windows, and window boxes. I hope you'll join the fun.
Almost all of the DIY projects shared here at Interior Frugalista have step-by-step tutorials so why not get your budget DIY on and subscribe. You can also follow us on Pinterest, Facebook, Instagram, and YouTube.
You can find my inspiration piece on page 119 of Jen Crider's Amazing Furniture Makeovers book. Her book made the bestseller list on Amazon.
Thanks for stopping by the Interior Frugalista today! I hope you were inspired by the repurposed bookcase dollhouse roof and flooring.
If you have any questions, please leave them in the comment section below or the Contact Me tab at the top to drop me an email. I love hearing from you!
If you enjoyed this repurposed bookcase dollhouse series, I'd be so thankful if you shared it with a friend and pinned it to your DIY Dollhouse or Repurposed Bookcase Ideas board on Pinterest.
I share my projects at these inspiring link parties.


Having fun yet, LOL. Wait until you get to the fun stuff---refurnishing it, can't wait to see what you choose to do, Marie!
ReplyDeleteOh my goodness, I'm having too much fun! I have so many ideas running through my head on how and what I want to use to furnish it.
DeleteLooking good!
ReplyDeleteTania
Thank you Tania! Oh my gosh, I knew a dollhouse was going to be fun but not this much fun. My brain is swirling with ideas for this thing. LOL
DeleteI will be looking forward to all the phases of the remodel. I love what you have done so far.
ReplyDeleteThank you very much Debra! I'm glad you like what you see so far and will be coming back to see more. xo
DeleteI love what you e done so far Marie! Can’t wIt to see what else you have planned. Barbies were my fav when I was a kid! 🤗🌸👯
ReplyDeleteSo glad you like the updates so far, Denise! My head is swarming with ideass for this dollhouse. Funny thing is, I wasn't a big Barbie fan growing up. You could find me either at the kitchen table designing and drawing houses or in the sandbox making roads for Tonkas. LOL I hope to give this to my granddaughter when she's older. She's only 8 months old so I have time to get it done. 😏
DeleteMarie,
ReplyDeleteLove this idea!! Thanks so much for sharing!!
Thanks so much for stopping by and for taking the time to comment!!
Hugs,
Debbie
Glad you like my project house, Debbie! It's a work in progress and way too much fun 😉
DeleteHow cool is this, transformation!! Barbie is going to LOVE here new abode I'm sure!! Can't wait to see what you do next, Marie!
ReplyDeleteThank you so much, Sam, I'm glad you like it so far! Can't wait to get started on the windows and front door.
DeleteRe-using the bookcase for a dollhouse is a fabulous idea. It's cute and economical!
ReplyDeleteThank you, Carol! I'm all about economical furniture makeovers and repurposed thrift store home decor around here. But what I like most about using a bookcase for a dollhouse is that it won't take up a lot of room in child's bedroom. That child being my granddaughter!
DeleteWow, you made a lot of progress Marie. LOVE, LOVE, LOVE the whitewashed floors and the black and white tiles in the kitchen. So mod ;-) Like everyone else I can't wait to see what you'll be doing next. It's going to look stunning
ReplyDeleteThank you so much, Michelle 😊 Means a lot coming from you, the Queen of amazing miniatures!
DeleteThis seems like such a fun project to do. I hope someday there will be some little girls in my life (mom of boys!)
ReplyDeleteIt IS such a fun project, Vanessa! I'm making this one for my granddaughter who is only 8 months old, so I have lots of time to finish it. LOL Finger's crossed for granddaughters in your life one day too.
DeleteI am enjoying this ride so far, Marie! How fun are those hardwood floors?! Amazing!
ReplyDeleteThank you Julie, I'm glad you're enjoying the dollhouse series so far!
DeleteThis is absolutely adorable! What a great idea! I only wish I had thought to do this when my daughter was little. (Some day I may have grandkids, and I will make this!) I'm featuring it at Thursday Favorite Things today at my blog. Congrats!
ReplyDeleteThank you very much Pam for the feature! This has been a fun project so far and I can't wait to keep working on it. I'm doing it for my granddaughter but she's only 8 months old so I have some time to get it done. LOL
Delete