How To Hide Unsightly Outdoor Vents With Repurposed Doors
Do you have unsightly house vents within view of your outdoor living space? Ours are right on our deck and no matter how pretty I decorate the space, those vents are still an eyesore. Shy of sticking a tall plant in front of them, I needed to come up with an idea that would both hide the vents while giving that area of our small deck a useful purpose.
And my inspiration came from two salvaged wooden doors taking up valuable space in our basement. I hope my creative idea for how to hide unsightly outdoor vents with repurposed louvered bifold doors provides you with an answer for hiding your unsightly house vents too.
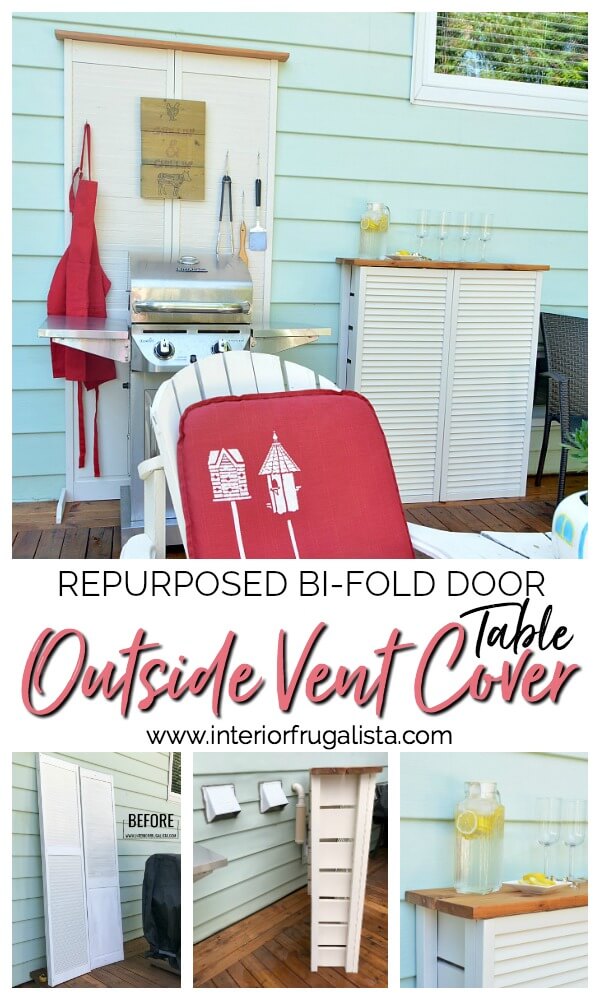
Repurposed Louvered Door Outdoor House Vent Cover
I'm sharing two repurposed wooden louvered door ideas for an outdoor living space today. The first is an outdoor vent cover bar table and the other a BBQ grilling station utensil holder that also acts as a heat barrier for vinyl house siding.
Both the outdoor vent cover table and the grilling station utensil holder are not difficult to make and I'll be sharing the detailed steps further down in the post. Both of these repurposed door ideas are great for a small deck or patio space.
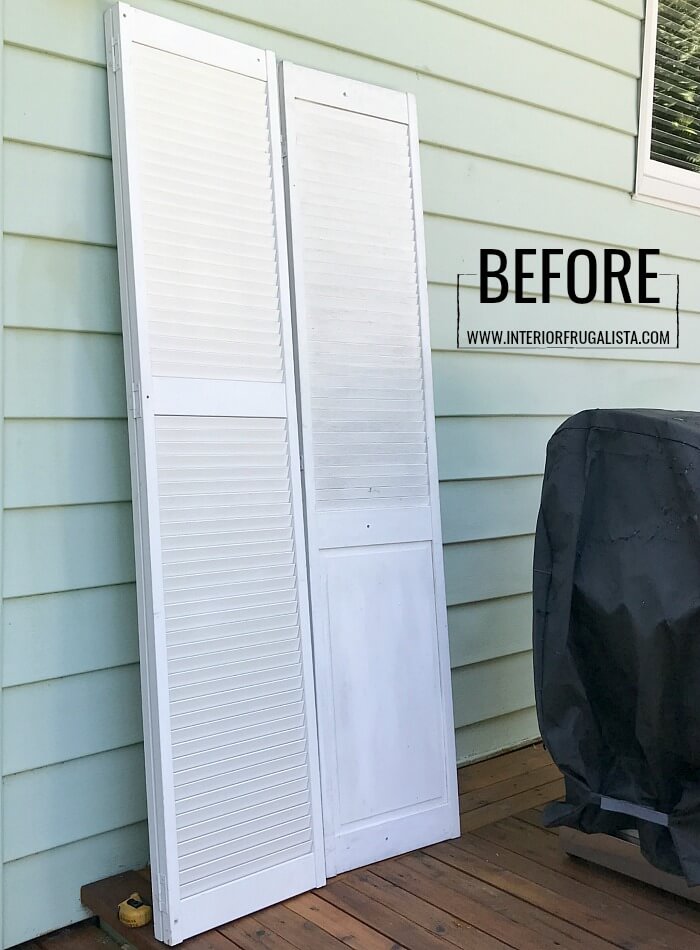
These are the salvaged wooden louvered bifold doors for these two projects. They were formerly divider walls in my booth at a local antique mall. I'm so glad to have finally found a new purpose for them.
By using louvered doors, the house vents still have adequate airflow while serving a useful purpose as an outdoor bar table. No more unsightly house vents, a handy table for entertaining outdoors while not taking up a lot of room on our small deck. A win-win in my books!
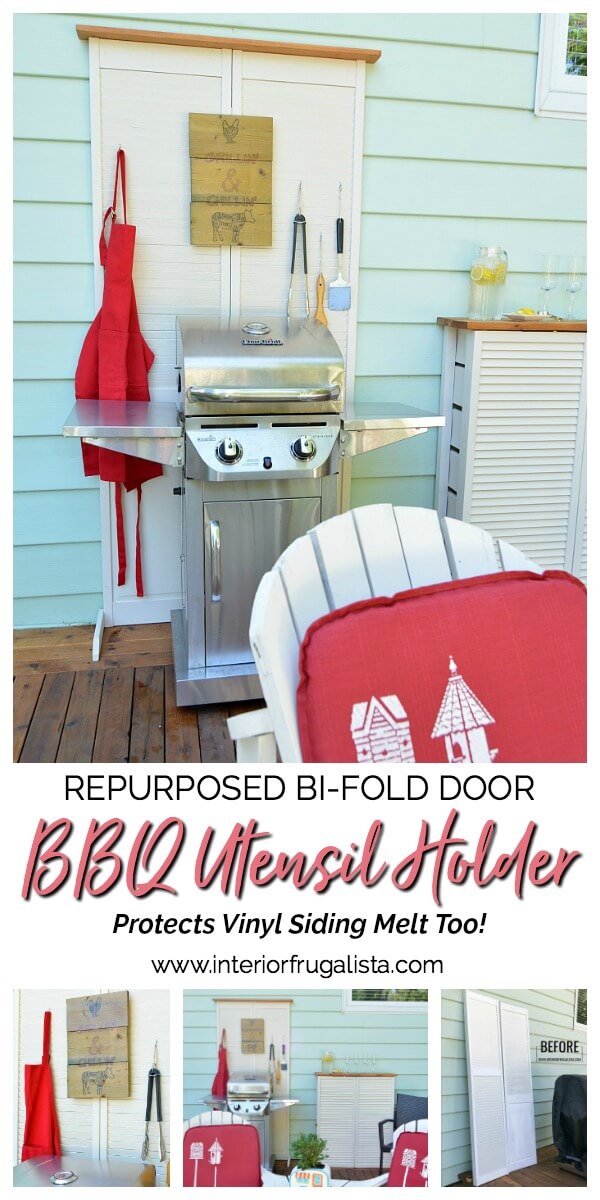
We turned the second set of bifold doors into a handy BBQ Grilling Station Utensil Holder. You could easily add a shelf or two with metal brackets as well, which I may just do.
But there is another purpose for this BBQ utensil holder. If you're like us and the only spot on your deck for the BBQ is against the house, then the louvered door screen acts as a barrier to protect the vinyl siding from melting!
Before we get into the nitty-gritty of how to build both projects, I should mention that we are self-taught DIYers and not trained professionals. This step-by-step tutorial is based on our building knowledge only. However, if you are a do-it-yourselfer like us, you'll find these steps helpful if you plan on making an outdoor vent cover and/or BBQ grilling station like ours.
Almost all of the DIY projects shared here at Interior Frugalista have step-by-step tutorials so why not get your budget DIY on and subscribe. You can also follow us on Pinterest, Facebook, Instagram, and YouTube.
We'll start with the outdoor house vent cover bar table. You could adapt our instructions to hinge the doors at the front so they open, with open shelves behind them. We chose to have our doors stationary and just use the top of the bar table.
Repurposed Louvered Door Outdoor Vent Cover Table
The goal was to cover the ugly furnace air intake vents and central vacuum exhausts on our deck. As I mentioned earlier, the louvered slats and board and batten-style sides allow unobstructed airflow. However, we do store the vent cover in the shed during the winter when the furnace is operational.
With the vent cover being only 12-inches deep, it's enough to hide the vents but not obstruct the traffic flow on our small deck. Anywhoo, enough chatter, you'll find the instructions for how to build it below.
Step 1 - Cutting Louvered Doors
The longer bottom half of the bi-fold door was the perfect height to cover the vents. We sliced the door on the table saw but don't attempt to cut it in one fell swoop. Either unhinge the doors and cut them each separately OR connect the doors first with metal straight brackets on the back to prevent them from folding.
Step 2 - Building The Vent Cover Sides
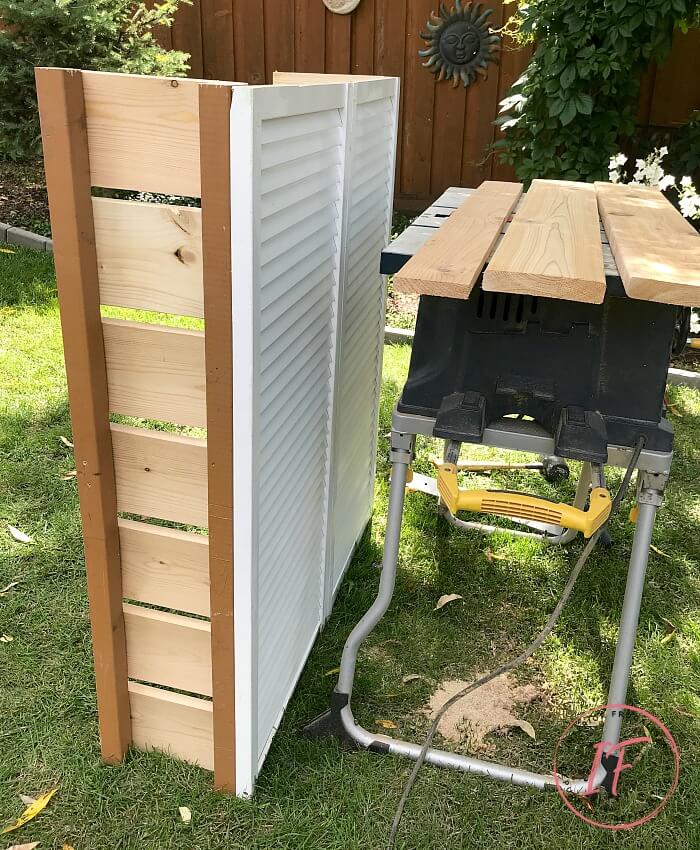
We used old cedar 2 x 2 lumber from a previous project for the uprights on the board and batten-style sides. First, we attached one on each side of the cut bi-fold door like pictured below.
Pro-Tip
To prevent the narrow uprights from splitting, drill small pilot holes first before attaching them to the door panels with galvanized wood screws.
Alternative Assembly For Doors To Open
If you would like the doors to open, then remove the hinges joining the two bi-fold doors. Add hinges to the top and bottom of the uprights on both sides and attach the doors.
We used pine fence boards from a previous project for the side slats. So I didn't have to measure each cut, I made a cutting jig by clamping a piece of lumber on the miter saw table for the board to butt up against each cut (pictured below).
Starting with the top and bottom slats and followed by the center slat, they were screwed to the backside of the uprights. The remaining slats were spaced evenly in between. Again, drill pilot holes first so the uprights don't split.
Open Shelving Alternative
If you chose to have the doors open in the front, at this point would be a good time to attach shelves inside. Just like the top of the bar table, use 1 x 6" fence boards for the shelves attached to the back of the uprights with metal L-brackets.
Step 3 - Painting Louvered Door Vent Cover
We used a paint sprayer to stain the vent cover and BBQ utensil holder with a white solid stain. Diluted with water in a 1:4 ratio much the same way as our Quick Way To Stain Adirondack Chairs tutorial.
Step 4 - Vent Cover Bar Table Wood Slat Top
The top of the bar table is made with three salvaged cedar deck board slats. The back slat needed to be ripped narrower on the table saw. Before installation, they are brushed with a transparent stain in the color Cedar Naturaltone.
Once the stain dried the fence boards are spaced evenly on the top of the vent cover with a 1 1/2-inch overhang on three sides. Attach the boards from underneath with metal L-brackets and galvanized wood screws.
That's it, we're done! Up next is the second repurposed louvered door idea with a simple BBQ grilling station.
Repurposed Louvered Door BBQ Grilling Station Utensil Holder
As mentioned earlier, the purpose of the grilling station is both to use as a handy Grill Utensil Holder AND to act as a heat barrier between the vinyl house siding and the BBQ. It is very simple to make this.
All you do is attach a stained cedar fence board on the top of the bifold doors to prevent them from folding. Easy peasy!
Instead of attaching the bi-fold door BBQ utensil holder to the house, we made it portable by adding wooden brackets to the bottom on each side. You can see the wood brackets in the photo above.
The utensils are hanging by S-hooks resting on the louvered slats. Alternatively, you could add a wooden shelf or two with metal brackets above the grill.
Other Ideas For The Louvered Door Utensil Holder
- Flower Wall - add decorative hooks and metal flower pot hangers at varying heights to display pretty potted plants and flowers.
- Small Potting Bench - Add a wooden shelf with metal brackets in the middle to use as a planting table. Add narrower shelves above to store an assortment of small flower pots and potted flowers. Add decorative hooks on the sides to hang your garden tools and it's the perfect small potting bench for a deck or patio.
- Decorative Outdoor Garden Screen - a backdrop for hanging metal garden art or fun outdoor signs.
- Shutters - Separate the bifold doors and have them flanking a window or door like shutters with solar fence light sconces hanging on each.
The possibilities for repurposing old louvered doors are endless. Here are a couple more ideas that we made with salvaged louvered bi-fold doors for our backyard. We built this Deck Privacy Screen flanking our DIY Outdoor Water Wall on our deck. We also used old bifold doors to make a Privacy Garden Fence.
Thanks for stopping by the Interior Frugalista today! I hope you were inspired by these repurposed louvered door ideas. If you have any questions, please leave them in the comment section below or the Contact Me tab at the top to drop me an email. I love hearing from you!
If you enjoyed this idea for hiding outdoor house vents, I'd be so thankful if you shared it with a friend and pinned it to your DIY Outdoor Ideas or Repurposed Door Ideas board on Pinterest.

I share my projects at these inspiring link parties.


This is so clever! Old bi-fold doors are so useful with a bit of vision.
ReplyDeleteThank you so much, Vanessa! I'm so glad to have those ugly vents hidden plus the addition of a spot to serve snacks or drinks on the deck.
DeleteNewly discovered subscriber! I am a male empty nester and admire your transformation and transition with your creativity. I am bursting at the seems with enthusiasm.
DeleteHi Marie!
ReplyDeleteI love your BBQ station! What a great way to protect your siding and it creates such a nice backdrop for the grill too! And that vent cover is genius - the louvered doors and slatted wood are perfect for ventilation. I'm sure the tabletop space is nice too! It sounds like trading grills worked out great. I hope you've been having a great week!
>>> Kim
Thank you so much, Kim! We are so happy with the smaller grill and LOVE the new spot for it on the deck. We feel so fancy having a devoted BBQ station that is both functional and looks good too. Glad you like it! Hope your week has been a good one.
DeleteI love this Marie! I wanted to make something similar but just ended up getting the little cart instead.
ReplyDeleteTania
Thanks Tania! We feel so fancy having a devoted BBQ station now. LOL
ReplyDeleteMarie you never disappoint with your creative re loving of something. This bbq station is awesome.
ReplyDeleteHappy Friday.
Hugs,
Kris
Hi Kris, I'm glad you like our BBQ station! It only took us twenty years to cover those unsightly house vents. So glad we can finally grill on the deck without worrying about the house siding melting. We haven't grilled this much in at least three years!
DeleteI really like this project. You wouldn't know they are bi fold doors. This is a great project to make over the weekend.
ReplyDeleteIt is a great weekend project that will only take an afternoon to build. I'm so glad we switched BBQs with out son and made this BBQ station happen. We haven't grilled this much in at least three years!
DeleteI need one of these to hide my gardening uglies. The extra pots, bags of soil, various tools.....funny how they need a space...but really are an eye sore. This is a great idea for me, too. Thanks so much for sharing this clever upcycle!! Your patio is so lovely....let's have a BBQ... :-) XO
ReplyDeleteSo happy to hear you found our BBQ station idea helpful to house your gardening supplies. It's so easy peasy to make, you'll have it done in a jiffy. Yes, wouldn't it be fun to enjoy a BBQ and glass of wine together...but I choose your amazing outdoor space. I'll bring the steaks and wine! LOL
DeleteWhat an awesome upcycle! Thanks so much for sharing with us at the To Grandma's house we go link party. I'll be featuring you Wednesday morning on my blog when the new party starts!
ReplyDeleteSo glad you like this idea Tarahlynn and thrilled that you'll be featuring it - thank you! xo
DeleteYou my friend are a life saver. Seriously!!! We have a beautiful little holiday home down at the coast but it was built in the 1940s and all the pipes and yucky stuff that normally get hidden in modern homes are such an eye sore. Brilliant idea and so functional too.
ReplyDeleteWoot woot, so glad you like this idea for hiding them, Michelle! Ours was built in the 60s but normally vents are placed at the side of a house but ours, snap dab in the only place suitable for a backyard deck. Wish we had thought of this years ago.
DeleteThis is such great idea! I have been saving ideas for dressing up my ugly wall. Pinned.
ReplyDeleteAwesome Cherryl, I'm glad you like this idea and thank you for the pin!
DeleteWow Marie, your patio is just beautiful! Love the use of those shutters, what a lovely way to hide something you don't wanna see!
ReplyDeleteI've featured this project in this weekend's DIY Salvaged Junk Projects 527. Thanks for linking this up!
Thank you so much, Donna, we do love spending many hours out here during the summer. Thank you so much for featuring our vent cover table, it is much appreciated! Happy Victoria Day and hope your weather is much better than the rain we're having today.
DeleteI am loving this idea Marie! So smart AND pretty! Thank you for sharing at Charming Homes and Gardens Party! Pinned!
ReplyDeleteThank you very much, Kim! Appreciate the visit and the pin 😀
DeleteA safe and healthy week to you too, Marilyn!
ReplyDeleteGreat job, Marie!
ReplyDeleteThank you Rachelle, appreciate it!
DeleteI love giving old things new life, great ideas and thank you for the detailed pictures and instructions!
ReplyDeleteYou're welcome Mike, I'm glad you like these ideas for repurposed bifold doors!
DeleteHi! I just came across your blog post. Neat project! Always looking for ways to increase the exterior aesthetic for my house! Along with that, I’m looking at replacing my current siding. I love yours!! Any chance you know the company and colour for the siding in these photos?
ReplyDeleteThanks for sharing your creativity!
Your are welcome Jaclyn, I'm glad to hear you like this idea for concealing outdoor vents. Unfortunately I don't know the name of the company nor the colour of our vinyl siding as it was installed by the former owner in the early '90s.
Delete