Repurposed Solid Oak Frame Industrial Coffee Table
When Mr. Frugalista came home with an unusual solid oak frame with shelves I had no clue what I was going to do with it. It looks to be handmade and someone put a lot of work into building it but for whatever reason, it ended up at Goodwill before it was finished.
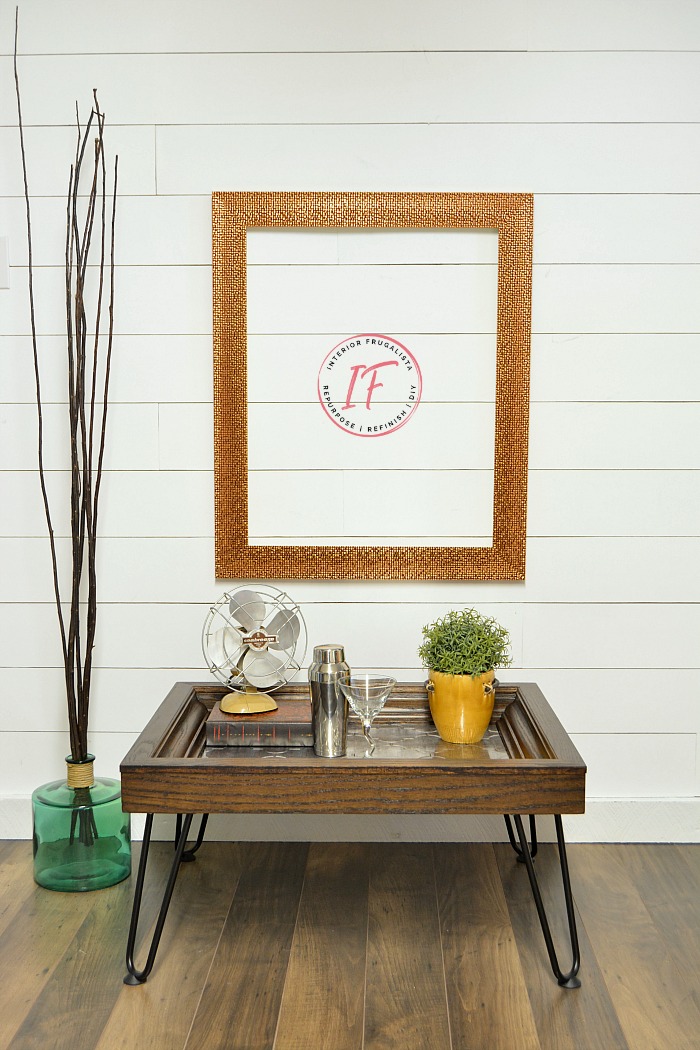
One thing was for certain that it wasn't going to be used for it's intended purpose and so it sat in the workshop for about a year. When inspiration finally struck, I ditched the two shelves, added some legs, and repurposed the solid oak frame into an industrial coffee table and I couldn't be more pleased with the results.
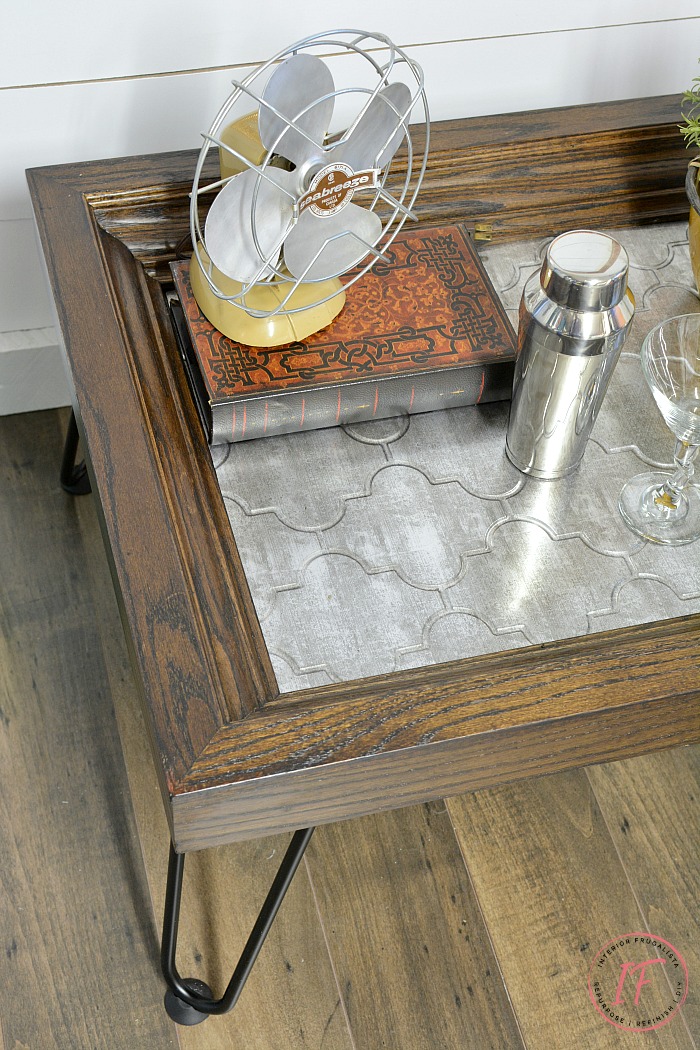
But to give the table an industrial vibe it was stained dark walnut and the top lined with galvanized tin.
I was hoping to find vintage tin tiles but those are hard to come by. Instead, I used a Monaco Silver Backsplash sheet that looks like a sheet of real galvanized tin. Even though it's fake I think it looks pretty darn good on this table.
At least being plastic you don't have to worry about water rings and spills and it's easy to wipe clean.
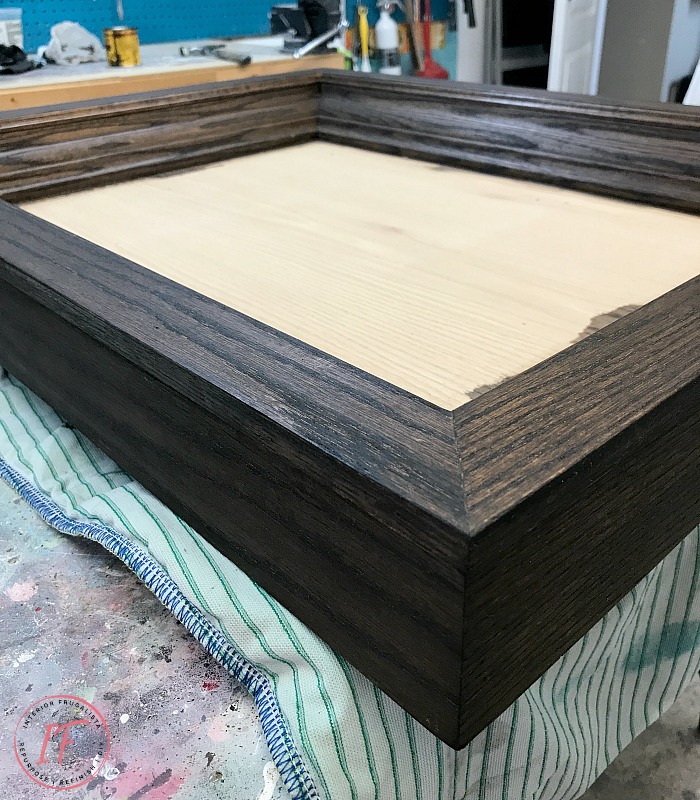
So here's what we started with. We paid $4 for this handmade solid oak frame with two shelves. Love the deep crown molding but the two small shelves, not so much.
Here's a side view of the frame so you can see how deep it is.
I did consider removing the shelves and turning it into interesting wall art but that seemed too predictable. Besides, this thing weighs a ton.
But I'm so glad I didn't because I like it much more as a unique coffee table.
I'm hoping one of my children will want it for their home so it can stay in the family. What can I say, I get attached to these pieces and hate to part with them.
This post contains affiliate links so you can see what products I used or recommend for this project. As an Amazon Associate, I earn a small commission from qualifying purchases at no extra cost to you.
The oak was sanded smooth to get rid of any splinters with a mouse sander. The table was cleaned with a damp rag and any fine particles removed with a tack cloth before moving on to the next step.
Everything but the top of the table was stained with two coats of dark walnut wood finish. Applied with a chip brush and wiped with a clean shop rag within 15-minutes. After 4-hours a second coat was brushed on after light sanding with 220-grit sandpaper.
After the stain dried about 6-hours it was protected with clear matte polyacrylic applied with my favorite Zibra Angled Sash Brush. A second coat was brushed on after 2-hours but first, it was lightly sanded with 220-grit sandpaper.
Once that was dry a few hours, time to add the black hairpin legs.
Lined up on all four corners and punched an awl through the two end screw holes to make it easier to start the screws that came with the legs with a power drill.
Now that the legs are on, time to add the Monaco Crosshatch Silver Backsplash Sheet to the top.
I had one sheet of faux tin and didn't want to risk any screw-ups so instead of measuring with a tape measure, I made a template with brown craft paper. I ran my hand along the edge and corners to make a crease and used a retractable utility knife to cut the paper while it was still in the frame.
I folded the paper template in half both vertically and horizontally to mark the center and lined it up with the center of the faux tin sheet and taped it in place.
I found it much easier to cut the tin by clamping a straight edge onto my work table with metal spring clamps before cutting with a sharp retractable knife. This prevented the straight edge from moving while I cut.
I'm so glad I used the template because it fits snug as a bug without the need for any adjustments. The last step was gluing the faux tin to the table with construction adhesive.
This table would look great with many different decor styles besides industrial or rustic. I could see it paired with mid-century modern furniture or even farmhouse style.
If you like this table then you may like the wooden trunk, also purchased at Goodwill, I turned into a Rustic Trunk Table. I also share how to line a trunk table with a men's flannel shirt.
If you have any questions about this table DIY, please leave them in the comment section below or press the Contact Me button at the top of the blog to drop me an email. I love hearing from you!
One thing was for certain that it wasn't going to be used for it's intended purpose and so it sat in the workshop for about a year. When inspiration finally struck, I ditched the two shelves, added some legs, and repurposed the solid oak frame into an industrial coffee table and I couldn't be more pleased with the results.
Repurposed Solid Oak Frame Industrial Coffee Table
Its solid oak construction made it the perfect candidate for a unique DIY coffee table especially when paired with black hairpin legs.But to give the table an industrial vibe it was stained dark walnut and the top lined with galvanized tin.
I was hoping to find vintage tin tiles but those are hard to come by. Instead, I used a Monaco Silver Backsplash sheet that looks like a sheet of real galvanized tin. Even though it's fake I think it looks pretty darn good on this table.
At least being plastic you don't have to worry about water rings and spills and it's easy to wipe clean.
So here's what we started with. We paid $4 for this handmade solid oak frame with two shelves. Love the deep crown molding but the two small shelves, not so much.
Here's a side view of the frame so you can see how deep it is.
I did consider removing the shelves and turning it into interesting wall art but that seemed too predictable. Besides, this thing weighs a ton.
But I'm so glad I didn't because I like it much more as a unique coffee table.
I'm hoping one of my children will want it for their home so it can stay in the family. What can I say, I get attached to these pieces and hate to part with them.
This post contains affiliate links so you can see what products I used or recommend for this project. As an Amazon Associate, I earn a small commission from qualifying purchases at no extra cost to you.
Here's how I made the oak table
The first thing I did was remove the two shelves. Thankfully they were screwed on from the back and easy to remove without damaging the wood. The screw holes were filled both on the underside of the table and the top with wood filler.The oak was sanded smooth to get rid of any splinters with a mouse sander. The table was cleaned with a damp rag and any fine particles removed with a tack cloth before moving on to the next step.
Everything but the top of the table was stained with two coats of dark walnut wood finish. Applied with a chip brush and wiped with a clean shop rag within 15-minutes. After 4-hours a second coat was brushed on after light sanding with 220-grit sandpaper.
After the stain dried about 6-hours it was protected with clear matte polyacrylic applied with my favorite Zibra Angled Sash Brush. A second coat was brushed on after 2-hours but first, it was lightly sanded with 220-grit sandpaper.
Once that was dry a few hours, time to add the black hairpin legs.
Lined up on all four corners and punched an awl through the two end screw holes to make it easier to start the screws that came with the legs with a power drill.
Now that the legs are on, time to add the Monaco Crosshatch Silver Backsplash Sheet to the top.
I had one sheet of faux tin and didn't want to risk any screw-ups so instead of measuring with a tape measure, I made a template with brown craft paper. I ran my hand along the edge and corners to make a crease and used a retractable utility knife to cut the paper while it was still in the frame.
I folded the paper template in half both vertically and horizontally to mark the center and lined it up with the center of the faux tin sheet and taped it in place.
I found it much easier to cut the tin by clamping a straight edge onto my work table with metal spring clamps before cutting with a sharp retractable knife. This prevented the straight edge from moving while I cut.
I'm so glad I used the template because it fits snug as a bug without the need for any adjustments. The last step was gluing the faux tin to the table with construction adhesive.
This table would look great with many different decor styles besides industrial or rustic. I could see it paired with mid-century modern furniture or even farmhouse style.
If you like this table then you may like the wooden trunk, also purchased at Goodwill, I turned into a Rustic Trunk Table. I also share how to line a trunk table with a men's flannel shirt.
If you have any questions about this table DIY, please leave them in the comment section below or press the Contact Me button at the top of the blog to drop me an email. I love hearing from you!


What a cool idea adding the backsplash. I love how it turned out.
ReplyDeleteThank you Claire, I'm glad you like the table!
DeleteI love your version of this. It is so current and such a difference than the other person was going for. I absolutely love it!
ReplyDeleteThank you very much, Debra! Believe me, I contemplated just finishing what the other person didn't but I'm so glad I put it aside for a year because I couldn't be happier with the end result. Have a great weekend and thanks for stopping by 🤗
DeleteI love this makeover Marie! The hairpin legs are gorgeous. It looks so much better as a coffee table!
ReplyDeleteThank you so much, Christina ☺️ I'm quite pleased with it as a table rather than a bulky wall shelf. Finger's crossed I have a taker this weekend during our Thanksgiving celebrations.
DeleteYou are so creative, Marie! And what a transformation! You can just look at the worst and see a thing of beauty! I love the look the backsplash created, too. How innovative!
ReplyDeleteThank you very much, Gail for your sweet comment, you made my day! It took me awhile to get a vision for that frame but once I got it, there was no turning back. xo
DeleteLove this idea of using the backsplash. This is really great Marie. Love it.
ReplyDeleteHappy Friday.
Hugs,
Kris
Thank you so much, Kris, I'm glad you like it. It was a fun project and so easy peasy too. Have a great weekend and hugs backatcha! xo
DeleteMarie that turned out fabulously! I love the faux tin on the table top. It gives it just the right MSM vibe with the hairpin legs, yet I can see it used in a farmhouse decor setting, too. Versatile. I just love the look of the dark wood with the faux tin. A very successful project!
ReplyDeleteThank you, Naomi! Yes absolutely it would work with a farmhouse setting too. My son has that industrial modern vibe going on in his house and so I'm hoping he wants this table for his soon to be media room in the basement.
DeleteI would love to know the story behind the frame and the way you've done it up is sooooooooo gorgeous. The whole industrial vibe appeals to me and the way you've combines all the different elements looks really good. Pinned
ReplyDeleteMe too, Michelle! I wonder what they planned on using it for or why they didn't they finish it. But like they say, one man's trash is another's treasure and I'm thrilled that it landed in my hands. It was such a fun project. Thanks for the visit and the pin! xo
DeleteWow! This is an incredible transformation, Marie! I love the way your table turned out! What a great piece!
ReplyDeleteThank you so much, Kristi! Love how effortlessly this one came together.
ReplyDelete