Hand Painted Pink Wooden Jewelry Box
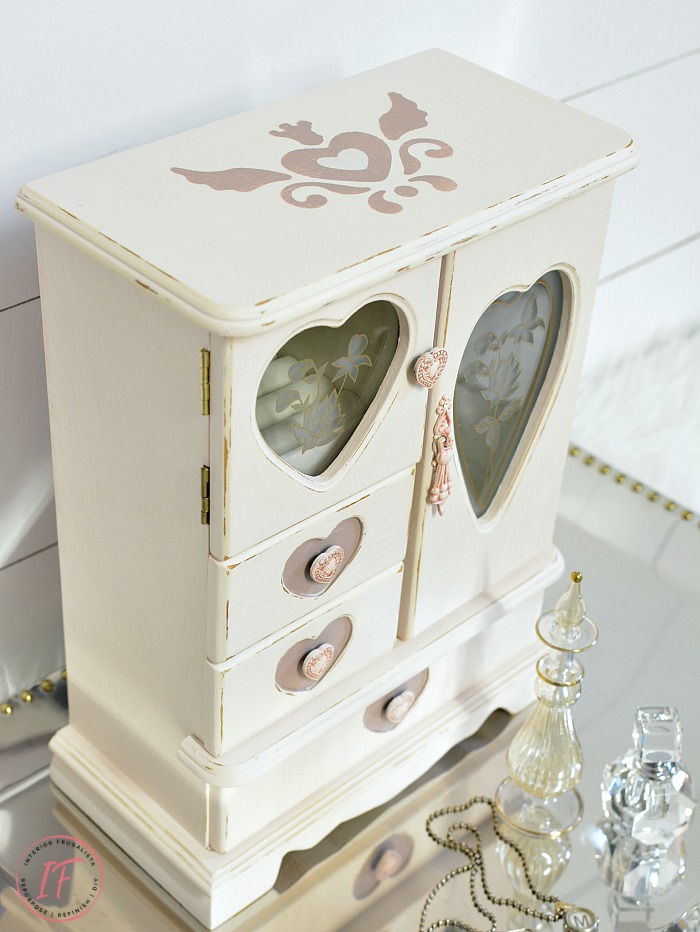
It's been a long time since I did a jewelry box makeover. I've had this one in my stash for a couple years. Christmas is coming and I thought the handpainted pink wooden jewelry box would make a lovely gift for a young girl. Also in my stash just waiting for the right small to makeover was a tiny sample jar of an ever so slight shade of pink called Little Piggy. Perfect for a jewelry box in a little girl's room or nursery.
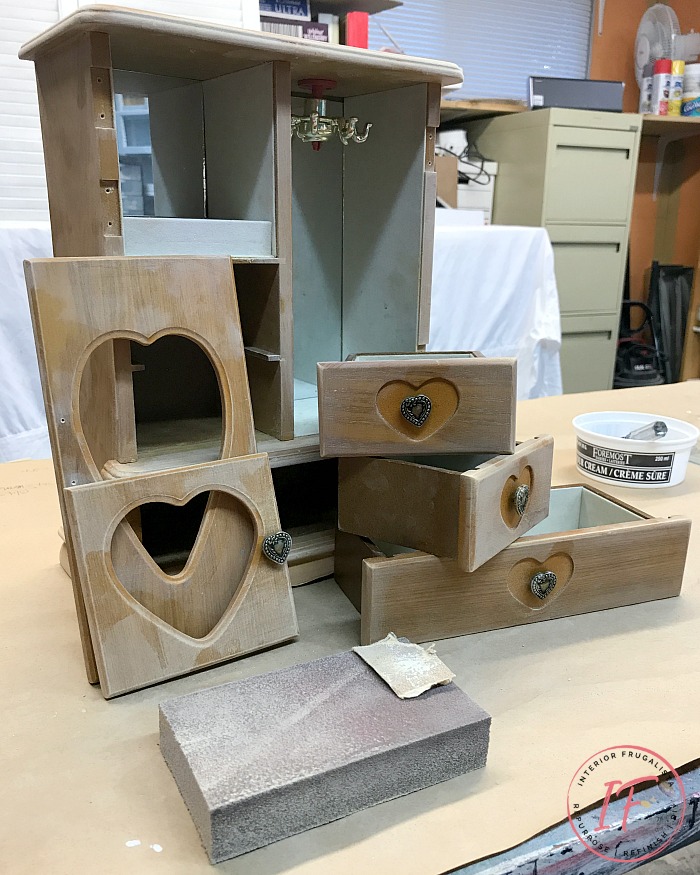
Here's where we started with this vintage Goodwill find. You see so many of these tall vintage jewelry boxes at the thrift stores but what made this one special was the heart-shaped glass on the doors and cute heart-shaped handles.
I don't know what took me so long to paint this children's jewelry box because they take no time at all. They are like miniature furniture makeovers but with these, I get to paint them while sitting down.
The light has been terrible here for days so the photos don't do the pretty paint color justice.
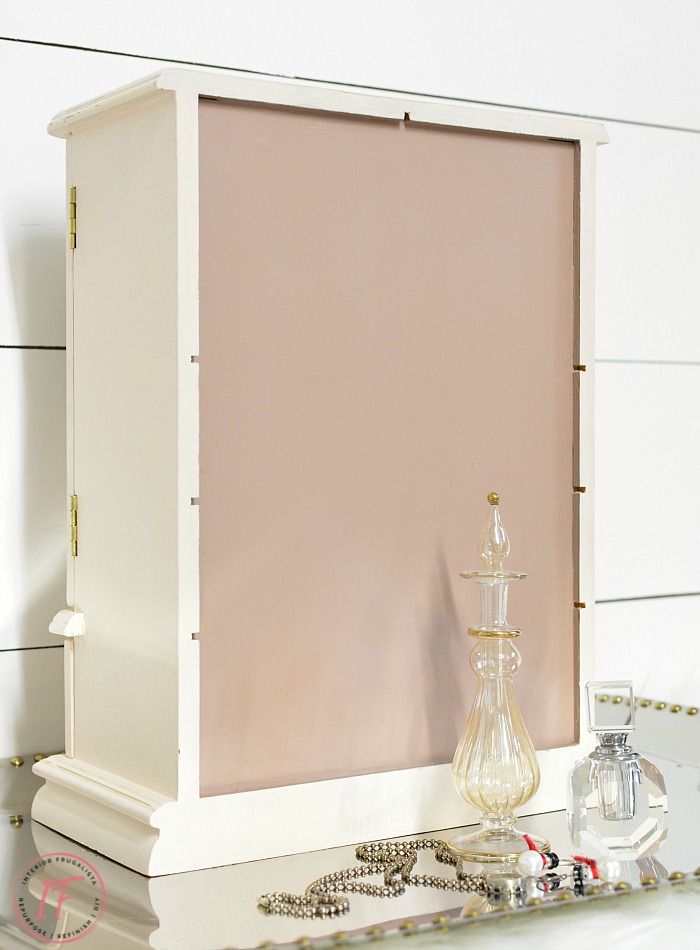
I also had a jar of dusty rose paint that hadn't been opened yet that I've been itching to try. Not only did I paint the recessed hearts on the drawers this color, but I also painted the back of the jewelry box too.
The heart knobs and teardrop pull were painted the same light pink and the details highlighted with rose gold wax.
I couldn't resist echoing the hearts onto the lid with a stencil.
220 Grit Sandpaper
Little Piggy Pink Tones For Tots (Fusion Mineral Paint)
Damask Dusty Rose (Fusion Mineral Paint)
Clear Furniture Wax
Rose Gold Furniture Wax (Fusion Mineral Paint)
Baby Wipes (felt cleaner)
Heart-Shaped Stencil (alternatives)
The first thing I did was remove the doors and drawers and put all the tiny screws and hinges in a plastic container for safekeeping. Before cleaning the jewelry box I lightly sanded the wood with 150-grit sandpaper to give the paint some bite.
Next, I vacuumed the felt and inside of the jewelry box followed by a good scrub with warm water, vinegar, and Dawn dish soap.
As I mentioned at the top of this post, the jewelry box was painted two-tone pink. First with pink Little Piggy Tones For Tots Fusion Mineral Paint and highlighted with dusty rose Damask Fusion Mineral Paint.
The handles and pull were also painted light pink and the details accented with rose gold furniture wax. Applied heavily with a lint-free rag so the wax nestled in the recessed parts of the hardware and the excess wiped away.
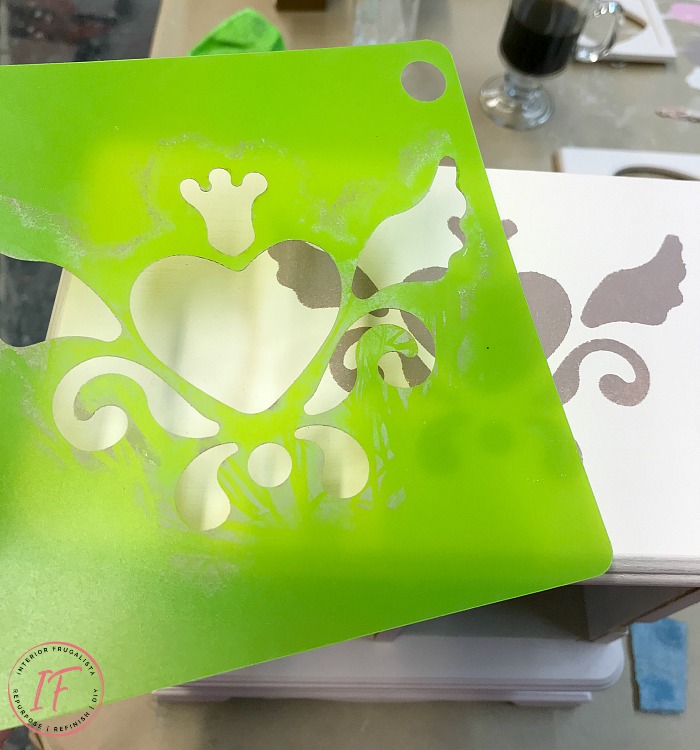
The jewelry box lid was stenciled with this heart-shaped stencil in the damask dusty rose color. A smaller heart from the stencil kit was placed over the larger heart and stenciled light pink.
The paint was protected with clear wax applied with a small round wax brush and buffed to a matte finish with a lint-free rag.
Breathing new life into these old jewelry boxes is so quick and easy and they make great gifts. I've given several jewelry box makeovers for birthday and Christmas gifts. I've donated some for silent auctions as well.
Here is a link to a few of my jewelry box makeovers but you'll also see some flatware box makeovers in the mix too. I have just as much fun grabbing those off the thrift store shelves to repurpose.
I finished this jewelry box within a few hours while working on another project. If you have any questions about this makeover, please leave them in the comment section below or press the Contact Me button at the top of the blog to drop me an email. I love hearing from you!
I'd be so thankful if you pinned this idea or shared it with a friend. With gratitude! -Marie
I share my projects at these inspiring link parties.
Hand Painted Pink Wooden Jewelry Box
Here's where we started with this vintage Goodwill find. You see so many of these tall vintage jewelry boxes at the thrift stores but what made this one special was the heart-shaped glass on the doors and cute heart-shaped handles.
I don't know what took me so long to paint this children's jewelry box because they take no time at all. They are like miniature furniture makeovers but with these, I get to paint them while sitting down.
The light has been terrible here for days so the photos don't do the pretty paint color justice.
I also had a jar of dusty rose paint that hadn't been opened yet that I've been itching to try. Not only did I paint the recessed hearts on the drawers this color, but I also painted the back of the jewelry box too.
The heart knobs and teardrop pull were painted the same light pink and the details highlighted with rose gold wax.
I couldn't resist echoing the hearts onto the lid with a stencil.
What you'll need to make it
This post contains affiliate links so you can see what products I used or recommend for this project. As an Amazon Associate, I earn a small commission from qualifying purchases at no extra cost to you.Supply List
Vintage Jewelry Box220 Grit Sandpaper
Little Piggy Pink Tones For Tots (Fusion Mineral Paint)
Damask Dusty Rose (Fusion Mineral Paint)
Clear Furniture Wax
Rose Gold Furniture Wax (Fusion Mineral Paint)
Baby Wipes (felt cleaner)
Heart-Shaped Stencil (alternatives)
Here's how I made it
The first thing I did was remove the doors and drawers and put all the tiny screws and hinges in a plastic container for safekeeping. Before cleaning the jewelry box I lightly sanded the wood with 150-grit sandpaper to give the paint some bite.
Next, I vacuumed the felt and inside of the jewelry box followed by a good scrub with warm water, vinegar, and Dawn dish soap.
Tip For Cleaning Jewelry Box Felt
The felt in this jewelry box was kind of gross. My tried and true method for cleaning felt is with baby wipes. I buy it at the dollar store and always have a box on hand for this purpose and many others.As I mentioned at the top of this post, the jewelry box was painted two-tone pink. First with pink Little Piggy Tones For Tots Fusion Mineral Paint and highlighted with dusty rose Damask Fusion Mineral Paint.
The handles and pull were also painted light pink and the details accented with rose gold furniture wax. Applied heavily with a lint-free rag so the wax nestled in the recessed parts of the hardware and the excess wiped away.
The jewelry box lid was stenciled with this heart-shaped stencil in the damask dusty rose color. A smaller heart from the stencil kit was placed over the larger heart and stenciled light pink.
The paint was protected with clear wax applied with a small round wax brush and buffed to a matte finish with a lint-free rag.
Breathing new life into these old jewelry boxes is so quick and easy and they make great gifts. I've given several jewelry box makeovers for birthday and Christmas gifts. I've donated some for silent auctions as well.
Here is a link to a few of my jewelry box makeovers but you'll also see some flatware box makeovers in the mix too. I have just as much fun grabbing those off the thrift store shelves to repurpose.
I finished this jewelry box within a few hours while working on another project. If you have any questions about this makeover, please leave them in the comment section below or press the Contact Me button at the top of the blog to drop me an email. I love hearing from you!
I'd be so thankful if you pinned this idea or shared it with a friend. With gratitude! -Marie
I share my projects at these inspiring link parties.


Great job!! I love the transformation, it really makes it so special because it's one of a kind! Beautiful!
ReplyDeleteYes exactly, no mass produced gift with these! It's such a shame to see them abandoned on thrift store shelves when they have so much potential to be beautiful again and put back to good use.
DeleteThis is really cute Marie. Hope your Halloween was good. We had snow ugh but still got about 20 kiddo's. Poor things all bundled up could not even see the costumes. I think our fall is over and winter is here now. Ugh! Too soon. Off to Michigan for Terry and I for a long weekend. Even with the cold I will enjoy getting away. Happy Weekend to you too.
ReplyDeleteKris
Wow, you beat us to the snow! It was chilly last night and the kids needed coats under their costumes but thankfully no trudging through the white stuff over here. Have a great weekend getaway you two! xo
DeleteSmall but huge difference! You really elevated that jewelry box to a new and trendy look. I love it. I have an old jewelry box in my closet that I need to update, but it doesn't have the pretty glass doors like yours.
ReplyDeleteWhen I see unique ones at the thrift store I just have to rescue them and make them all pretty and useable again. I've done several and just like big furniture makeovers, it's amazing what a little paint will do to make them beautiful again.
DeleteMarie, this is just toooo precious! What a great job and marvelous gift for a little princess!
ReplyDeleteThank you so much, Ceyla! The little princess who will be the recipient of this jewelry box is my granddaughter. I'll slip a little sparkly surprise inside before wrapping it.
DeleteI absolutely love it, Marie! I have two or three thrift store jewelry boxes to make over and have been avoiding doing them because I can't decide where to begin and what color to use, etc., etc.,.... I'm just afraid to start on one and mess it up I guess. Maybe I'll just start one with white paint and see where it goes. I really need to get them done and sold or gifted. Do you have any advice in general about how to begin?
ReplyDeleteNaomi, my biggest advice about how to begin is...BEGIN! It is just paint and you can't mess it up. Pick a color that compliments the color of the felt inside. Remove the doors and drawers with a little jewelry screwdriver. Sand it just a little with 150 grit sandpaper to give the paint some bite. Don't put the paint on thick, thinner coats are always better and sand with 220 grit sandpaper in between each coat for a nice smooth finish. Protect the paint with clear wax or non-yellowing clear coat. Visit the link I included in the post to the other jewelry boxes I've done for inspiration. YOU CAN DO THIS!!!
DeleteWhat an adorable find Marie and she's perfect for a little girl now that she has her new coat of dusty pink.
ReplyDeleteThis pretty in pink jewelry box is a Christmas present for my granddaughter. I'll find a sparkly surprise to put inside before wrapping it.
DeleteGreat makeover!
ReplyDeleteThank you so much, Virginia!
DeleteReally sweet makeover! Someone is going to be thrilled to receive this cute jewelry box.
ReplyDeleteThank you so much, Michelle, it is being gifted to my granddaughter for Christmas with a few special surprise gifts inside.
DeleteThis is adorable Marie! The heart knobs and teardrop pulls are perfect! Your granddaughter will cherish this forever 💕
ReplyDeleteI sure hope so, Christina! I inscribed the back so she'll always remember who made it for her and when.
DeleteYou know I love all thing mini. This is much better refreshed with your DIY skillz. Beautiful!
ReplyDeleteThank you so much! Your comment is coming in as an "unknown" reader, I wish I knew who you were because you've left such sweet comments! xo
Delete
ReplyDeleteFine. I have long thought what to make for my daughter. Thanks for the idea.
So glad to hear you were inspired!
DeleteThanks for the share and the pin, Marilyn. Have a great weekend!
ReplyDeleteI totally love how this turned out, Thanks for sharing with us at the To Grandma's house we go link party. I'll be featuring you on my blog!
ReplyDeleteI'm so glad you like it, Tarah and thank you so much for the feature, I appreciate it so much! xo
Delete