How To Transfer Graphics Onto Wood With Glossy Paper
If you are looking for an easy way to add graphics and typography on to your wood projects then you'll love this image transfer technique. In mere minutes using recycled paper or paper from your kitchen pantry, you can add wow factor to unfinished or painted wood projects. This technique is perfect to use for DIY wooden signs, boxes, tool caddies, trays, or even furniture. I'm going to show you how to transfer graphics onto wood with glossy paper and provide a list of paper suggestions that work best.
This image transfer method can also be used as an alternative to the Graphite Paper Image Transfer Method for tracing intricate graphics or typography that you plan on hand-painting.
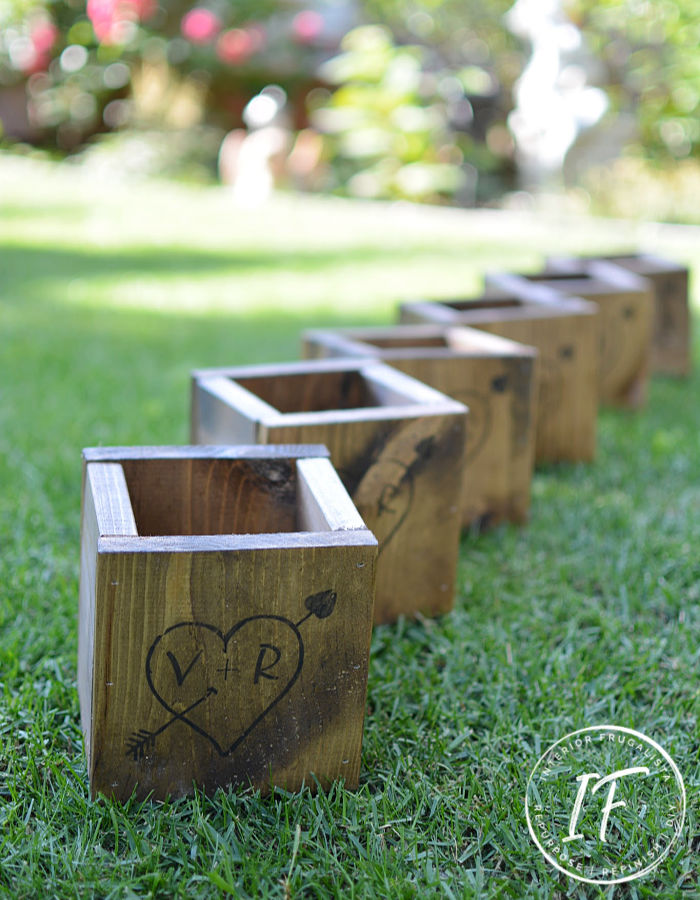
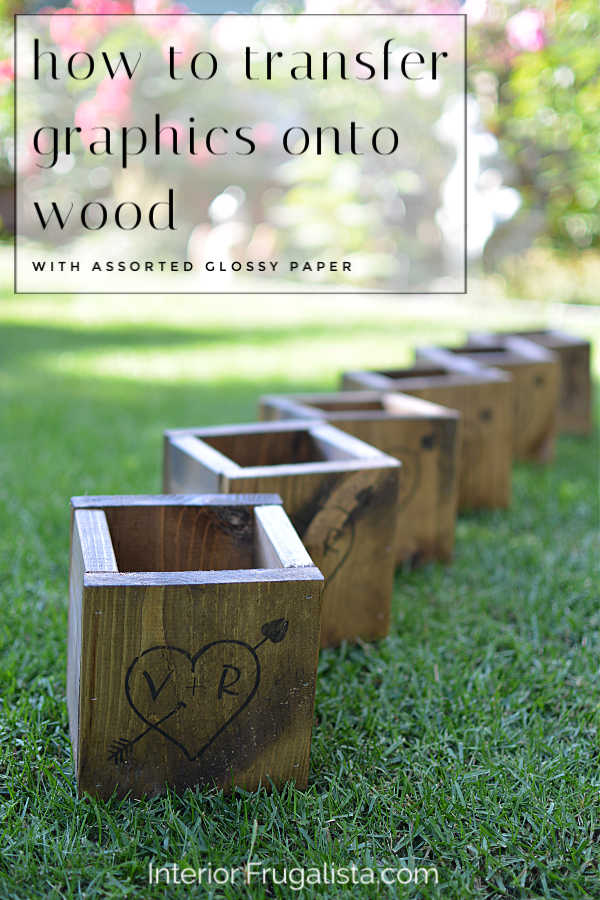
I've used this method several times to transfer images onto DIY wood projects and it works like a charm. Once the ink is completely dry, the image will not smudge and you can apply a clear coat to seal it. I added love hearts to these rustic stained centerpiece boxes for my daughter's wedding. I didn't apply a protective clear coat and they withstood being transported 10-hours squished in a box plus a lot of manhandling at the venue.
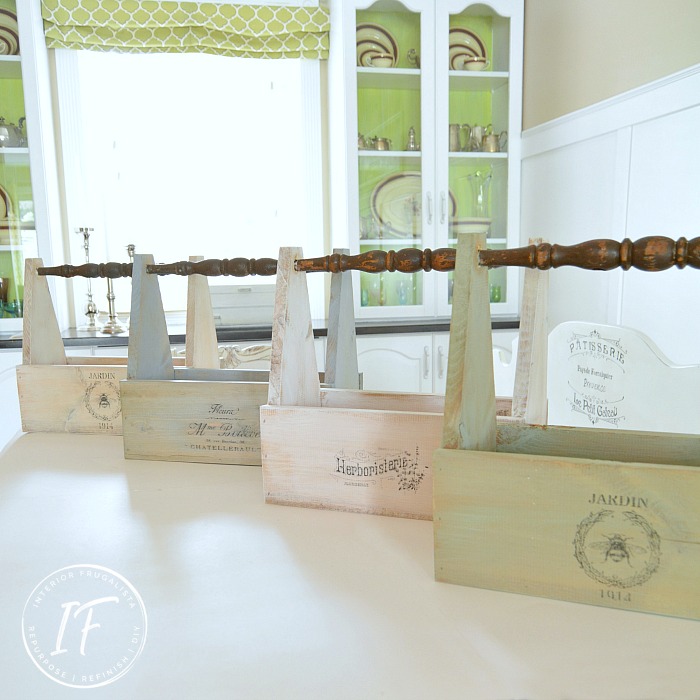
I also used this image transfer technique on these DIY Painted Wooden Garden Caddies to sell at a local outdoor market. Mine (the green one in the forefront) is still going strong years later.
Glossy Packaging
Recycle the glossy sheets that come in packages of stationery like printer papers.
Printer Labels
Remove the address or file folder printer labels from the sheets and use the glossy paper backing.
Parchment Paper
Wax Paper
Clear Sheet Protectors
In this tutorial, I used both recycled glossy packaging sheets and parchment paper. Let's get started.
For the glossy paper transfer, I'm using this Jardin 1914 graphic found at The Graphics Fairy website on my Chair Spindle Garden Caddy. For the parchment paper transfer, I'm using the French Herb Shop graphic also found at The Graphics Fairy website.
With the back of a spoon, plastic scraper tool (pictured above), or old credit card, rub firmly over the graphic. Lift the paper and check every so often for areas that may not have transferred well.
Once you're happy with the transfer, remove the tape and voila!
Allow the ink to completely dry before adding a protective clear coat or wax. I like to err on the side of caution and let it dry overnight.
I hope you found this tutorial helpful for adding beautiful images or typography onto your wood projects. Here's another Image Transfer Technique With Transfer Medium or Mod Podge that I thought you might enjoy as well. This one is great for transferring photographs and colored images onto furniture and home decor.
If you have any questions about this glossy paper image transfer technique, please leave them in the comment section below or the Contact Me tab at the top. I love hearing from you!
If you enjoyed this Image Transfer Tutorial, I'd be so thankful if you shared it with a friend and pinned it to your Image Transfer Techniques board on Pinterest.

I share my projects at these inspiring link parties.
Image Transfer Technique With Glossy Paper
This image transfer method can also be used as an alternative to the Graphite Paper Image Transfer Method for tracing intricate graphics or typography that you plan on hand-painting.
I've used this method several times to transfer images onto DIY wood projects and it works like a charm. Once the ink is completely dry, the image will not smudge and you can apply a clear coat to seal it. I added love hearts to these rustic stained centerpiece boxes for my daughter's wedding. I didn't apply a protective clear coat and they withstood being transported 10-hours squished in a box plus a lot of manhandling at the venue.
I also used this image transfer technique on these DIY Painted Wooden Garden Caddies to sell at a local outdoor market. Mine (the green one in the forefront) is still going strong years later.
Glossy Paper Suggestions For This Image Transfer Technique
These are just a few suggestions for types of paper you can use to transfer graphics on wood.Glossy Packaging
Recycle the glossy sheets that come in packages of stationery like printer papers.
Printer Labels
Remove the address or file folder printer labels from the sheets and use the glossy paper backing.
Parchment Paper
Wax Paper
Clear Sheet Protectors
In this tutorial, I used both recycled glossy packaging sheets and parchment paper. Let's get started.
How To Transfer Graphics With Glossy Paper
For the glossy paper transfer, I'm using this Jardin 1914 graphic found at The Graphics Fairy website on my Chair Spindle Garden Caddy. For the parchment paper transfer, I'm using the French Herb Shop graphic also found at The Graphics Fairy website.
Two Important Transfer Technique Tips
- THIS IMAGE TRANSFER TECHNIQUE MUST BE USED WITH AN INKJET PRINTER.
- YOU MUST ALWAYS PRINT A MIRROR IMAGE OF YOUR GRAPHIC/TYPOGRAPHY.
Printing On Parchment or Wax Paper
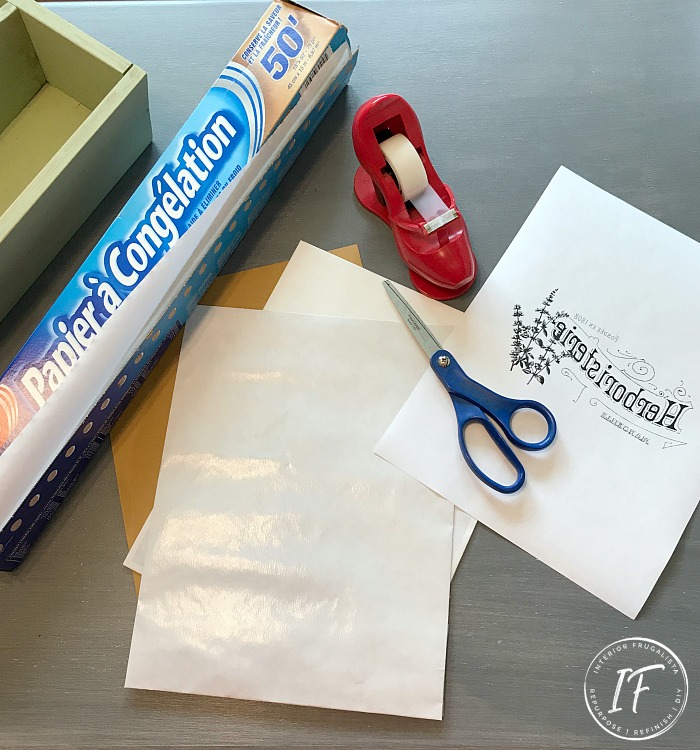
When transferring graphics with parchment or wax paper, there's a little prep you must do first. I've never had success simply feeding parchment or wax paper into my inkjet printer without it jamming. To avoid this, tape the parchment or wax paper (shiny side up) onto a sheet of card stock or bond paper (use what you have on hand).Printing On Glossy Paper
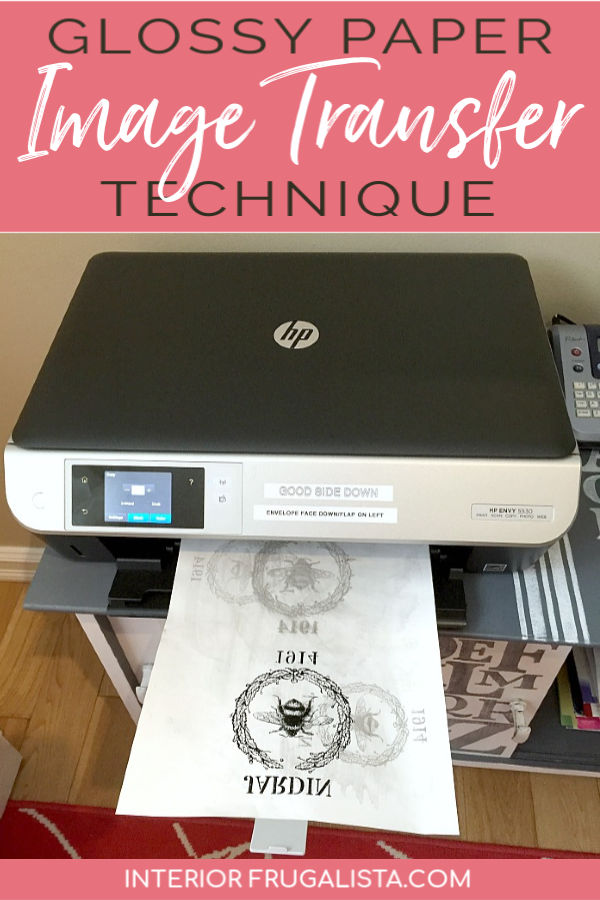
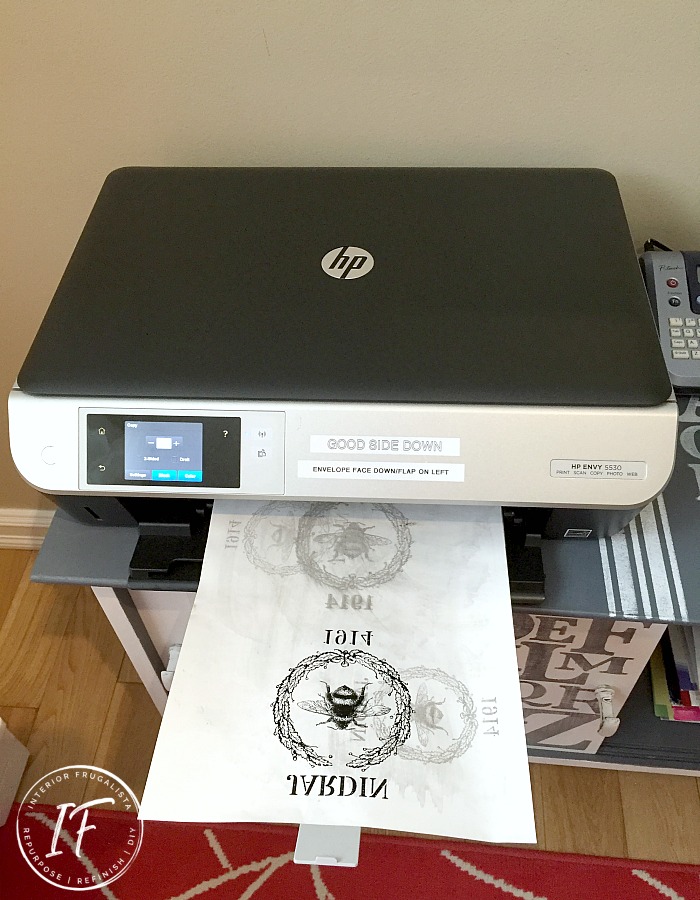
The photo below is an example of a recycled glossy sheet that came in a package of special printer paper. The glossy side of the paper is fed facing down in my printer.Step 1 - Printing the graphic
Whether you're using glossy paper or parchment/wax paper, place it into the inkjet printer so it prints on the glossy side of the sheet.Yes, You Can Reuse The Glossy Paper!
You can see in the photo below that I've reused my glossy paper a few times. You can reuse the same sheet by wiping any residual ink left after the transfer with a slightly damp paper towel.Step 2 - Transferring the graphic
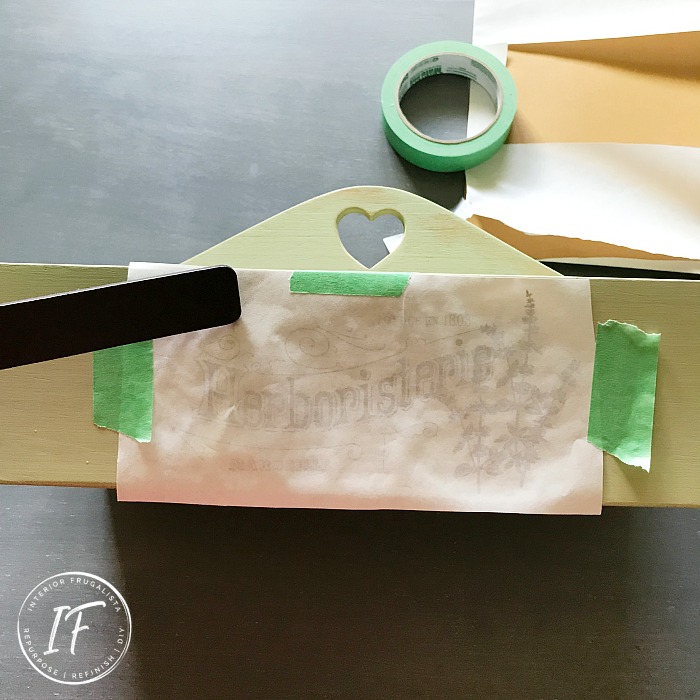
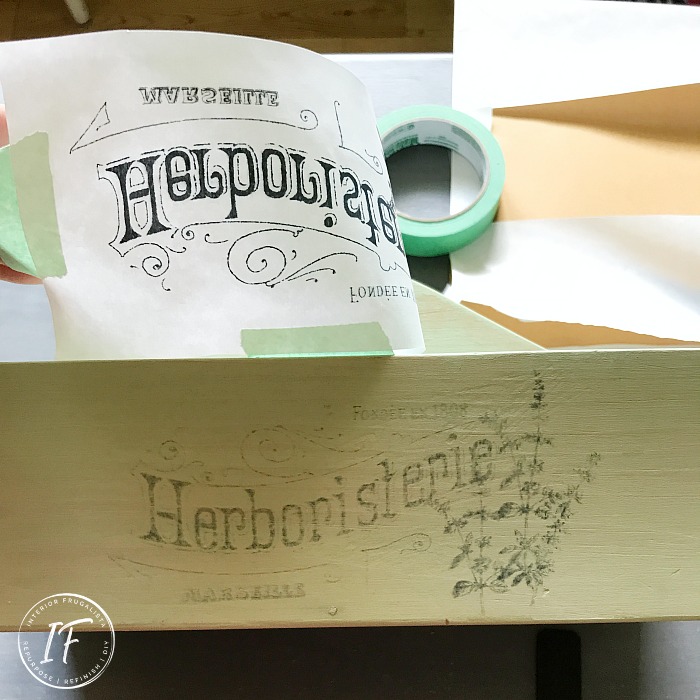
Hold the graphic above your wood project and eyeball where you want it placed. Carefully set the print side down while the ink is still wet, being mindful not to move it around to avoid smearing, and hold it in place with painter's tape.With the back of a spoon, plastic scraper tool (pictured above), or old credit card, rub firmly over the graphic. Lift the paper and check every so often for areas that may not have transferred well.
Once you're happy with the transfer, remove the tape and voila!
Allow the ink to completely dry before adding a protective clear coat or wax. I like to err on the side of caution and let it dry overnight.
I hope you found this tutorial helpful for adding beautiful images or typography onto your wood projects. Here's another Image Transfer Technique With Transfer Medium or Mod Podge that I thought you might enjoy as well. This one is great for transferring photographs and colored images onto furniture and home decor.
If you have any questions about this glossy paper image transfer technique, please leave them in the comment section below or the Contact Me tab at the top. I love hearing from you!
If you enjoyed this Image Transfer Tutorial, I'd be so thankful if you shared it with a friend and pinned it to your Image Transfer Techniques board on Pinterest.

I share my projects at these inspiring link parties.





I'll have to give paper transfer technique this a try, thank-you so much!
ReplyDeleteBe forewarned Emily, you'll want to add transfers to all.the.things. LOL
DeleteGreat tutorial, Marie. Pinned for later!
ReplyDeleteThank you so much, Pamela, and I appreciate the pin too! Have a nice evening 😀
DeleteI've always wondered how to to do this! Pinning this for later because I'm definitely going to try it. I love your garden caddies, they are so pretty!
ReplyDeleteSo glad you found this tutorial helpful and appreciate the pin! Thank you for your sweet compliment re: my chair spindle garden caddies, I'm glad you like them. 😀
ReplyDeleteI have done something similar using freezer paper. Parchment paper is so much easier to find, I need to try it. Still love love love my farmhouse caddy.
ReplyDeleteExactly! I find the parchment paper works just as well as freezer paper and you can get it at the dollar store for less. So glad to hear you still enjoy your farmhouse caddy.
Delete