Rustic FAUX Reclaimed Barn Wood Pumpkin Craft
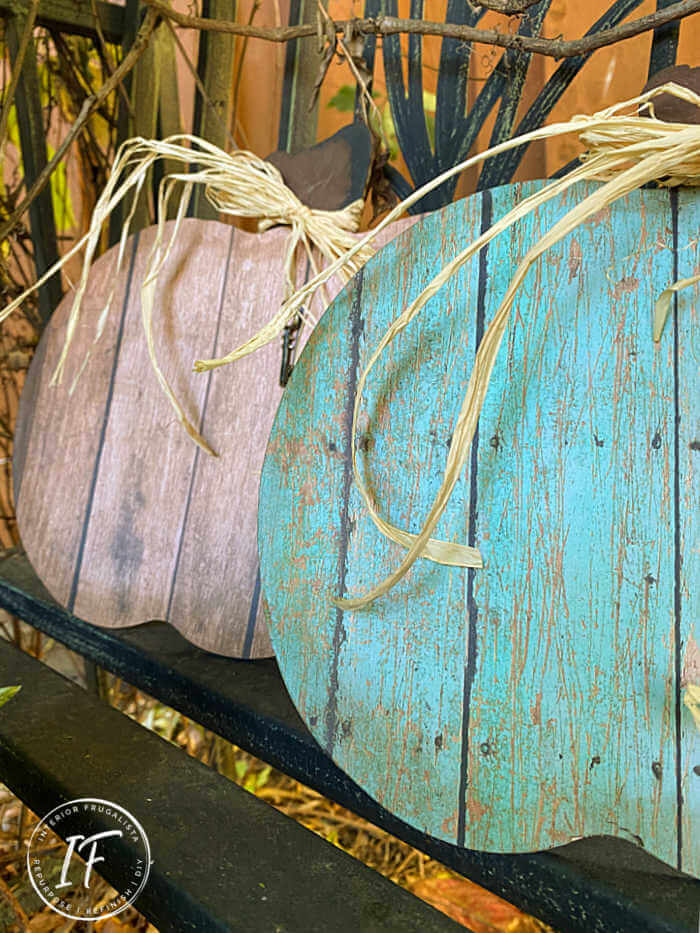
What to do when you've been itching to make pallet wood pumpkins but you don't have any pallets? Fake it! That's what I did when making these rustic faux reclaimed barn wood pumpkins.
No power tools are required to make these realistic reclaimed wood pumpkins. Don't they look just like the real thing? They are so easy to make, you can have an entire pumpkin patch in less than an hour.
Easy Decoupage Faux Wood Pumpkins
At just over $2 a pumpkin, they are a budget-friendly fall decor idea. A trip to the dollar store and the scrapbook paper aisle of your local craft store will get everything you need to make them so let's get started.

This post contains affiliate links so you can see what products I used or recommend for this project. As an Amazon Associate, I earn a small commission from qualifying purchases at no extra cost to you.
The inspiration for these faux reclaimed wood pumpkins came during a trip to the dollar store where I found these Thanksgiving pumpkin signs.
While they looked a little ahem cheap, I figured the pumpkin shapes had perfect crafting potential.
How To Make Faux Wood Pumpkins
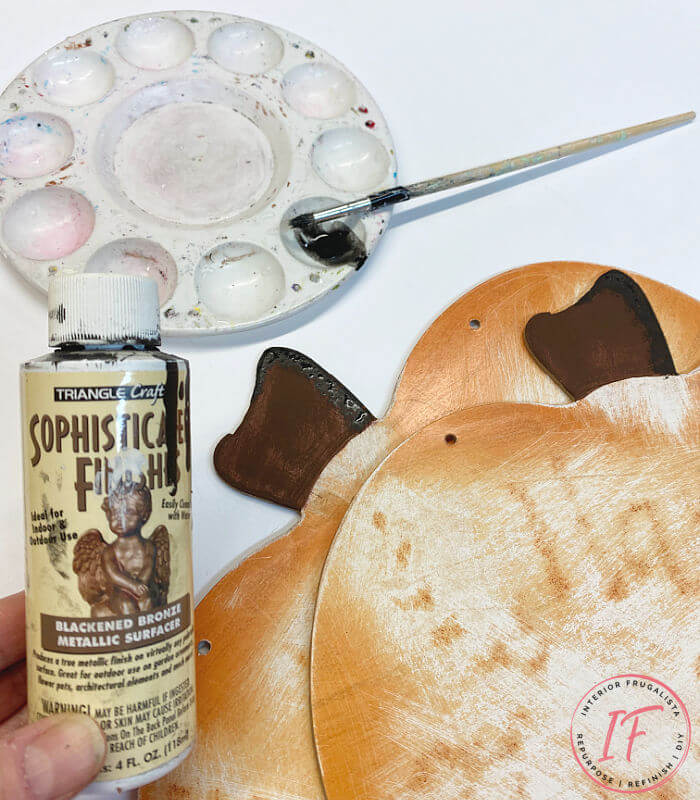
We'll begin the pumpkin craft by removing the bronze glitter from the thanksgiving signs with a sanding block.
Next, let's make those pumpkin stems look a little more realistic with burnt umber craft paint that I had on hand.
To add depth to the stems I created a shadow with a blackened bronze paint that I had on hand. This step is completely optional.
How To Decoupage Faux Wood Pumpkins
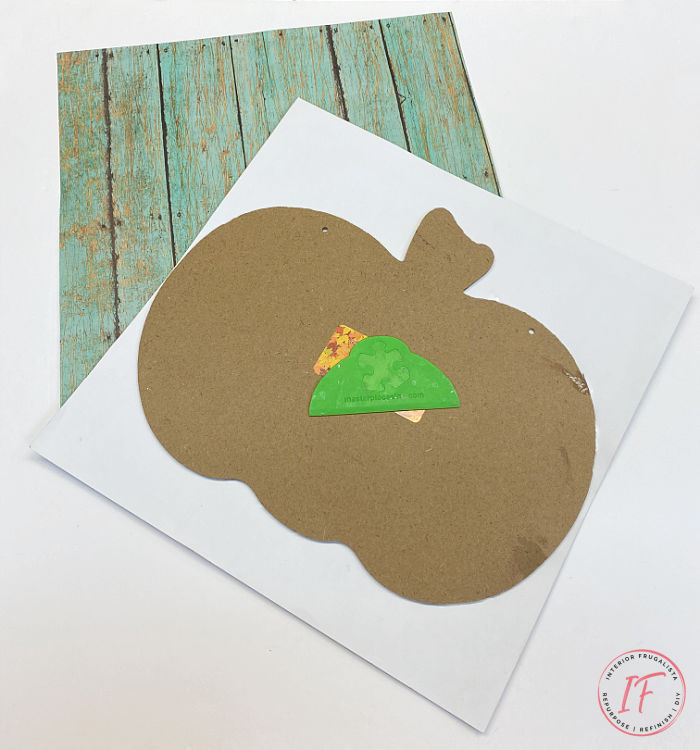
Next, I went through my scrapbook bin in search of faux reclaimed wood paper (alternative) and hit the jackpot with these.
At this point, you could trace the pumpkin shape onto the scrapbook paper and cut them out, if that's your preference. I didn't bother and will trim the paper later.
Brush a generous coat of Mod Podge onto the pumpkin shape and set your scrapbook paper on top. Gently rub the paper with the tips of your fingers or a scraper to remove any wrinkles.
Check for any areas along the edges that didn't bond well and use a small art brush to apply more Mod Podge in those areas.
Once they are completely dry, use a sharp craft knife to trim the paper.
To protect the paper, apply two coats of a matte Mod Podge on top of the decoupage paper. If you plan on using the pumpkins outdoors, seal them with Outdoor Mod Podge.
How To Age Decoupage Pumpkins
While the front of the pumpkins looks like real reclaimed wood, our secret is obvious when you look at the sides of the pumpkins. To make them look more realistic, we're going to use brown wax.
With a lint-free rag dab brown wax along the edge of the pumpkins. Don't fret if you get some of the wax on the front of the pumpkins. In fact, I encourage you to get a little along the top edge because it adds to the time-worn weathered charm.
Use your finger inside the rag to dab the wax in random motions along the edges, blending it as you go.
You can see the difference in the photo below between the green pumpkin that has been waxed along the edges and the brown pumpkin without dark wax. Big difference, right!
Last but not least embellish the pumpkins with raffia ribbon wrapped around the stem and hang a small charm or whatever embellishment you like. I had a bag of skeleton key charms in my stash so that's what I used.
That's it, so easy, right? Wouldn't you agree the faux reclaimed wood pumpkins look very realistic. You have to touch them before realizing they are decoupage barn wood paper.
Enjoy decorating with your new pumpkins! For more pumpkin craft ideas visit my DIY Fall Ideas page.
For more pumpkin inspiration you may like these 12 DIY pumpkin ideas that are easy on the wallet. Thanks for stopping by the Interior Frugalista today! I hope you were inspired by these faux reclaimed wood pumpkins.
Almost all of our DIY ideas have step-by-step tutorials so why not get your budget DIY on and subscribe. You can also find us on Pinterest, Facebook, Instagram, and YouTube.
If you have any questions, please leave them in the comment section below or the Contact Me tab at the top to drop me an email. I love hearing from you!
If you enjoyed this rustic faux wood pumpkin craft, I'd be so thankful if you shared it with a friend and pinned it to your Fall Decor Ideas or Pumpkin Crafts board on Pinterest.
I share my projects at these inspiring link parties.


Great makeover! Love the colors you chose!!
ReplyDeleteJenna
Thank you very much, Jenna! Now I want to make a bunch more because they were so fun to make.
DeleteI thought for sure they were real wood planks!! Great directions - they are adorable!!
ReplyDeleteYessss, I'm thrilled that you think so, Patti! Thank you so much and so glad you found the directions helpful too.
DeleteCute, cute! Great idea, I have some similar scrapbook papers!
ReplyDeleteTania
Thanks Tania, they were fun to make! I went back to the dollar store to get more pumpkin shapes because this gal wants a fake pumpkin patch. LOL
DeletePaper?? Are you kidding me?? I never, ever would've guessed that. These are amazing. Off to pin you pretty pumpkins with their darling key accents. You are so creative!
ReplyDeleteYessss, my hope was that you couldn't tell the difference so your sweet comment makes this ole gal happy, Kim! Thank you for the pin as well. xo
DeleteSaweeet! I love your take on them so much better. Happy Fall! :D
ReplyDeleteHappy Fall back to you, Larissa! Upcycling these dollar store signs was all about the pumpkin shape and not having to cut my own. Easy peasy!
DeleteHello Marie, this is a great project. I love how the scrapbook paper you selected really transformed the pumpkins.
ReplyDeleteThanks Jasmine, I thought the barnwood paper looked so realistic.
Deleteoh! it looks great! you had excellent idea! I thought it is made of old painted wood and when I read it my eyes were getting bigger and bigger :) I fall in love with it and probably I will make a small one for my photos - thank you for tutorial <3
ReplyDeleteSo glad you thought they were made with real salvaged wood, that was my hope! Thank you for your kind comments and the visit.
DeleteBrilliant hack to upcycle those dollar tree signs!! I'd love for you to share over at our weekly Wednesday Creative Crafts Linky Party
ReplyDeletehttps://creativelybeth.com/creative-crafts-linky-party-9-join-in-the-fun/
Have a great week!
Creatively, Beth
Thanks Beth, I'm glad you like them. See you at the party on Wednesday and wishes you a great week as well!
DeleteHi Marie. This is so great. I love the colors and using modge podge and pretty cool paper. This is really a great makeover. Happy Sunday. xoxo Kris
ReplyDeleteThanks Kris, they were so much fun to make that I went back to the dollar store and got more! LOL Happy Sunday back to you my friend!
DeleteYou did it again!! I thought, Wow, she painted them to look like barnwood...great idea! THEN, I read further and it's scrapbook paper...an even BETTER idea!! Thank you so much for the directions cause I think I might have to make a $ Store run!!
ReplyDeleteYessss, so glad this idea inspired to make some fake barn wood pumpkins for yourself too. Happy pumpkin patch making, Karolyn!
DeleteSo much better than the dollar store version! Love them. 👍🌼👏
ReplyDeleteHey Denise, nice to see you here! I bought those signs just for the shape. LOL Psssst, and I went back for more because I was having too much fun. 😉🎃
DeleteA spectacular "fool the eye" who would believe they were not reclaimed wood. Love them.
ReplyDeleteYesss, so glad you think so, thank you! 😊
DeleteLove, love, love these pumpkins, Marie!! I too, thought they were made from real wood. I'll have to check my stash & see if I have "wood look" paper lying around!! Just love this idea!
ReplyDeleteI'm so glad you like this DIY pumpkin idea, Kathi and I'm thrilled that you thought they were real wood! I hope you find the perfect plank wood scrapbook paper in your stash to make some.
DeleteBrilliant Marie!!!! And the dark wax around the edges does make the pumpkins seem even more 3 dimensional/weighty somehow.
ReplyDeleteThanks Michelle, glad you like them! Dark wax just gives everything that lovely time-worn goodness. I think I use it more than clear wax come to think of it. LOL
DeleteThis is so clever, I love it!
ReplyDeleteThank you so much, Kasia, for stopping by!
DeleteI thought you had painted them!
ReplyDeleteSheila
I wish I was that talented, Sheila! LOL Glad to hear you think they look like real wood.
DeleteThese are so cute! I love what you've done with them. Thanks for sharing the tutorial. I'm visiting today from the Embracing Home and Family link up. Have a great weekend Marie!
ReplyDeleteYou're welcome, Marielle, so glad you like them and thank you for stopping by for a visit!
DeleteSuper cool look Marie! Looks like the real deal from here!
ReplyDeleteAwesome, that was my hope, Donna, so I'm thrilled that you think so!
DeleteMarie,
ReplyDeleteThese are just too cute for words. They look just like wood. Congratulations, you are being featured at Over The Moon Linky Party. I hope you stop by. https://www.eclecticredbarn.com/2020/10/over-moon-linky-party_11.html
Hugs,
Bev
Thrilled to hear you think they look like the real thing,and even more thrilled to see they are being featured. Thank you so much, Bev! xo
DeleteMarie, your pumpkins are crazy cute and I never would have guessed they are covered in paper. Such a darling project and I'm excited to share it this week on the Tuesday Turn About Link Party.
ReplyDeleteMichelle, I'm so happy to read that you thought they were the real thing. That was my goal when planning this project. I'm thrilled to see they are being featured, thank you very much! xo
DeleteStunning Pumpkins !! Where did you pick the scrapbooking paper from ?
ReplyDeleteThank you for sharing with us at Meraki Link Party.
Naush
Glad you like them, Naush, thank you! I've had this scrapbook paper in my stash for years so I'm not sure where exactly I got them but likely Michaels.
DeleteThis is such a great DIY project for fall Marie! I have a sign above my headboard that looks like real wood, but it's not the real thing. Love it! Thank you for sharing at CHarming Homes and Gardens.
ReplyDeleteI bet your faux wood sign looks amazing, Kim! I liked the look of the faux barn wood pumpkins so much that I've started a sign for our bathroom (getting gutted before Christmas *finger's crossed*).
DeleteThese had me fooled! love the pink and blue colors.
ReplyDeleteI'm happy to feature them at the FWF link party, Marie :)
hugs
RR
Yay, so glad you thought they were the real thing, Rachelle! I'm thrilled to hear you're featuring them. Thank you so much! xo
DeleteVery clever and creative of you! I would not have guessed just by looking at them that they were paper Great job. #HomeMattersPar
ReplyDeleteThis is music to my ears, Donna, because that's exactly what I was hoping. Thank you!
Delete