DIY Wood Table Riser From A Salvaged Desktop
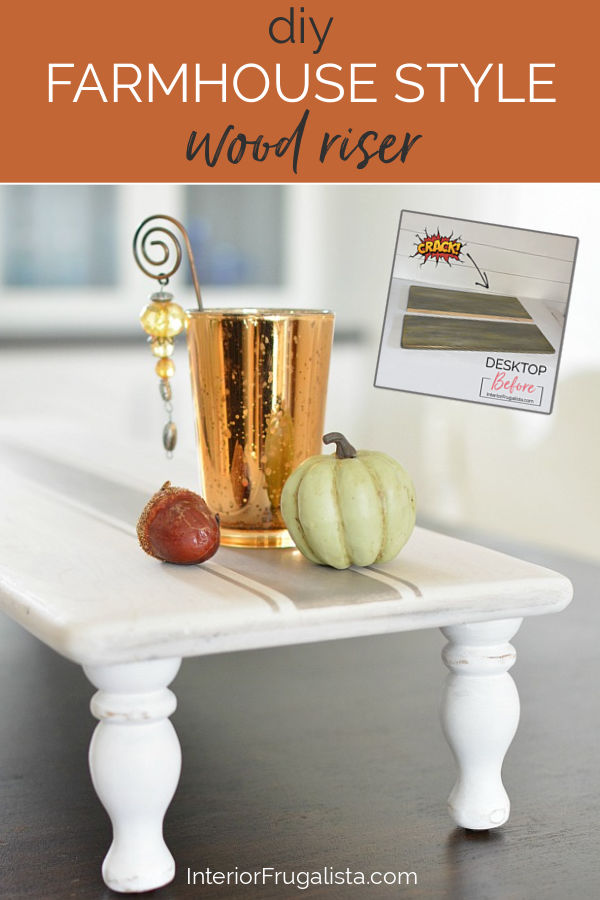
A DIY wood table riser from a salvaged desktop with a cozy modern farmhouse style. Nothing gets thrown out around here if I can help it and it drives Mr. Frugalista crazy. My motto is that pretty much anything can be repurposed into something with a little creativity.
Such was the case with the top of an old boarding house table that was split in half. It was headed for the burn pile when I uttered the words he dreads hearing most...
Here's where we started with the broken top on an old boarding house table. It was removed during the Modern Farmhouse Desk Makeover repurposed as a worktable for my new office.
This is the smaller piece I used to make the table riser?
But first, the edge on the broken half needed some work so the profile matched with the other three sides.
Of course, to qualify as a wood riser the board also needed some feet.
But it's that sweet stenciled grain sack stripe that gives the riser the modern or country farmhouse charm.
It's going to get a lot of use on our dining room table between now and the holidays. But it'll also be used as a seasonal centerpiece year-round.
With Canadian Thanksgiving around the corner, I'll incorporate some real mini pumpkin tealights like I made last year. I'll also go through my fall decor bin and add a few ticking stripe pumpkins and sweater pumpkins in the mix too.
For the holidays I'll set the Retro Christmas In A Jar on top with other vintage decorations.
So let's get into the nitty-gritty of how it was made, shall we?
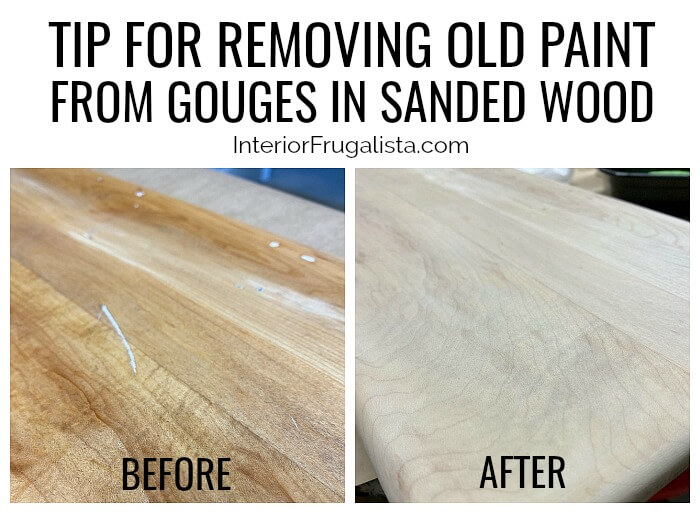
But even with all that sanding, there were some white spots on the wood, assuming old paint in the deeper gouges. Because I plan on staining the board, they had to go.
We don't have any light wood in our dining room and our table is dark walnut so I opted for a contrast with a whitewash instead. But still wanting to see the wood grain I thinned White Magic VooDoo Gel stain with water to a milk-like consistency. Applied with a slightly damp car detailing sponge, my favorite application for stains and topcoats to eliminate brush strokes.
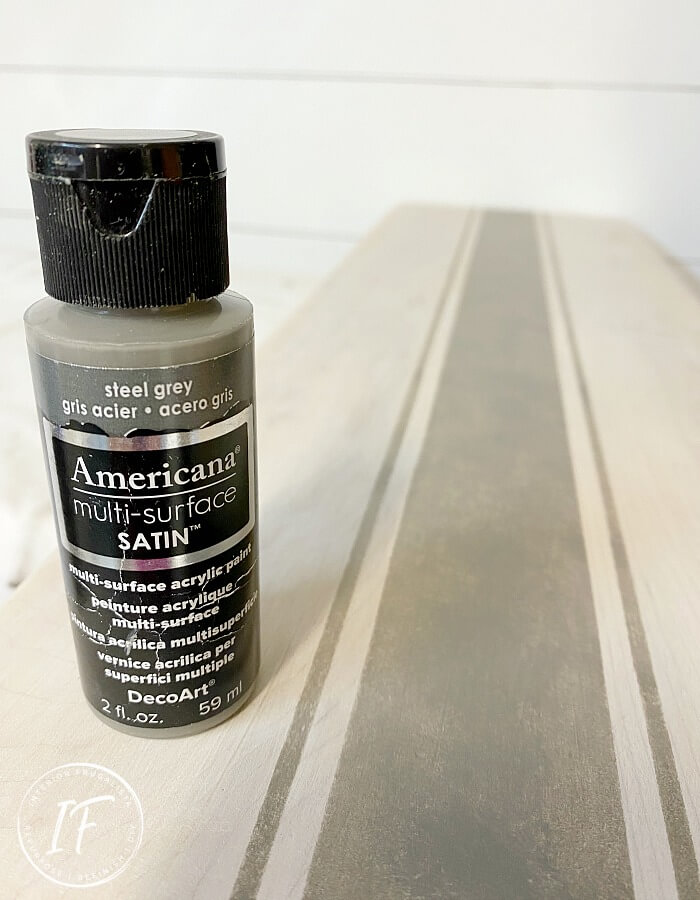
Instead of opaque painted stripes, I made them look more transparent by pouncing the graphite paint color on with a stencil brush. After it dried I went over the grain sack stripes with 220-grit sandpaper to smooth the paint and give them a distressed finish.
To do this the feet needed dowel screws. If you've never done this before, I've included instructions below that I hope you find helpful.
I'm so glad I caught the broken desktop before it ended up in the burn pile because it made such a sweet farmhouse table riser.

Such was the case with the top of an old boarding house table that was split in half. It was headed for the burn pile when I uttered the words he dreads hearing most...
"Wait, I can make something with that!"
Wooden Display Pedestal From A Salvaged Desktop
...and with a little elbow grease, that's exactly what happened. The smaller piece was the perfect size for a wood riser on our dining room table. Now I need to come up with an idea for the other half.Here's where we started with the broken top on an old boarding house table. It was removed during the Modern Farmhouse Desk Makeover repurposed as a worktable for my new office.
This is the smaller piece I used to make the table riser?
But first, the edge on the broken half needed some work so the profile matched with the other three sides.
Of course, to qualify as a wood riser the board also needed some feet.
But it's that sweet stenciled grain sack stripe that gives the riser the modern or country farmhouse charm.
It's going to get a lot of use on our dining room table between now and the holidays. But it'll also be used as a seasonal centerpiece year-round.
With Canadian Thanksgiving around the corner, I'll incorporate some real mini pumpkin tealights like I made last year. I'll also go through my fall decor bin and add a few ticking stripe pumpkins and sweater pumpkins in the mix too.
For the holidays I'll set the Retro Christmas In A Jar on top with other vintage decorations.
So let's get into the nitty-gritty of how it was made, shall we?
Here's How We Made It
This post contains affiliate links so you can see what products I used or recommend for this project. As an Amazon Associate, I earn a small commission from qualifying purchases at no extra cost to you.Step 1 - A Routered Edge
The first thing the salvaged board needed was a nice profile along the edge. To do that we used a 3/8-inch with 1-inch shank 2-flute flush router bit (now that's a mouthful) on the router. First, ran it along the edges on one side of the board and flipped it over to finish the profile on the other side.Step 2 - The Old Paint Layers Are Outta Here
Next up, the layers of paint needed to go starting with a 60-grit sanding sheet on a quarter-sheet sander. To get the remaining paint the sanding sheet was switched to 120-grit. Last but not least, to get the wood as smooth as a baby's bottom the sanding sheet was switched to 220-grit.But even with all that sanding, there were some white spots on the wood, assuming old paint in the deeper gouges. Because I plan on staining the board, they had to go.
How To Remove Old Paint From The Deep Gouges Of Sanded Wood
After a little research, I learned you can get rid of these white spots with hydrogen peroxide. So I tried it by saturating cotton swabs and soaking the spots for several minutes. Next, I sanded the spots lightly with a sheet of 220-grit sandpaper while they were still a little wet and it worked! You can't tell those white spots were there now.Step 3 - Staining The Wood Table Riser
The hardest part of this wood table riser project was deciding what finish to give it. The original plan was to keep the natural wood and protect it with food-grade hemp oil. But like what often happens, I changed my mind.We don't have any light wood in our dining room and our table is dark walnut so I opted for a contrast with a whitewash instead. But still wanting to see the wood grain I thinned White Magic VooDoo Gel stain with water to a milk-like consistency. Applied with a slightly damp car detailing sponge, my favorite application for stains and topcoats to eliminate brush strokes.
Step 4 - Grain Sack Stripes For Farmhouse Style
To add the Modern farmhouse touch, the top needed some grain sack stripes down the center. You can make the stripes with painter's tape or do it the easy way and save yourself a lot of time with these awesome grain sack stencils from Funky Junk's Old Sign StencilsInstead of opaque painted stripes, I made them look more transparent by pouncing the graphite paint color on with a stencil brush. After it dried I went over the grain sack stripes with 220-grit sandpaper to smooth the paint and give them a distressed finish.
Step 5 - Adding Feet To The Table Riser
Now we're ready to give the wood pedestal tray some feet. I had small wooden legs in my stash but they didn't have any dowel screws to attach them to the board. I could have used a strong glue but I knew the riser would get a lot of use and felt better knowing they were attached with screws.To do this the feet needed dowel screws. If you've never done this before, I've included instructions below that I hope you find helpful.
- Mark the center of each foot and drill a small pilot hole.
- To ensure the screw is the same depth on all four feet, place a piece of tape on the drill bit to the depth you need in the foot.
- Thread the dowel screw into the pilot hole with vice grips because those threads are sharp.
- Check the depth of the screw against the side of the riser to make sure it sits below the top. The last thing you want is the screw to pop through the top of the table riser.
- On the bottom side of the riser measure equal distance in both directions to find the center point for your feet and mark it with a pencil. Repeat on the remaining three corners.
- Place a piece of tape on the pilot hole drill bit to gauge the depth so you don't poke through the top.
- Attach the feet and voila!
The feet were looking a little worse for wear so I gave them a fresh coat of white paint that I had on hand and distressed them a bit with 220-grit sandpaper.
I'm so glad I caught the broken desktop before it ended up in the burn pile because it made such a sweet farmhouse table riser.
If you have any questions about this wood table riser build, please leave them in the comment section below or the Contact Me tab at the top. I love hearing from you!
If you enjoyed this modern farmhouse display pedestal, I'd be so thankful if you shared it with a friend and pinned it to your Farmhouse Decor or DIY Table Centerpiece Ideas board on Pinterest.

If you enjoyed this modern farmhouse display pedestal, I'd be so thankful if you shared it with a friend and pinned it to your Farmhouse Decor or DIY Table Centerpiece Ideas board on Pinterest.


I love it Marie! You and I are cut from the same cloth, I don't let anything go to waste either! I've definitely got to make one of these! I think it would be so handy to set on the counter for a buffet style dinner. It would allow you to put more on the counter so people can dish up everything they need! Brilliant! Pinned!
ReplyDeleteTania
Psssst, it gives me great joy to be able to say to him,"I told you so"! Yes, the riser is definitely going to come in handy for buffet gatherings too (whenever the hell we have those again). Have fun making one for your home, Tania!
DeleteOh, I love this Marie!! It's just perfect...
ReplyDeleteThanks Kim! I pulled my fall decor bin out this morning and plan to decorate it (and the house) later today.
DeleteYAY, for SATIN paint...I shake my head when I see all the ridiculous steps people use to make the perfect chalk-paint finish---which is so EASY when it is actually tedious and hardly a great finish, when two coats of a good quality Satin paint is almost indestructible. Great project, and unique idea! Sandi
ReplyDeleteThanks Sandi, glad you like the farmhouse riser! I used the satin finish for the stencil because it's what I had on hand. When it comes to paint finishes (unless for crafting or painting walls) I'm a chalky finish girl all the way!
DeleteFantastic idea!! Plus your tips for DIY are awesome. 🙌🏻
ReplyDeleteThank you, Larissa, means a lot coming from you, the Queen of DIY, that you think the tips are awesome!
DeleteThat's a great save Marie and little table riser not only looks lovely with it's grain sack stripes but she's functional too. Oh and thanks for the tip on using a slightly damp car detailing sponge. I'm definitely going to be trying that
ReplyDeleteGlad you like that top coat tip, Michelle, it's a game changer!
DeleteBeautiful re love. That is what I like about you Marie. You can take something someone else would trash and make it beautiful again. Amazing. Happy New Week. xoxo Kris
ReplyDeleteThank you for your kind words, Kris! I'm strange that way, love looking at the broken and discarded and seeing it's potential. LOL Wishing you a terrific week as well! xo
DeletePerfect! :)
ReplyDeleteSheila
Thanks Sheila, I'm glad you like it!
ReplyDeleteOh my goodness...I would have stopped him from throwing that table top out too. That's some solid hardwood. And the phrase "I can make something out of that" comes out of my mouth all the time and my husband dreads it as well. I love this project and will have to remember it the next time I have spare wood. I have a piece of the same type of rubberwood in my garage right now that is about 9" x 7" and I refuse to let my husband throw it out because, although it's small, once he routes the edges and I sand it and apply food grade oil, it becomes the new cutting board I need. :)
ReplyDeleteLove it Lena, nice to see someone else who sees potential in what is deemed junk! Well now, you just gave me an idea for the other half of the desktop. I need a large cutting board. Thanks for the inspiration!
DeleteHello Marie, this is another great project and inspiration. You are so creative and I love stopping by and seeing your creations. They are indeed a source of inspiration to me.
ReplyDeleteJasmine, you made my Sunday morning! I'm so glad you find inspiration here. It's feedback like this that motivate me to keep on keep'n on, so thank you for that! xo
DeleteGenius idea! I never think of table risers but I hope I will after seeing yours. Thank you for sharing!
ReplyDeleteAwesome Tracy! They are so handy not only for a table centerpiece but especially when hosting gatherings to use on the buffet table so you can fit more foot on the table.
DeleteI love this idea!! You could make the other one the same and give as a gift!! Pinned!
ReplyDeleteThat's a good idea, Cheryl! Since publishing this post I decided to make something for my kitchen (coming soon). Thanks for the visit and the pin!
DeleteAwesome upcycle, Marie!! I'd love for you to share over at our weekly Wednesday Creative Crafts Linky Party https://creativelybeth.com/creative-crafts-linky-party-8-join-in-the-fun/
ReplyDeleteHave a great week!
Creatively, Beth
Thanks Beth, glad you like it! I'm a regular at your WCC party and will be linking this project this week.
DeleteThis is so darn cute, Marie! I love how it turned out. I'm always in search of interesting lifts and levels. Thank you!
ReplyDeleteThank you so much, I'm glad you like it!
DeleteWhat an amazing idea! These are adorable! I love that your hubby helps you with your projects, like mine use to :-) And as for the hardware, I love the brushed nickel. But I know I am probably behind the times and you have already chose hardware haha! Hugs!
ReplyDeleteChristina, I miss those projects, you two are quite the team. Thanks for chiming in about the cabinet hardware, that seems to be the most popular choice. Hugs backatcha!
DeleteWhat a great repurposed project, Marie! I love it. It's both pretty and functional.
ReplyDeleteThank you very much Bev, I'm pleased with how it turned out.
DeleteYou did a fantastic job on this table riser! I always love a good repurpose! Kudos too for such a detailed tutorial!
ReplyDeleteThanks a bunch, I'm glad you like the desktop repurpose and detailed tutorial. I'm working on the other half of that desktop as we speak.
DeleteOh my goodness... it looks exactly like a vintage decadent bench! This is darling Marie! And what a great way to use those stripes! The colours are so lovely too!
ReplyDeleteI've featured your amazing project in this weekend's DIY Salvaged Junk Projects. Thanks for linking it up!
Thank you so much, Donna, both for your sweet comments and the feature! xo
DeleteTable risers seem to be all the rage these days, and I have to say your version with the grain sack stripes is one my favorites. So pretty!
ReplyDeleteYou made my day, Lisa, thank you so much!
DeleteI really love this! I have been wanting to make something similar for our buffet! Yours is outstanding! Thank you for sharing at Embracing Home and Family!
ReplyDeleteThank you, Jenn, I'm glad you like the farmhouse style!
DeleteI swear Marie, you have to stop making the rest of us look bad. This is so stinkin' cute! Pinned.
ReplyDeleteFar from it, Cindy! But, can you come sit on my shoulder during those days when I'm ready to throw in the towel.LOL Glad you like the table riser, thank you. 😀
DeleteThis is absolutely fabulous ! I totally love it. The finishing and the idea are marvelous.
ReplyDeleteMarie, Thank you for linking at Meraki Link Party.
Naush
Thanks Naush, I'm glad you like it!
DeleteThis is such an amazing idea!! Pinned to remember!! Thanks for sharing at Charming Homes & Gardens! ~ Kristin | White Arrows Home
ReplyDeleteSo glad you like the table riser, Kristin, and thanks for the pin!
DeleteSo stinkin' cute Marie! Thank you for sharing this with us at Farmhouse Friday!
ReplyDeleteThanks Michelle, I'm having fun decorating this table riser for the seasons.
Delete