Mini Fall Chalkboards With Chalk Art Like A Pro
Do you admire the amazing chalk art displays this time of year at your local coffee shop? Do you find yourself thinking, I wish I could do that? Well, I'm here to tell you that you can, no artistic skills are required!
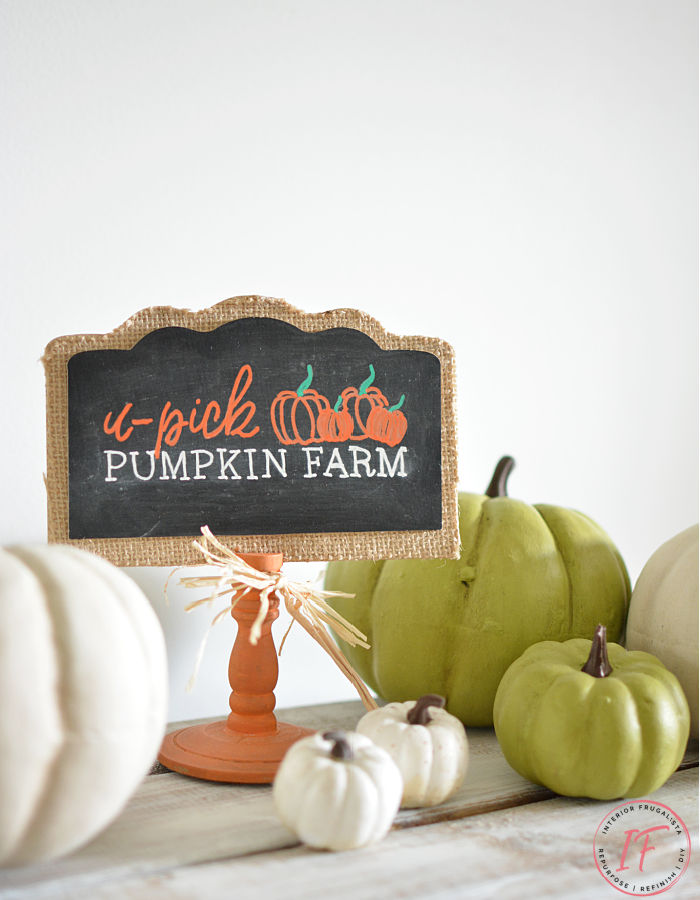
Today I'm going to show you how to get your inner chalk artist on like a pro and I'll demonstrate how with some cute mini fall chalkboard signs.
Get Your Inner Fall Chalk Artist On The Easy Way!
I've had these little pedestal chalkboards from the dollar store in my stash leftover from our daughter's wedding. The nice thing about them is that the pedestal base adds height to seasonal vignettes when you need it or you can detach them from the base for small signs.
I have a lot of fun decorating our large kitchen chalkboard wall for the seasons using this easy chalk art technique. I often get asked how I create such professional-looking chalk art and so today I'm spilling the beans on how I fake it 'til I make it!
This post contains affiliate links so you can see what products I used or recommend for this project. As an Amazon Associate, I earn a small commission from qualifying purchases at no extra cost to you.
Let's Get Our Inner Chalk Artist On
The trick for making chalk art look like a pro is cheating with printable graphics from places like PicMonkey.
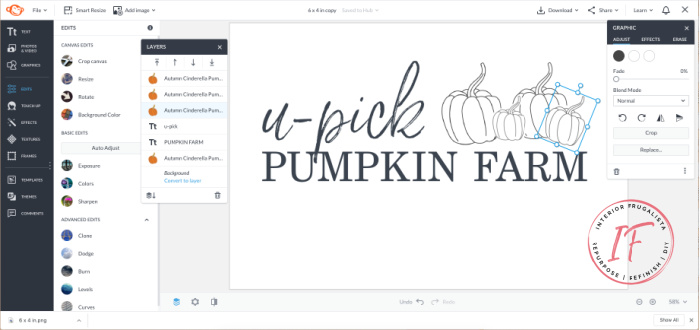
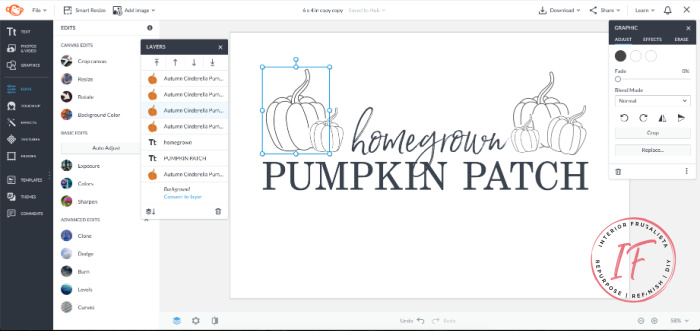
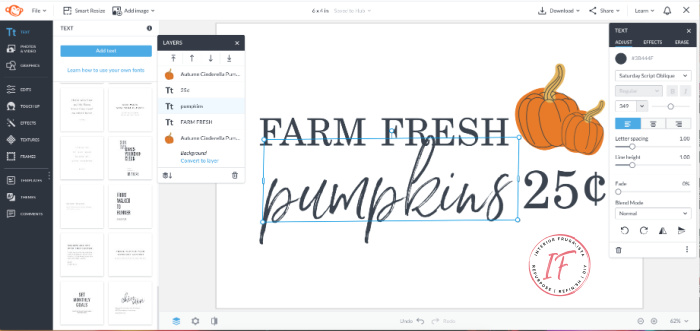
Create simple graphics and/or typography that requires little artistic skill to recreate. I'm going to demonstrate with the PicMonkey dashboard. Here are screenshots of the three graphics I made for my mini fall chalkboards.


How To Create Graphics In PicMonkey
- Open PicMonkey and scroll down to the bottom to Collage Layouts And Blank Canvases.
- Scroll down to the bottom to Print Sizes and select the size you want - I selected 6 x 4 inches for my graphic.
- On the left sidebar press the Graphics tab and scroll through the large selection of graphics that are available. You can select the seasonal menu like I did or type "pumpkins" in the search bar.
- Drag and drop the design elements into your canvas. Change the size by dragging your mouse on the corners.
- You have the option to remove the color from the graphics or leave them in. For this project, I chose to remove the color to save on printer ink.
- Press the Text tab and you'll see readymade options on the left sidebar or type your own and edit the font, size, and color to your liking.
- Once you are happy with your graphic design, press the Download tab at the top and save it to your computer.
- In your printer settings set the orientation to landscape and the paper size to 4 x 6 before printing the graphic.
If you'd like to use any of my graphics, click on the links below for your FREE unwatermarked download.
How To Transfer Graphics Onto Chalkboard
Now that you have your graphics printed, you'll want to separate the chalkboard from the base.
- You'll need a box of colored chalk unless you're doing white chalk art and preferably dustless chalk.
- Tape the graphic onto a window with the print side facing the window.
- Rub colored chalk over the graphic with each respective color.
- Tape the chalk side of the graphic onto the mini chalkboard.
- Pressing firmly, trace over the graphic with a pencil so the chalk transfers onto the chalkboard.
Option 1 - Sticks Of Chalk
Once you have the graphic traced, remove the paper and use a chalk sharpener to get a fine point on sticks of colored chalk. Go over the transferred graphic with each color. If you didn't use dustless chalk, blow on the chalkboard as you work to remove the chalk dust.
Option 2 - Chalk Pens
My preference is to use chalk pens because, unlike chalk, they won't rub off. Plus you get a more professional and crisp finish. The chalk art can easily be removed later with a damp cloth.
Now that we have the chalkboards finished, time to add a touch of fall to the pedestal bases.
How To Upcycle Dollar Store Chalkboard Signs For Fall
First I painted the stands in traditional orange fall color with paint that I had on hand.
Then I aged them by applying brown wax with a lint-free shop rag and wiping off the excess.
Last but not least, attach the mini chalkboards to the base and tie some natural raffia ribbon around it. Add your cute mini fall chalkboard signs to your autumn vignettes to wow your guests with your chalk art skills!
Thanks for stopping by the Interior Frugalista today! I hope you were inspired to make mini fall chalkboards to incorporate into your autumn decor this year.
Almost all of our DIY ideas have step-by-step tutorials so why not get your budget DIY on and subscribe. You can also find us on Pinterest, Facebook, Instagram, and YouTube.
If you have any questions about this chalk art tutorial, please leave them in the comment section below or the Contact Me tab at the top. I love hearing from you!
If you enjoyed this mini chalkboard idea for Fall, I'd be so thankful if you shared it with a friend and pinned it to your DIY Fall Ideas or Chalkboard Typography board on Pinterest.
I share my projects at these inspiring link parties.


So cute!
ReplyDeleteThank you Virginia, a fun little project for fall vignettes!
DeleteOmg, this is brilliant Marie! I love your little signs you made!!
ReplyDeleteTania
Thanks a bunch, Tania, I'm glad to finally put these little chalkboards from my daughter's wedding to good use. I still have a bunch more - Christmas. LOL
DeleteThis is really cool, Marie! And I learned something new on how to use PicMonkey, too! Thanks! I have a love-hate relationship with PicMonkey! I am a subscriber to the site but can't seem to use it fully. Every time I think of ways on how I want to use it, I end up being disappointed in not knowing how or being limited as to what I can do.
ReplyDeleteReally! and I'm the opposite, constantly seeing more ways I can use it to its fullest capacity. If you ever need help with something, don't hesitate to ask and hopefully I can walk you through. They also have video tutorials which I find helpful, have you checked any of those out?
DeleteSo cool! I've never used PicMonkey but it looks fun! Thanks for the tutorial :)
ReplyDeleteI LOVE PicMonkey, Sara, and as a matter of fact I'm working in it right now for our upcoming Int'l Bloggers Club challenge on Monday.
DeleteYour crafts are so cute, and after seeing them and hearing what else you make on your Cricut, I've decided to ask my husband for one for Christmas. :-) Thanks for sharing at the Sundays on Silverado Link Party, Marie.
ReplyDelete-Niky @ The House on Silverado
You will LOVE it Niky! I asked Santa for one every year for three years. Must've been on the naughty list. I was thrilled when he (well my kids) finally fulfilled my wish (he got me the Cricut Heat Press). LOL Finger's crossed you get one!
DeleteOmg !! Marie, I've been for searching for such a tutorial - I hope to use this technique. Thank you so much for sharing at Meraki Link Party.
ReplyDeleteNaush
So glad you found this tutorial helpful, Naush, and have fun getting your inner chalk artist on! It's especially fun during the holidays.
DeleteSuper cute Marie.
ReplyDeleteThank you Kris and sending hugs from Canada your way! xo
DeleteSuper cute Marie! I use the same transfer method when I want an really neat design! Thank you for sharing with us at Embracing Home and Family!
ReplyDeleteThanks Jenn! When I learned this transfer method a few years ago I was so excited to finally have professional looking chalk art on the chalkboards around our house.
DeleteMarie, this project is so adorable and looks fun to do. Love it!
ReplyDeleteThank you so much! It is such fun to create art on our chalkboard wall that looks so professional, especially for each season. I hope it helped you embrace your inner chalk artist!
DeleteThese pumpkin chalkboard signs are adorable, Marie! I'm so glad you shared them at Tuesday Turn About! I'm excited to be sharing them at tomorrow's party! Pinned!
ReplyDeleteI'm glad you like them, Julie, and I'm thrilled to hear they'll be featured at TTA! xo
DeleteI have used this same method and it works great. But I never think to use PicMonkey to create the graphic. So much easier that way. Thanks for sharing this week. #HomeMattersParty
ReplyDeleteI love PicMonkey for creating quick and easy chalkboard graphics (or any graphic for that matter). LOL
Delete