Easy Peasy Embroidery Hoop Pumpkin Wreath
You guys, I think I have a serious pumpkin addiction. When I go through all the fall ideas I've shared on the blog, every other project is related to pumpkins. It's no wonder Mr. Frugalista says our house looks like it threw up pumpkins!
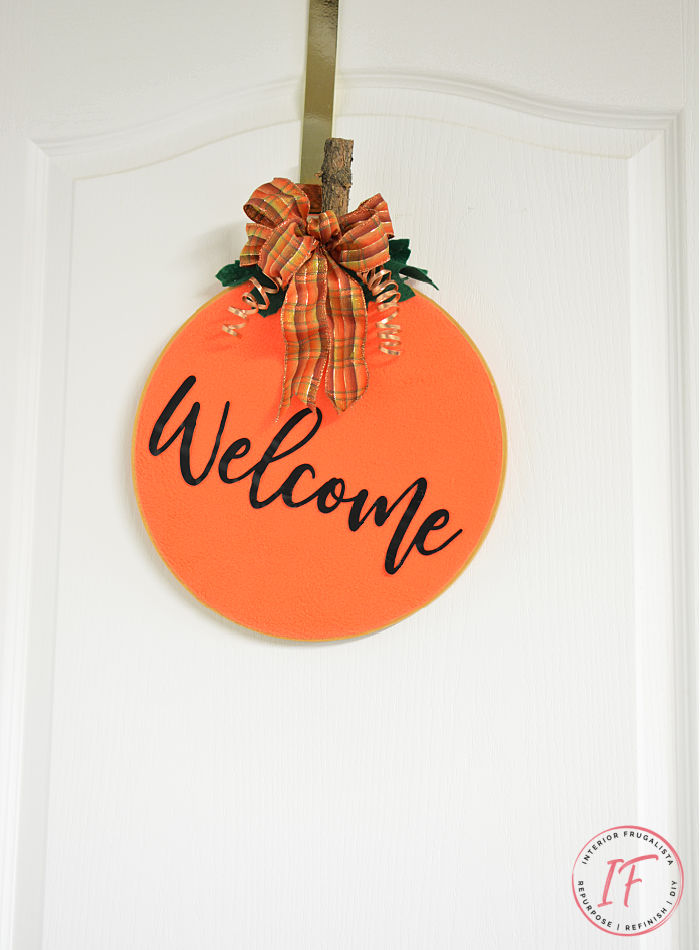
If you too are afflicted with the love of all things pumpkin, then I have an easy peasy embroidery hoop pumpkin wreath idea for you. It's a budget-friendly fall decor idea using recycled, foraged, and thrift store finds.
DIY Embroidery Hoop Pumpkin Wreath
But if you don't have everything you need to make this homemade autumn wreath, you're sure to find the rest of the supplies at the thrift store and/or dollar store.
What You'll Need To Make It
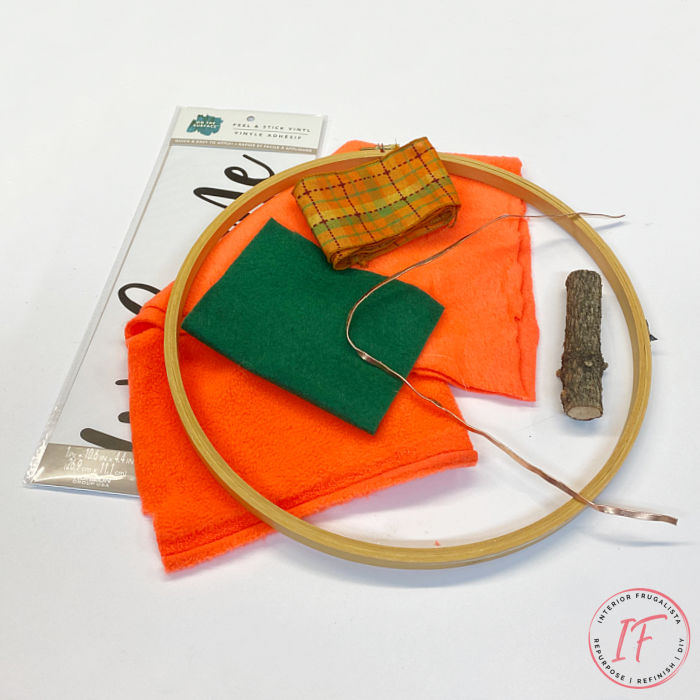
These are the supplies I used to make the fall embroidery hoop wreath. This post contains affiliate links so you can see what products I used or recommend for this project. As an Amazon Associate, I earn a small commission from qualifying purchases at no extra cost to you.
Supply List
Recycled Fabric
12 Inch Embroidery Hoop
Welcome Vinyl Sticker (alternatives)
Green Felt
Copper Wire
Or Natural Twine and White School Glue
Fall Wired Ribbon
Small Tree Branch Slice (foraged)
Hot Glue Gun
I hit the jackpot when I found this 12-inch embroidery hoop at Goodwill for $2. Wreath forms can be pricey so to save a buck look for old wreaths at the thrift store and strip them down to the wreath form.
How To Make The Pumpkin Hoop Wreath
Look in your closet or fabric bin for old garments in fall colors or patterns to use for the pumpkin wreath. Things like an old tablecloth, tea towel, sweaters, or flannel shirts.
The orange fleece I used is leftover from a Halloween costume I made my daughter several years ago.
Vinyl Welcome Banner
I found a Welcome peel and stick vinyl decal at Walmart several months ago. It's meant for wood, a flat surface, or fabric with no pile.
Ideally, making an iron-on heat vinyl decal with my Cricut Maker would have been better suited for fleece for better adhesion but I went with it anyway.
Alternatively, the vinyl decal could be attached to a wood banner instead and hung on the front of the wreath.
To attach the vinyl, place the inner embroidery hoop under the fabric and line up the vinyl so it sits in the center. Remove the hoop and then slowly peel the transfer paper from the back of the vinyl. Use a scraper to attach it firmly and then slowly peel away the clear top sheet.
At this point, you can paint the outer circle of the embroidery hoop if you like but I chose to keep mine the natural wood.
Stretching Fabric Onto Embroidery Hoop
- Separate the inner and outer circles of the embroidery hoop.
- Lay your fabric over the top of the inner circle.
- Set the outer circle over top and pull the fabric taut.
- Tighten the clasp on the embroidery hoop.
- Cut the excess fabric around the hoop.
- Tuck the remaining fabric on the back of the wreath form and hot glue it in place.
Pumpkin Leaves, Tendrils, And Stem
To make the pumpkin leaves I used some green felt that I had on hand. You don't have to use felt, any green fabric with or without a pattern would be fine too.
Fold the fabric in half so you end up with two leaves. Trace a leaf shape onto the fabric and cut them out.
Pinch the leaf together on the bottom and add a dab of hot glue to hold the 3D shape. Attach the leaves on either side of the embroidery hoop clasp with a hot glue gun.
For the tendrils, I used copper wire left over from the Black and Copper Pumpkin Topiaries. I wrapped the wire around a wood dowel to curl it and attached it to the top of the wreath with hot glue.
Alternatively, you could use twine dipped in white school glue and wrapped around a pencil until stiffened.
For the pumpkin stem, step outside and forage a small branch to hot glue onto the top of the embroidery hoop.
Add A Pretty Bow
Last but not least make a loopy bow with a wired fall ribbon for the top of the wreath. I can't make a bow if my life depended on it so I cheat and use this bow-making tool.
That's it, I told you it was easy peasy!
For more pumpkin inspiration you may like these 12 DIY pumpkin ideas that are easy on the wallet. Thanks for stopping by the Interior Frugalista today! I hope you found this pumpkin wreath tutorial easy to follow and were inspired to make a handmade wreath for Fall.
Almost all of our DIY ideas have step-by-step tutorials so why not get your budget DIY on and subscribe. You can also find us on Pinterest, Facebook, Instagram, and YouTube.
If you have any questions, please leave them in the comment section below or the Contact Me tab at the top to drop me an email. I love hearing from you!
If you enjoyed this easy embroidery hoop fall pumpkin wreath idea, I'd be so thankful if you shared it with a friend and pinned it to your Fall Wreath Ideas or DIY Fall Decor board on Pinterest.
I share my projects at these inspiring link parties.


I'm not afflicted yet, but you sure do inspire me to be - lol!
ReplyDeleteLOL, happy to hear you feel inspired, Sara! I seriously need to stop with the pumpkins already. LOL
DeleteSo simple and soooooooooo pretty too Marie. Simple easy crafts are always the best. Pinning
ReplyDeleteThanks Michelle, I'm sure enjoying the simpler and easier crafting. A nice break from the power tool projects!
DeleteHello Marie, the hoop wreath turned out beautiful. I love that you have a close up of the bow, I love how it turned out and it really catches ones attention.
ReplyDeleteThanks Jasmine! You may have noticed the ribbon in the supply photo and the actual ribbon on the wreath are different. Decided last minute that the wreath needed a little bling with copper metallics!
DeleteCute!! I actually have a large embroidery hoop that is just waiting for a craft. I think this might be it!
ReplyDeleteAwesome, Kim, glad you found inspiration here for your embroidery hoop!
DeleteSuper cute! You always have the best projects! THank you for sharing at Embracing Home and Family
ReplyDeleteYou're so sweet, thank you Jenn!
DeleteThis is so cute Marie, and so easy to make to boot! What's not to love? Thanks so much for sharing this with us at Farmhouse Friday!
ReplyDeleteThanks, glad you like it Michelle! It now hangs on my daughter's front door.
Delete