Unique DIY Concrete Succulent Planter
Today I'm sharing something I've never done before and it had me leaping outside of my comfort zone. I've made concrete stepping stones many years ago but never have I covered anything in concrete.
I had no idea if it was going to work, especially considering I was combining ceramics and wood. Always up for a challenge, I persevered and made this unique DIY concrete succulent planter.
Hand-Held Cement Succulent Planter
Here's where I started with these bits and bobs. If the hand looks familiar that's because you saw it in my Ombre Wood Bead Garland post last week before it was covered in concrete.
The hand is so tippy because the base isn't level and I've been wanting to mount it onto something for years. I figured our challenge this month was the perfect opportunity to finally get it done.
You may be wondering why I would cover a perfectly good ceramic hand with concrete. Well, today is our Int'l Bloggers Club challenge and the theme this month is cast in concrete.
While my hand isn't technically cast in concrete, it sure looks like it! I did, however, cast the hearts embellishing the planter in concrete.
If you haven't heard of our Int'l Bloggers Club, we are a group of blogging friends from around the globe who come together on the third Monday of every month to share a themed DIY project.
We have members from Spain, South Africa, Australia, the USA, and Canada. The theme for our last challenge was I Love Resin and I shared how to make Damask Resin Drink Coasters for beginners.
The hand used to hold a clear acrylic photo frame and I have no idea where it went. I rummaged through my stash to find something else for the hand to hold. When I found a small wooden box missing a lid the concrete planter idea was born.
Everything about this concrete craft is faux, faux, faux. From the faux cast concrete to the faux succulents. Real ones wouldn't stand a chance with my brown thumb.
Before we get into the nitty-gritty of how to make the DIY cement planter, almost all of the DIY projects shared here at Interior Frugalista have step-by-step tutorials so why not get your budget DIY on and subscribe. You can also follow us on Pinterest, Facebook, Instagram, and YouTube.
Okay enough with my blabbering, let me show you how I did it.
Here's How I Did It
This post contains affiliate links so you can see what products I used or recommend for this project. As an Amazon Associate, I earn a small commission from qualifying purchases at no extra cost to you.
Once I had the square wood plaque and the wooden box glued to the hand with Gorilla contact adhesive, it was time to play with some quick set premixed concrete and artist palette knives.
Covering The Bits And Bobs In Concrete
I'm not going to lie, this step was TEDIOUS applying thin layers of the quick-set concrete and waiting for it to dry between coats.
Having never covered anything in concrete before, I found it challenging to layer the cement perfectly smooth. I'm not sure but perhaps it was the type of ready mix concrete I used. I smoothed it as best I could with palette knives but it still went on rather rough.
In hindsight, I wonder if it would have been easier to dip the hand into the bucket of concrete instead. Pictured below is after the first layer while it was still wet.
Smoothing The Concrete
It took three or maybe it was four coats (I lost track after the second) to get full coverage. Once the last layer was completely dry, I attempted to smooth the concrete with water in a misting spray bottle and wet/dry sandpaper.
I tried several different grits of sandpaper and found the 80 and 120 grit worked the best. It took some time to smooth the dried concrete and I probably could have gotten it smoother had I persisted. I worked at it slowly over the span of a few days.
It's not perfect but I decided to embrace the imperfections and declare it has a time-worn patina. 😏
Cast Concrete Hearts
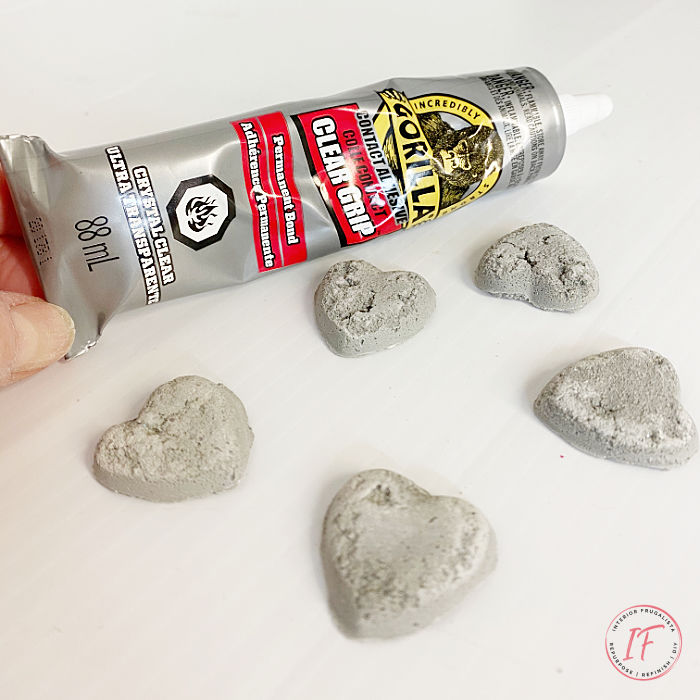
I did do some cast concrete by making small concrete hearts to embellish the small planter box. I made them with plastic heart molds that I had on hand but I highly recommend using silicone heart molds instead.
On some of the hearts, I placed a small dowel at the top to make holes. I'll be using them in an upcoming project. Ignore my feeble attempt at making concrete votive candle holders pictured in the background above. After four days the concrete was still sopping wet inside the plastic containers.
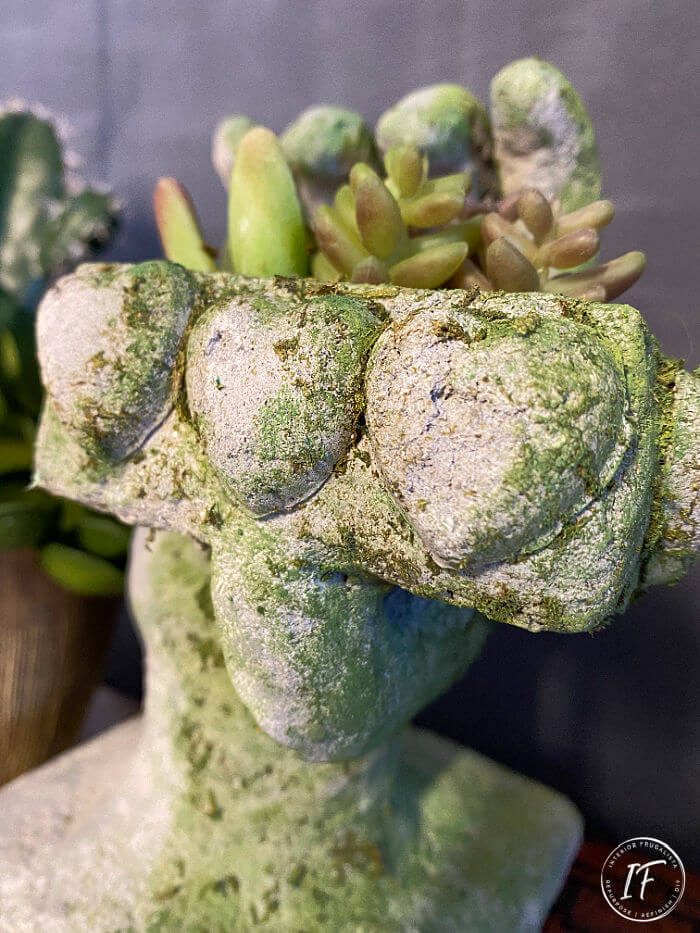
Next, I attached the concrete hearts to the planter with Gorilla contact adhesive.
Adding Moss To The Concrete Planter
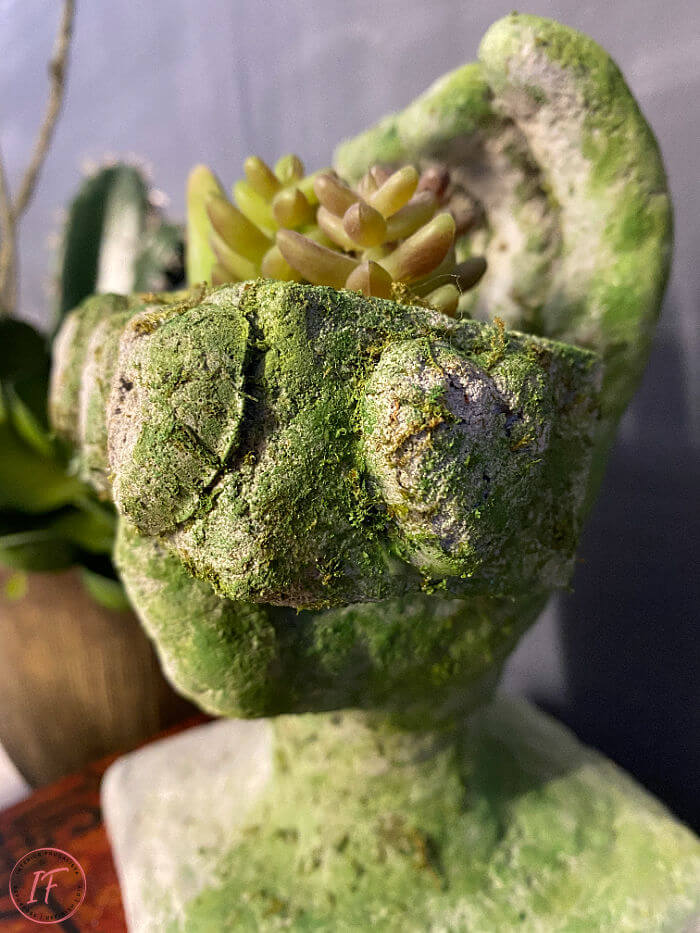
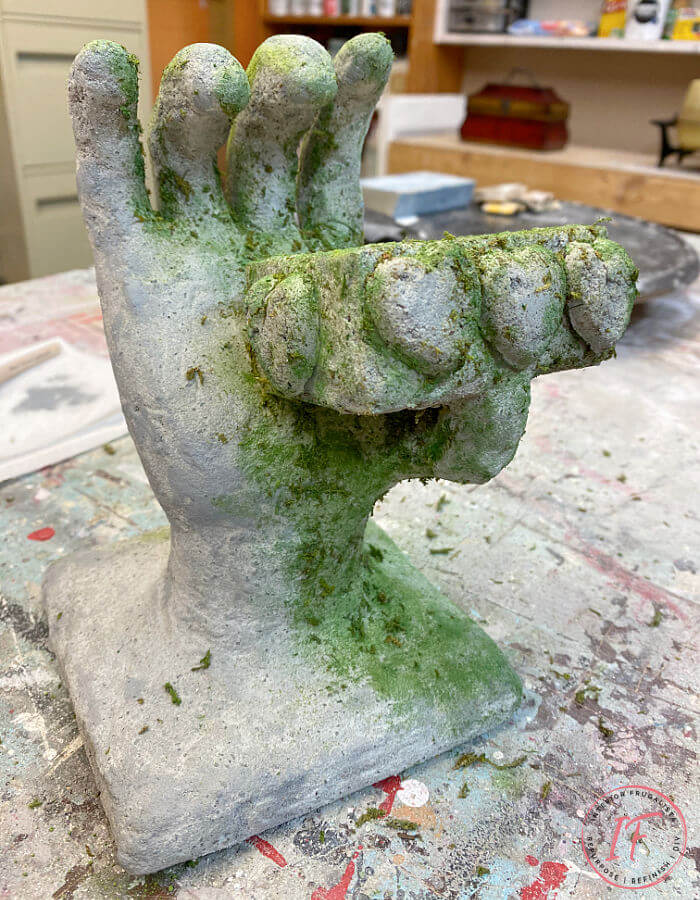
After allowing the glue to cure for a few hours I got busy adding real and faux moss to the cement hand succulent planter.
Working in sections, I brushed generous amounts of white school glue and then dabbed ground dried moss over top. To grind the dried moss into more of a powder I used a mortise & pestle.
I strategically added the moss to what would naturally be the shaded parts of the concrete hand statute.
Once again working in sections, I lightly misted the area with water and brushed french sage artisan powder with an art brush.
Adding Faux Succulents
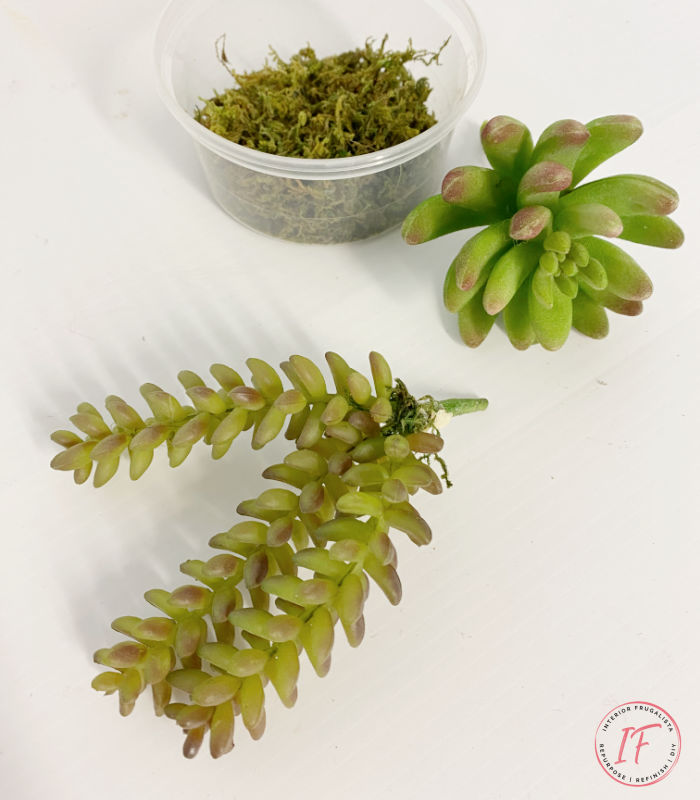
Last but not least, it was time to add the succulents. I cut a small piece of florist foam to fit inside the planter box. I covered the foam with a layer of dried moss. Then I trimmed the faux succulents to fit the scale of the box and poked the wire through the foam.
It was a fun project, despite stepping way out of my comfort zone. Now that I've tried my first attempt at covering decor with premixed concrete, I decided to try another faux concrete option. You can find those two thrift store upcycles here in my Faux Concrete Paper Mache Bunny and Faux Concrete Ceramic Bust Statue posts.
Thanks for stopping by the Interior Frugalista today. I hope you were inspired by the DIY Concrete Succulent Planter. If you have any questions, please leave them in the comment section below or the Contact Me tab at the top to drop me an email. I love hearing from you!
If you enjoyed this Concrete Hand Succulent Planter, I'd be so thankful if you shared it with a friend and pinned it to your DIY Concrete Decor Ideas or Succulent Planter Ideas board on Pinterest.

Now let's see what my talented friend's made for our Cast In Concrete challenge by clicking the links below.
DIY Rustic Avocado Sailboat | A Crafty Mix
Zen Styled Garden Decor | Unique Creations By Anita
How To Make A Cement Planter | Birdz Of A Feather
DIY Vintage Farmhouse Faux Concrete Eggs | Raggedy Bits
How To Make A Cement Block Garden Planter | What Meegan Makes
Unique DIY Concrete Succulent Planter | Interior Frugalista
I share my projects at these inspiring link parties.









Be still my little planter loving heart, I would never have thought of painting concrete mix onto an existing form, but it makes total sense and the result is gorgeous. It really looks like you cast the hand and the planter. And here's me trying to figure out how on earth you managed to cast such a complex shape :D Love it Marie
ReplyDeleteP.S. try making small holes in the bottom of the votive candle holder containers. It will help drain any excess water so the concrete can cure ;-)
Girl, did you hear me all the way over in SA asking, "what would Michelle do to add moss to the concrete statute?" This one had me sweating a little but I'm so glad it worked out in the end. THANK YOU for the great tip! Dang, I tossed them in the trash but I still have some leftover concrete so perhaps I'll do a take two on the votive holders.
DeleteWOW I'm very impressed! I have not seen this before, You did a wonderful job
ReplyDeleteJanice
Thank you very much, Janice, I'm glad you like this idea! I'm now hooked and want to try it on a few other thrift store finds I have in my stash. Fun fun fun. LOL
DeleteThis turned out so cool and totally unique. I love every thing about it and will be looking up the quickcrete, that would have worked easier for me. I also tried a hand planter at first but it was a total flop. I will send you a photo so you can have a giggle.
ReplyDeleteThank you very much Anita, that means a lot coming from the talents of you! Your concrete project is AMAZING and I want to try something similar for our backyard this summer. I'm sure your hand planter was better than you think, you've piqued my curiosity and I look forward to seeing the photo.
DeleteThis is so cool Marie! I love it, pinned!!
ReplyDeleteTania
Thanks Tania, I'm glad you enjoyed my quirky idea and appreciate the visit and pin!
DeleteCool project!
ReplyDeleteThanks so much!
DeleteI am so glad you shared this tutorial, Marie. I was wondering if you could add cement to an already made form. You answered my question perfectly.
ReplyDeleteI have a vase that I have been wanting to try this method with but unsure of the results.
The addition of the moss put it absolutely over the top for me. I just LOVE me some moss anytime I can use it.
Have a wonderful week.
I'm thrilled to hear my tutorial was helpful, Meegan, and I can't wait to see your vase when it's done! I'm going to try covering more thrift store decor in concrete to see if I can perfect the smoothness factor. Have fun with your vase!
DeleteAnd you nailed it!!! What a brilliant first time cement project! So creative project and they would make lovely gifts too using lots of different items!
ReplyDeleteThank you, Sam! Now that I've given it a whirl I'd like to try covering more thrift store decor in concrete. I already have a few items in the queue for garden decor.
DeleteHow cool! I would never have the nerve to try this! What fun to be in an international blogger's group...
ReplyDeleteJenna
I almost didn't have the nerve to try it either, Jenna. I'm glad I persisted, even though it was over several days. Now I want to concrete all.the.things. LOL Thanks for stopping by today!
DeleteThis is so unique and special. Thank you for showing how to add concrete to the outside of an object. The moss is just a perfect final step. Pinning.
ReplyDeleteThanks Leanna, I'm not sure if I used the best type of concrete and I'm going to try covering more objects with different types to see which works best. It was fun stepping out of my comfort zone on this one though.
DeleteThat turned out great Marie! You'd never guess there was a ceramic hand under there. Awesome!
ReplyDeleteThanks Tuula, it was a fun and intimidating project but now I want to concrete all.the.things!
DeleteSuper cool Marie. You are so creative and have such vision. Love this. Happy New Week. xoxo
ReplyDeleteKris, you made my Monday morning! Thank you for your sweet words and happy new week backatcha my friend xo
DeleteThis is so crazy creative Marie! I love all the concrete texture you added and how you gave it a fresh feel with patina too. It's so cool. Definitely pinning this so I can try it as well. It turned out great! Hugs, CoCo
ReplyDeleteThank you very much, CoCo, I'm glad you like my quirky idea! I enjoyed this concrete craft so much that now I want to concrete all.the.things. LOL I hope you have as much fun playing with premixed concrete as I did. Hugs backatcha
DeleteThis turned out really cool. Now I'm looking around to see what I can turn into a concrete sculpture. Thanks for sharing!
ReplyDeleteAwesome Denise, I'm glad you like this idea. Have fun creating your own concrete sculptures! I plan on making more too because it was such fun.
DeleteNo need for apologies, Marilyn, thank you so much for the share and pin! Have a lovely Sunday. xo
ReplyDeleteLove this, Marie! A concrete project has been on my mind for a few years, too. Maybe I'll get to it this spring! Pinned.
ReplyDeleteThank you Debra! I'm hoping to try an outdoor poured concrete project this Spring but haven't a clue what yet.
Delete