Simple Vintage-Style Valentine Heart Banner
Do you decorate your home for valentine's day? Are you like me and keep it simple and the valentine's decor budget at a minimum? If so then you'll probably like this budget-friendly valentine mantle idea.
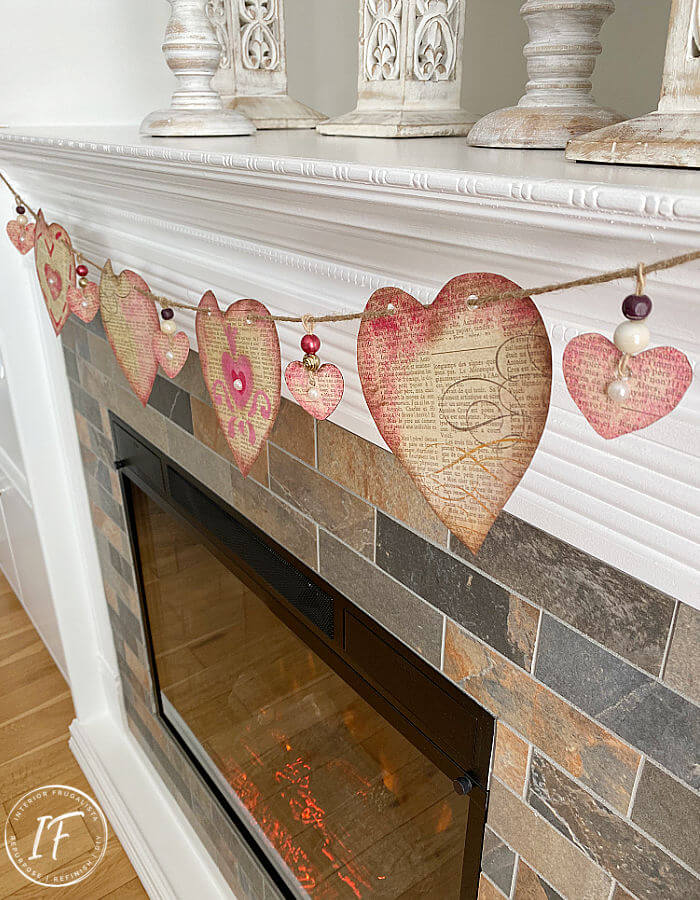
This simple vintage-style valentine heart banner with Victorian charm is made with scrapbook paper. If you are a crafter, you may have everything to make it on hand.
Vintage-Inspired Paper Heart Garland
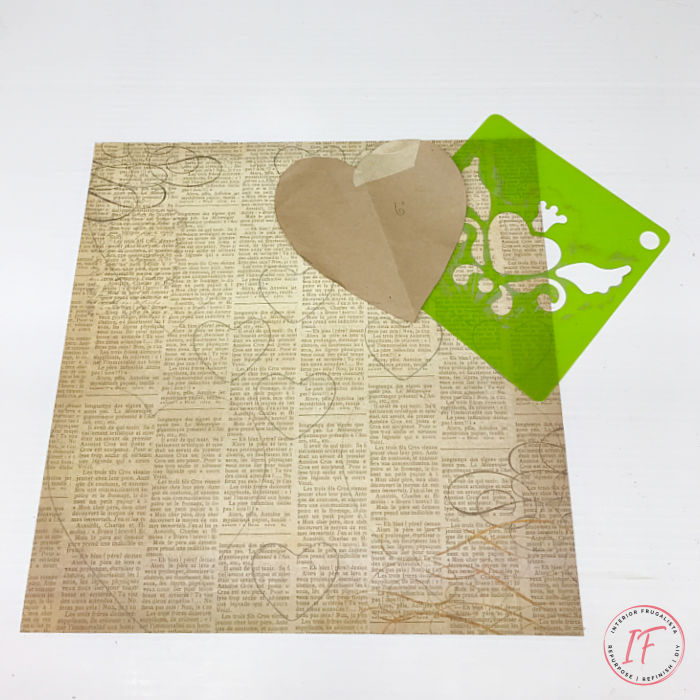
It all started with a sheet of vintage-style newsprint scrapbook paper that I had in my stash. I thought it made the perfect backdrop for the heart-shaped banner flags to give it a vintage look. Alternatively, you could use pages from an old book or sheet music instead.
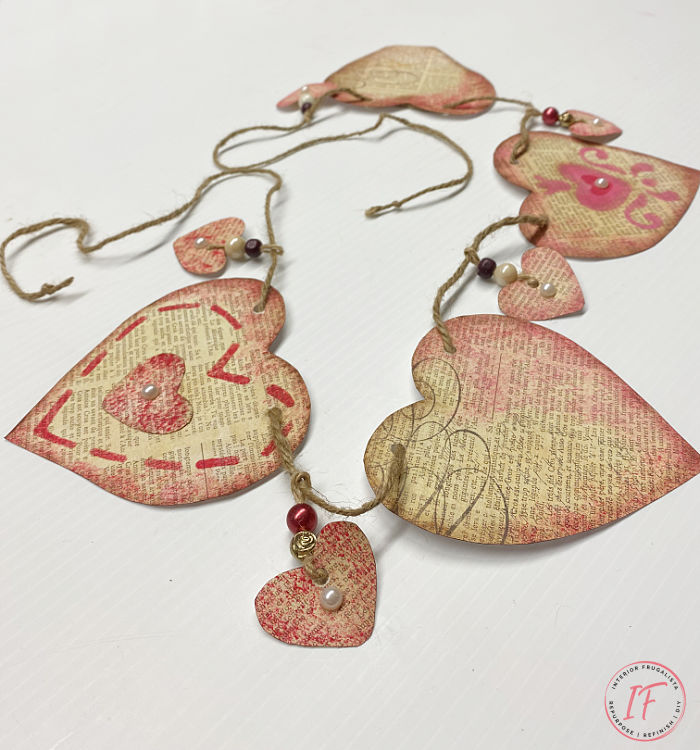
Distressing the hearts with traditional pink and red gives them a shabby chic finish and aging the edges with brown paint adds to the vintage charm.
Some of the larger hearts were turned into love hearts for valentine's day with cute stencils. But a feminine touch was added to the paper hearts with pretty pearl beads.
I think the simple twine works well with the aged paper hearts and adds a little rustic charm. But the beaded hangers for the small hearts give the garland a lovely Victorian charm.
Before we get into the nitty-gritty of how to make the valentine paper heart garland, almost all of the DIY projects shared here at Interior Frugalista have step-by-step tutorials so why not get your budget DIY on and subscribe. You can also follow us on Pinterest, Facebook, Instagram, and YouTube.
Here's How I Made It
This post contains affiliate links so you can see what products I used or recommend for this project. As an Amazon Associate, I earn a small commission from qualifying purchases at no extra cost to you.
Making the paper heart garland is quick and easy. The hardest part is narrowing down your vintage scrapbook paper choices.
Trace Heart Shape Banner Flags
Once I chose the vintage newsprint scrapbook paper then I went through my stencil stash to find heart stencils to use as templates. I didn't have a large 6-inch heart stencil so I made a template with craft paper. Trace four 6-inch hearts and six 2-inch hearts with a pencil on the scrapbook paper. Don't cut them out just yet.
Paint And Stencil Banner Hearts
With a small stencil brush or art brush, pounce red acrylic craft paint along the inside perimeter of the pencil line on each heart. Offload some of the paint first by dabbing it onto a paper towel.
Once the red paint is dry to the touch repeat with the pink acrylic craft paint, extending it a little towards the center (like pictured below). There are no rules, we're essentially shading the hearts with traditional valentine colors.
Next, we'll add a valentine touch by turning two large heart-shapes into love hearts with red craft paint and seasonal stencils.
Age Painted Banner Hearts
Once the paint is dry, cut the hearts along the pencil line. Now we'll age the painted hearts by pouncing burnt umber acrylic craft paint along the edges (as pictured below). Less is more so again offload some of the paint by dabbing the brush onto a paper towel or craft paper in my case.
Embellish Heart Banner Flags With Pearls
Here's where we'll add a feminine touch to the center of the hearts with pearl bead stickers found at the dollar store.
Hole Punch For Stringing Banner
We're going to make two holes on the top of the large hearts and one on the small hearts with a hole punch. But first, for added reinforcement place a small piece of masking tape on the back before punching the holes.
You won't see the tape once the banner is hanging unless you plan on hanging it on a mirror. If that's the case you may want to use white tape instead.
Beaded Heart Banner Hangers
Before we string the hearts on the twine this is where we'll add a Victorian touch to the banner with beaded hangers for the small hearts.
I rummaged through my costume jewelry and found a few beaded bracelets that I never wear. To make the beaded hangers string two beads with twine and a large eye embroidery needle.
Thread it through both beads from the bottom and then through the top again to form a loop. Thread one piece of the twine through the hole on the front of the small hearts (like pictured below).
Tie the two strands together on the back of the heart with a double knot. Leave a bit of a tail when you cut the twine and hold them in place with hot glue (like pictured below).
Now we're ready to string the hearts onto the twine.
String Twine Through Heart Banner
Cut a piece of twine around 60-inches long. Depending on where you plan on hanging the valentine banner you may have to increase the length and perhaps the number of hearts.
I like to switch things up from year-to-year so where I hang the garland this year may not be where I hang it next year. For this reason, I like to leave a tail trailing on either end. Better to have the twine too long than too short.
To make the twine easier to string through the holes wrap a piece of tape on one end. Start with one of the small hearts and thread the twine through the loop on the beaded hanger.
Next, thread the twine from the front of a large heart and behind, and then through the bottom of the next hole. Repeat the pattern until all the hearts are on the garland.
Remove the tape on the one end of the twine and hang your DIY paper valentine garland. Adjust the space between each heart and enjoy your new banner!
Here's another vintage-style paper banner idea for Spring that you may like made with dollar store finds. For more heart day inspiration visit our DIY Valentine Ideas page.
Thanks for stopping by the Interior Frugalista today! I hope you were inspired by this valentine banner idea. If you have any questions, please leave them in the comment section below or the Contact Me tab at the top to drop me an email. I love hearing from you!
If you enjoyed this cheap valentine's decor idea, I'd be so thankful if you shared it with a friend and pinned it to your DIY Valentine Decor or DIY Paper Garland Ideas board on Pinterest.

I share my projects at these inspiring link parties.


We don't go overboard with our valentine's decor either, I suppose it's natural when two old farts have been together for as long as the Hubby and I have ;-) but I do enjoy making him a card and you've just given me such a great idea for one and I have all the stuff I need to. So thanks for that Marie
ReplyDeleteYup, totally natural for us two old farts in the empty nest who have been together for 30+ years too. Once the kids left the roost I totally scaled down the valentine's decor. I'm so glad to hear you found inspiration from this banner for hubby's valentine's day card!
DeleteI absolutely love how your heart banner turned out Marie! Soo pretty, and pretty easy too. I don't do much for V Day, but I do like to have a few hearts around. It's fun to create with them. Love that you used jute twine. It's goes with everything.
ReplyDeleteThank you so much, Tuula! Yes, I completely agree that it's nice to have some hearts around for valentine's day and while being stuck at home these days.
DeleteThat is just fabulous. I'm a banner junkie and this one is lovely!
ReplyDeleteFrom one banner junkie to another - THANK YOU! xo
DeleteSo pretty with the colored edges and spots!
ReplyDeleteAlexandra
EyeLoveKnots.com
Thanks Alexandra! It speaks to my vintage loving heart. LOL
DeleteThese are really cute and I love the touch of the pearls. Have a good weekend. xoxo
ReplyDeleteThank you Kris! I hope you are staying warm this Sunday morning. We woke up to -33C (-27F) temperatures this morning. Dang cold!
DeleteI love this so much! Thanks so much for sharing this at the Sundays on Silverado Link Party! It is being featured tomorrow! XOXO
ReplyDeleteNiky @ The House on Silverado
I'm glad you like it, Niky and thrilled that it's being featured - thank you!
DeleteI love this. You used a sheet of newsprint but they could easily be made with pages from old books.
ReplyDeleteThank you Janet, I'm glad you like it! Absolutely you could use pages from old books or even music sheets for the banner.
DeleteSo cute, Marie. And the way you embellished them makes it pop even more. I'm featuring it at tomorrow's FWF party!
ReplyDeleteHugs,
Rachelle
I'm glad you like the banner Rachelle and thank you so much for the feature! xo
DeleteMarie this is a darling project!
ReplyDeleteMarie, this is beautiful! I love your Valentine's banner and all of the details you added! Thank you so much for sharing at Tuesday Turn About! Wishing you a wonderful weekend! xo
ReplyDeleteThank you so much, Lynne, it was fun to make. Wishing you a wonderful weekend too!
DeleteSo pretty! Pinning.
ReplyDeleteThank you Virginia, and the pin!
DeleteI LOVE your paper heart garland, Marie! It looks so vintage! Pinned, and I'm so happy to be able to feature you at this week's Tuesday Turn About! Woot!
ReplyDeleteAwe, I appreciate your sweet comment, pin, and the feature. Thank you so much, Julie! xo
DeleteThis garland is adorable! I don't decorate for Valentines Day, but I think I could manage this sweet garland. Thanks for sharing :)
ReplyDeleteI don't decorate much for Valentine's Day either Cindy so hanging a garland is taking my decorating way over the top. LOL
DeleteI just saw you are featured on Tuesday Turn About this week Marie! Congrats!
ReplyDeleteThanks Cindy, I'm thrilled to be featured there and a few other parties this week!
Delete