DIY Dollhouse Miniature Clocks In Two Styles
It's been a long time since I posted a dollhouse update. It feels great to be playing in the land of miniatures again. This time I had fun with an upcycled miniature grandfather clock along with repurposing a jar lid for a DIY dollhouse wall clock.
Miniature Grandfather Clock and DIY Wall Clock
Our miniature fixer-upper dollhouse began when we found an IKEA Billy Bookcase at our local Salvation Army Store for $14.99 to gift to our granddaughter. The goal for the dollhouse is that everything, including the dollhouse, is either repurposed or a DIY project.
You can find the other dollhouse miniature ideas on our dollhouse page. It even has a realistic miniature fireplace with a flickering flame.
The motivation for the miniature dollhouse clocks started with a trip to Goodwill where we found a miniature german grandfather clock for $3.50. All the mechanisms are still intact but unfortunately, the clock no longer works. In my books, that makes it fair game for a makeover.
According to my research, these handpainted clocks were made in West Germany in the 1950s. As I mentioned earlier, they are a collector's item and sell for at least $50, without the key.
Even though it no longer works, I'm sure for a price the clock could be repaired. But we decided not to pursue that route and instead give it a makeover for our granddaughter's dollhouse.
Miniature Grandfather Clock Makeover
So let's get started with the DIY dollhouse miniature clocks in two styles. If you are a collector, you may want to stop reading here because I'm about to share how the german clock got a farmhouse-style makeover.
This post contains affiliate links so you can see what products I used or recommend for this project. As an Amazon Associate, I earn a small commission from qualifying purchases at no extra cost to you.
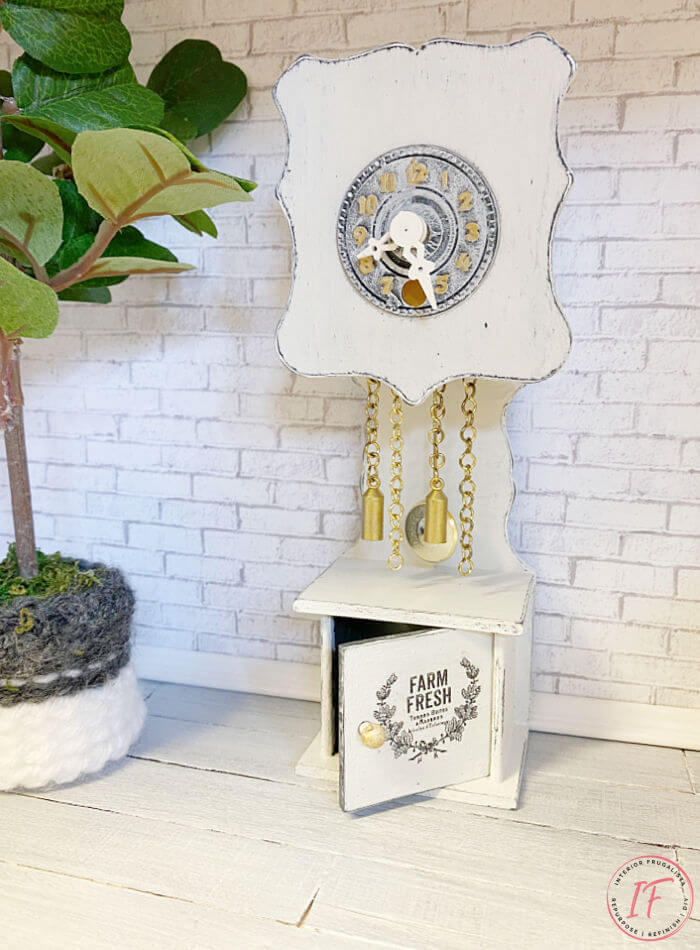
I decided to give the grandfather clock a simple white makeover with a farmhouse-style charm.
In order to cover the floral details, the clock was primed first with a white stain-blocking primer.
Next, it was painted with one coat of black FAT Chalk Style Paint in the color Raven that I had on hand. This acts as a base coat for distressing later. I painted the blue plastic clock face too.
Once the black base coat was dry I painted it white with two coats of Dixie Belle Paint in the color Fluff. To distress the finish, I used 220-grit sandpaper along the edges so the black base coat showed underneath (pictured below).
With a small art brush, I painted the numbers on the clock face and the wooden knob on the lower door with gold metallic craft paint.
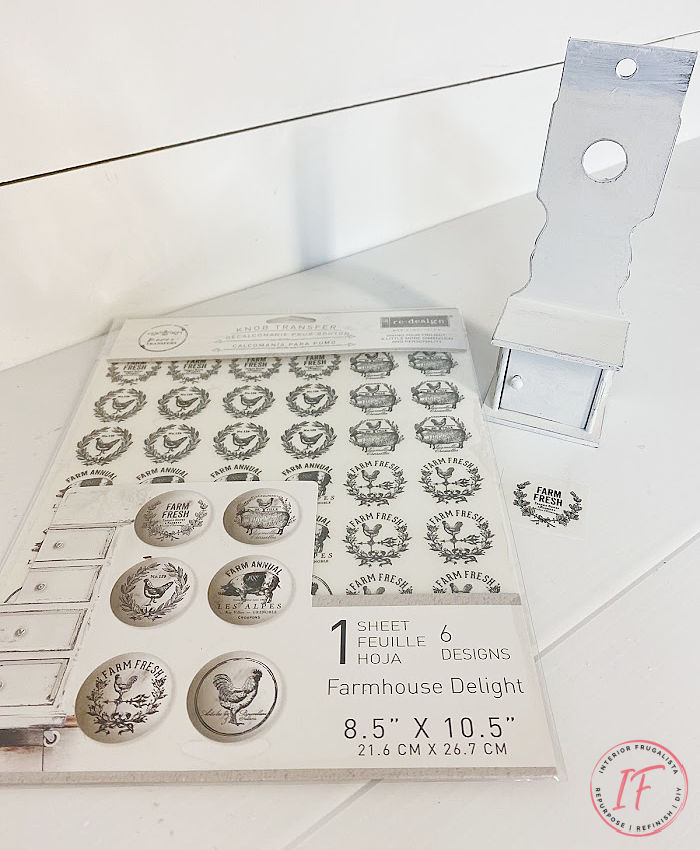
To add farmhouse charm I rubbed a farmhouse delight knob transfer onto the front of the bottom door.
Had the 1950s German grandfather clock still worked, I would have kept it in its original condition. But I think it looks pretty darn cute with its new look.
Next up is how I made the easy peasy DIY wall clock for the dollhouse kitchen.
DIY Dollhouse Miniature Wall Clock
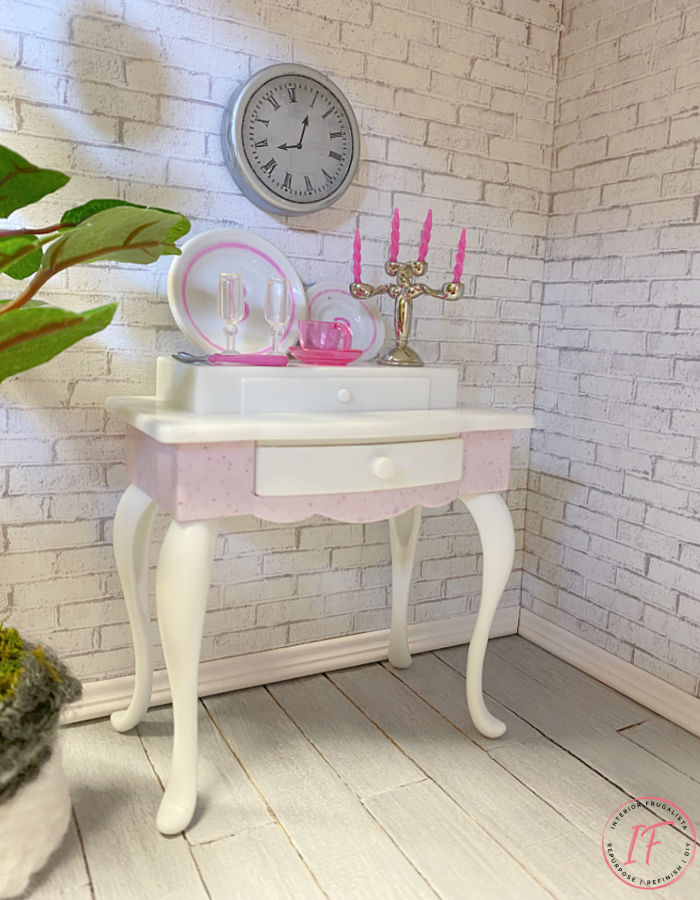
I save everything in all sizes that have paint storage potential. On a shelf in the workshop were some empty Scentsy melt sample jars. I realized the size of the lid with the silver rim would be perfect to repurpose into a miniature wall clock.
All that I had to do was add a clock face and so I set out to make a clock face decal for the front of the glass.
How To Make A Miniature Clock Face Decal
It's so easy to make small decals for glass and I'm sharing the simple steps below.
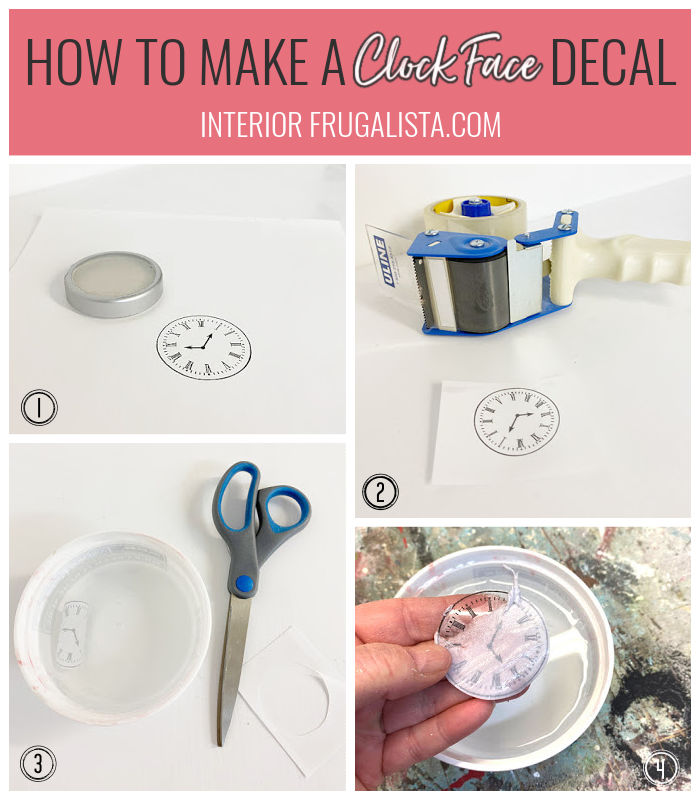
- You can find numerous clock face printables in different styles online with a quick Google search. Once I found one I liked I changed my laser printer settings to resize the graphic to fit the jar lid.
- Once printed trim around the clock face and run a piece of clear packing tape over the graphic.
- Place it into a bowl of warm water just long enough for the paper to get wet.
- Rub your fingers to remove the paper from the back of the tape. The tape should still be sticky on the back.
If the tape lost too much adhesiveness, apply a thin coat of Mod Podge or white school glue onto the glass to secure the decal. It will dry clear.
See, told you it was easy!
Before we get into the nitty-gritty of both dollhouse clocks, almost all of the DIY projects shared here at Interior Frugalista have step-by-step tutorials so why not get your budget DIY on and subscribe. You can also follow us on Pinterest, Facebook, Instagram, and YouTube.
Thanks for stopping by the Interior Frugalista today! I hope you were inspired by these miniature dollhouse clock ideas.
If you have any questions, please leave them in the comment section below or the Contact Me tab at the top to drop me an email. I love hearing from you!
If you enjoyed the dollhouse clocks, I'd be so thankful if you shared it with a friend and pinned it to your Dollhouse Miniatures or DIY Dollhouse Accessories board on Pinterest.
I share my projects at these inspiring link parties.


Marie,
ReplyDeleteI am blown away by this!! I love my doll house but i bought everything for it because i could not imagine working with something on this small scale..I do not have the fine motor dexterity to do so...I am amazed at your talents!! I can't believe that i actually finished that photo organizing project...It only took me decades to do so!!!
Thanks so much for taking the time to stop by and by letting me know that you did by leaving such a sweet comment!!
Stay safe, healthy and happy!!
Hugs,
Deb
Thank you for your sweet comments, Deb! I'm honored you feel this way about the dollhouse clocks considering your amazing doll house. Oh believe me, I struggle with the fine motor dexterity too so my skills are limited.
DeleteSo cute!! I've got to get busy on my dollhouse again!
ReplyDeleteTania
Thanks Tania! I've got to working on the kitchen. It has no cupboards or appliances yet and my grandkids keep reminding me of that when they visit. LOL
DeleteA girl after my own heart....very cute clocks, both of them. I know I made two with sticker faces...which was super easy. Lots of fun for your Grand and you! Sandi
ReplyDeleteThanks Sandi, means a lot coming from you who I consider the Queen of Dollhouse Miniatures!
DeleteOh...I didn't know you had a dollhouse! I have one in the basement that needs restoring. Your clocks are making me want to get started right away...they're perfect!
ReplyDeleteYes, I repurposed a Billy bookcase for my granddaughter. The plan is to gift it to her on her third birthday but at this rate it may be her fourth. LOL You definitely should get to that restoration, it's so much fun!
DeleteAwwwww, they're just so flippin cute. The both of them. The little German one that you gave a farmhouse makeover looks like the real thing, Marie. What a lucky find and you just gave me such a great idea for a future post too. Thank you. Pinned
ReplyDeleteThanks a lot Michelle, means a lot coming from the Queen of Miniatures!
DeleteI love theses updates on the dollhouse Marie! These miniature clocks are so darn charming and cute! I had no idea these miniatures were collectables or really worked in some cases!!! Learned something new. 🤗
ReplyDeleteThank you Denise, miniatures are about the only furniture makeovers I'm doing these days. 😉 They take up far less room. LOL It was such fun giving the clock a a mini makeover with big furniture style. I wish the clock was in working condition, I would have loved to see it in action.
Delete