Faux Concrete Glossy Black Ceramic Bust Statue
Nothing goes to waste around here! I had some faux concrete mixture leftover from the paper mache bunny makeover and couldn't let it go to waste. So I dug through my thrift store stash in search of something else to cover in concrete and found this pretty lady. I have no idea who she is but she’s been hiding in a box for years.
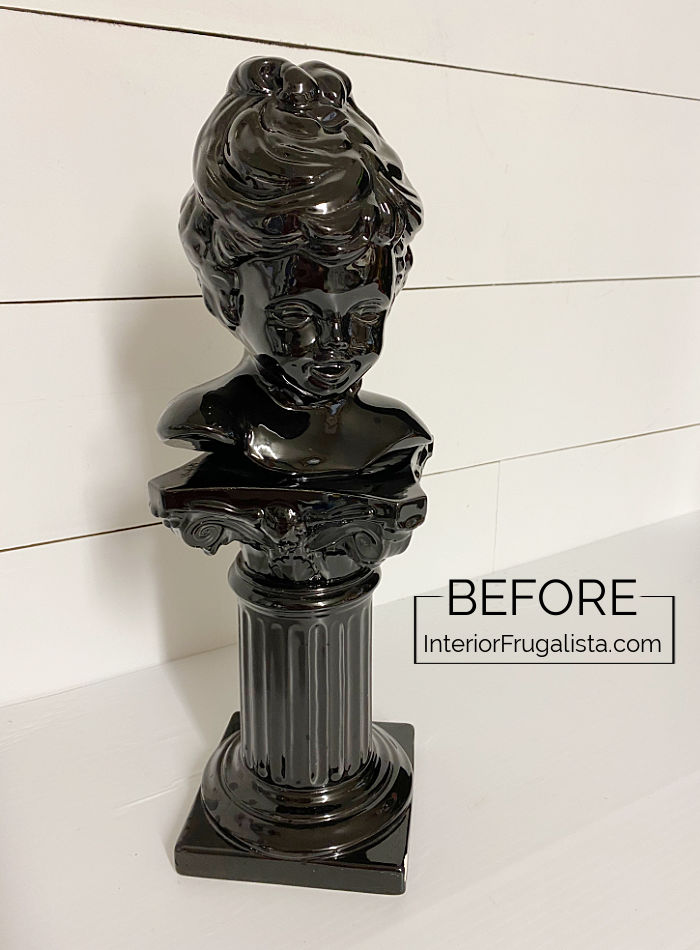
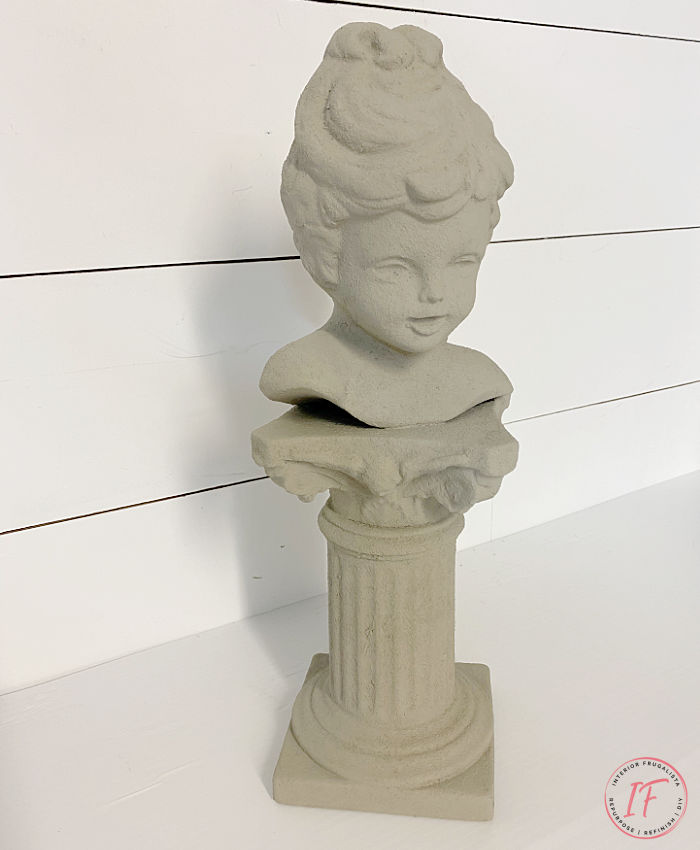
Found at Goodwill, this high gloss black Scioto ceramic bust had a few chips on the bottom making it the perfect candidate to get concretized (is that a word?). Now after the faux concrete bust statue makeover, she looks just like the real thing!
Faux Concrete Scioto Ceramic Bust Statue Makeover
If you have dated decor that you no longer have on display, this is a great way to breathe new life into it again. It's a fairly quick makeover process and before you know it you'll have that old decor looking like a cement garden statue in no time.
This is what this sweet lady looked like before the makeover.
And here she is now, looking just like a real cement garden statue.
Before we get into the nitty-gritty of how to turn thrift store finds into faux concrete, almost all of the DIY projects shared here at Interior Frugalista have step-by-step tutorials so why not get your budget DIY on and subscribe. You can also follow us on Pinterest, Facebook, Instagram, and YouTube.
What You'll Need To Make It
This post contains affiliate links so you can see what products I used or recommend for this project. As an Amazon Associate, I earn a small commission from qualifying purchases at no extra cost to you.
Supply List
- Small Bust Statue (or thrift store decor)
- Dixie Belle Sea Spray Texture Additive
- French Linen Annie Sloan Chalk Paint
- Paris Gray Annie Sloan Chalk Paint
- Pure White Annie Sloan Chalk Paint
- Black Acrylic Craft Paint
- Chip Brush
- Water-based Clear Coat (Exterior Grade for Outdoors)
If the paint I used is not readily available in your area, any water-based paint in similar colors is fine.
Here's How I Did It
Step 1 - Faux Concrete Mixture
Mix 1/2 cup of French Linen Annie Sloan Chalk Paint to 1 scoop of Dixie Belle Sea Spray Texture Additive. Mix it well until it looks like brownie batter consistency.
Step 2 - First Faux Concrete Color
With an inexpensive chip brush pounce (stipple) a layer of the texture mixture. You can see in the photo below, you'll need a couple of coats to hide the original finish. Allow it to completely dry before applying the second coat.
Apply the second coat much like you did in the first. The texture additive gets tacky as it dries and this is a good time to knock down any texture that is too pronounced. Pictured below is after the second coat had dried.
Step 3 - Second Faux Concrete Color
Now we're going to add texture and a second lighter gray color to get the variegated look of real concrete.
Without adding more sea spray to the French Linen mixture, add one scoop of Paris Grey and one scoop of Pure White Annie Sloan Chalk Paint to lighten the color.
Instead of pouncing it on like the first two coats, randomly swipe the brush in sideward motions over the raised areas of the bust, letting it go on a little thicker in some areas. Basically highlighting those areas, while not covering the French Linen color underneath.
Step 4 - Let The Paint Fly
Next, pour a few drops of black acrylic craft paint onto a paper plate and thin it a little with a drop of water. Dip an old toothbrush into the paint and flick the paint randomly, less is more.
Oh, and before you go flicker happy, make sure everything within a few feet around you is covered in drop sheets.
Step 5 - Protecting The Finish
Last but not least, brush or spray a water-based clear coat to seal the faux concrete. If you'll be using yours outdoors, then you'll want to use an exterior-grade sealer.
That's it! From Goodwill ceramic female bust to lovely concrete garden statue that no one will know isn't the real thing. A few months ago I also turned a ceramic hand sculpture into a faux concrete succulent planter.
Thanks for stopping by the Interior Frugalista today! I hope you were inspired by this ceramic bust statue transformation. If you have any questions, please leave them in the comment section below or the Contact Me tab at the top to drop me an email. I love hearing from you!
If you enjoyed this faux concrete idea, I'd be so thankful if you shared it with a friend and pinned it to your Upcycled Thrift Store Decor or Faux Concrete Ideas board on Pinterest.

I share my projects at these inspiring link parties.


If "concretize" isn't a word I think it should be...lol. Your concrete girls is gorgeous my friend! XOXO
ReplyDeleteI agree it should be. LOL Thanks my friend, I was so happy to find her in my thrift store haul to use up the leftover texture mixture. I completely forgot I had her!
DeleteMarie,
ReplyDeleteThis came out perfect!! Love it!! Thanks for sharing!!
Hugs,
Debbie
Thank you very much, Debbie! xo Concretizing is so much fun. LOL
DeleteThat looks amazing Marie! What a gorgeous new statue for your garden this year. I have never done this but you've inspired me to try with an old planter I have. I'm pinning it and it's on my to do list! Have a great weekend ahead!
ReplyDeleteSo happy to hear my faux concrete garden statue has inspired you to give it a try on your planter! Be forewarned, Denise, you'll want to concretize all.the.things! LOL Thanks for pinning and have fun playing with pretend concrete!
DeleteMarie, this is crazy creative! As usual...
ReplyDeleteYou're so sweet, Kim, I'm glad you like my sweet concretized lady! I'm thrilled with the results and can't wait to place her in my rose garden this summer.
DeleteWow! This is incredible! I love it!
ReplyDeleteHi Florence, thank you so much! It really was a lot of fun and I had to stop myself from concretizing a whole lot of other things in my thrift store haul. LOL
DeleteI'm so surprised at how much her concretized makeover made all her features pop. You can see all of her now and she has the sweetest little face. So much better than that glazed black.
ReplyDeleteRight! That surprised me too Michelle and it's my favorite part of this makeover. She really does have the sweetest little face and I can't wait to display her in my rose garden.
DeleteMarie, she is gorgeous!! I love that her features really stand out with the "concretizing"!! I've been looking for a bust like her and if I get lucky enough to find one, she is so going to be "concretized"!!! Thanks so much for sharing this great idea!
ReplyDeleteThank you so much, Karolyn! I was so pleased to see her features getting more and more pronounced as I applied the concrete. Good luck with your quest to find a bust to concretize. And when you do, if you have any questions, you know where to find me.
Delete