DIY Rustic Industrial Dollhouse Coffee Table
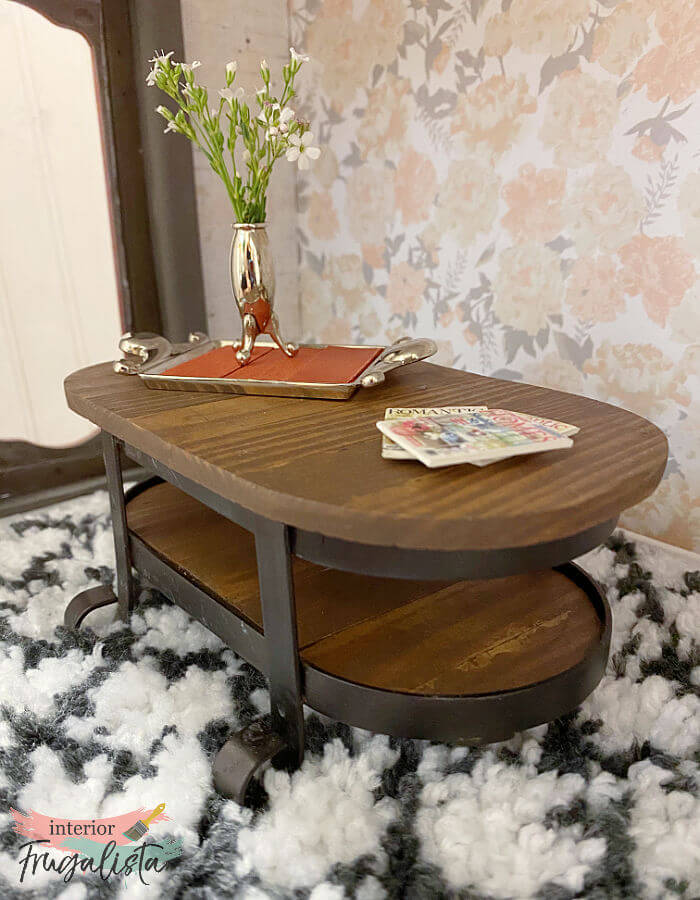
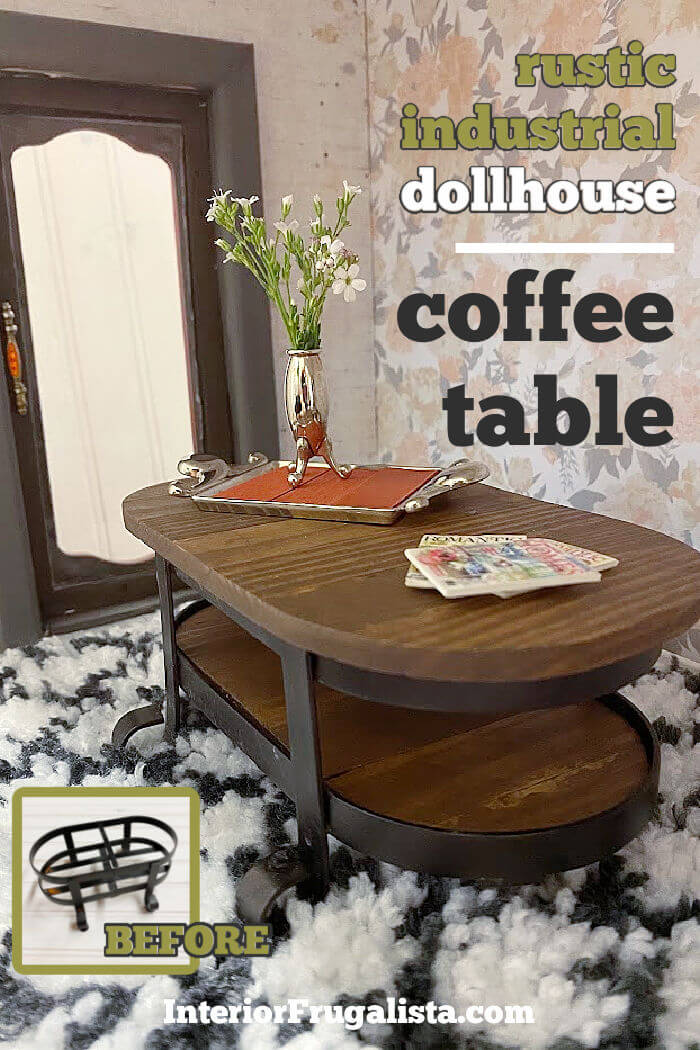
Time for another fixer-upper dollhouse project. This time I'm sharing how I turned a metal bathroom soap dispenser caddy into a rustic industrial dollhouse coffee table. I'm also sharing how easy it is to make miniature dollhouse magazines to display on the coffee table.
My favorite part of our dollhouse series is browsing through thrift stores for repurposed dollhouse miniature potential in the most unlikely finds.
Recycled Soap Dispenser Caddy Dollhouse Coffee Table
If you are new to the dollhouse series, we have been working on a dollhouse to gift our granddaughter, one DIY project at a time. Everything about this dollhouse is either repurposed or handmade. Even the dollhouse is a secondhand repurposed IKEA Billy bookcase!
Last month I shared our handmade plaster dollhouse fireplace with real stacked logs and realistic flame. I also made a flatscreen television from a recycled mint tin to hang above the fireplace.
The inspiration for the rustic dollhouse coffee table came during our bathroom renovation in the Spring. When we replaced the hand soap and lotion bottles, the old metal caddy reminded me of the base of an industrial-style coffee table. Do you see it too?
I also had a bag of small wooden tiles found at Goodwill for $6.50. They are the perfect size to use as wood slats for the bottom shelf and tabletop of the rustic dollhouse coffee table.
It's like the metal soap and lotion caddy was waiting for some wood slats! They were just too perfect for a unique industrial dollhouse coffee table.
Here's How I Made It
Because I wanted a rustic vibe for the coffee table, all I did was clean the metal caddy and left the rusty parts as is. Next up is making a tabletop and shelf with those wooden tiles.
Glue Wood Tiles Together
I used seven wooden tiles for each wooden top. To assemble them I brushed wood glue on the sides of the tiles and simply butted them together. I used a small bar clamp to hold them tightly together while the glue cured overnight.
Trace Oval Shape On Shelf And Tabletop Pieces
Before moving on to the cutting step, I double-checked that there was a tight bond with the glued slats to ensure they were each one solid piece of wood.
Next, I turned the metal caddy upside down onto one piece and traced the inside of the oval shape for the shelf. For the tabletop, I essentially used the entire piece of wood and traced the oval profile on each corner to accommodate an overhang along the edge of the table.
Cut Oval Shapes
Even though we checked to make sure the slats were glued tightly together, we're going to err on the side of caution for safety reasons before cutting the oval shapes. The last thing we want is for the boards to come apart while cutting with a power saw.
- Sandwich the tabletop between two thin pieces of wood, leaving one side of the traced oval exposed.
- Clamp all three pieces of wood onto a worktable with spring clamps with the cutting side over the edge.
- Cut along the traced oval with a jigsaw. Ideally, if you have a band or scroll saw, use that instead.
- Remove the sandwiched boards and repeat the previous steps for the opposite side of the tabletop.
- Repeat steps 1-4 for the shelf.
- Sand the edges and the tops with a mouse sander.
My apologies for not including a photo of this step. I swore I took a photo but can't for the life of me find the digital file.
Stain Tabletop And Bottom Shelf
Now we're ready to add the rustic charm to the wood slats with stain. I used a water-based gel stain in the color Tobacco Road that I had on hand. Applied with a lint-free rag and the excess stain was immediately wiped off.
Once the stain was dry I protected it with a brown wax applied in the exact same way as the gel stain.
Attach Wood Tabletop And Shelf To Metal Base
To attach the bottom shelf to the metal base I ran E6000 glue over the metal slats and set the wooden shelf on top, pressing firmly for a good bond.
Next, I carefully ran a bead of E6000 glue along the top rim of the metal caddy and set the tabletop in place. I set some weight on top and let the glue cure overnight.
That's it, how cute is this rustic coffee table!
Now let's make some miniature dollhouse magazines to display on top of the rustic industrial coffee table.
DIY Coffee Table Magazines
I found miniature magazine printables at this new to me shop on Etsy. She offers many fabulous printables for dollhouse accessories. I printed the magazine covers on regular bond paper with the best print quality setting.
I cut them to size with a paper cutter and chose a few of my favorites. I also cut a strip of heavy white cardboard the same width as the magazine covers.
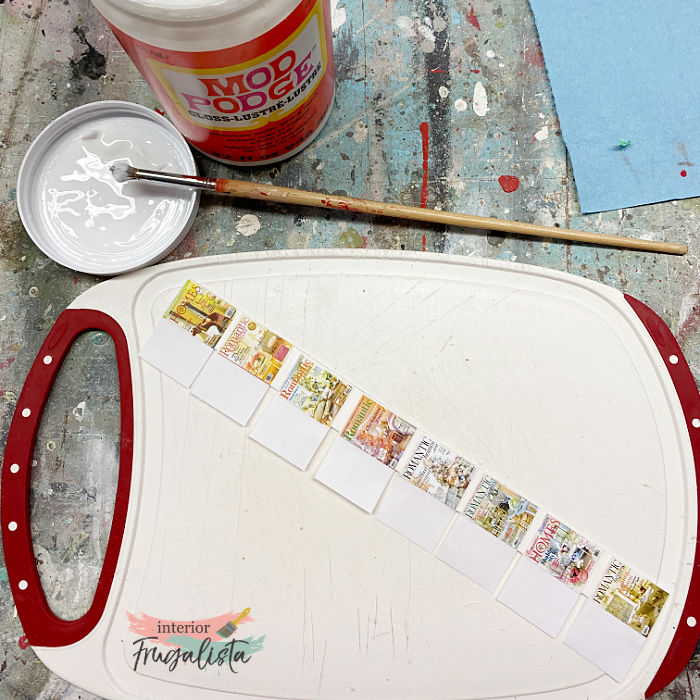
The next step is to decoupage the magazine printables onto the strip of white cardboard with Mod Podge. Align the front of the magazine covers first and then wrap them over onto the backside of the cardboard. Leave a gap between each magazine cover for cutting later.
After they dry, apply another coat of Mod Podge on both sides of the magazines. This will not only protect the paper but add a glossy finish to the paper like a real magazine.
Once the Mod Podge is completely dry, cut the cardboard between each magazine with sharp scissors. I set three on top of the dollhouse coffee table and saved the others to switch out during the holidays.
Thanks for stopping by the Interior Frugalista today! I hope you were inspired by this repurposed bathroom metal caddy dollhouse coffee table. Just wait until you see what I used to make a dollhouse refrigerator next month!
Almost all of our DIY ideas have step-by-step tutorials so why not get your budget DIY on and subscribe. You can also find us on Pinterest, Facebook, Instagram, and YouTube.
If you have any questions, please leave them in the comment section below or the Contact Me tab at the top to drop me an email. I love hearing from you!
If you enjoyed this DIY rustic industrial dollhouse coffee table, I'd be so thankful if you shared it with a friend and pinned it to your dollhouse furniture or Dollhouse Ideas board on Pinterest.
I share my projects at these inspiring link parties.


I think you are having too much fun with this dollhouse...great project, I never thought of gluing the boards together on that small of scale. Side note. It took me 14 minutes to view your site because of the the pop-up videos ads...sigh. I confess I haven't been viewing more than the first photo of your posts for a long time because of this. Always great work, Marie!
ReplyDeleteI am definitely having a blast with this dollhouse project. The most fun is finding objects that can be repurposed into dollhouse furniture and accessories. Wait until you see what I used to make a refrigerator!
DeleteOh I really like this, it turned out great!!! The stained wood and metal are perfect:@)
ReplyDeleteThank you so much Lynn, I had so much fun putting this piece together!
DeleteI thought it was the real thing when I saw the first piccy!!!! It's stunning, Marie and I can't wait to see that miniature refrigerator.
ReplyDeleteWoot woot then mission accomplished! Thanks so much Michelle, that means a lot coming from the queen of miniatures!
DeleteWow Marie - this is SO creative. That's one lucky grand daughter!
ReplyDeleteThank you, Sara! I think grandma is having more fun with this dollhouse than my sweet Everly. Although she gets so excited when she visits and discovers new things in her work in progress dollhouse.
DeleteYou have such a good eye for things, Marie! I love every detail of this sweet table. You have one lucky granddaughter! Smiles, Suzanne.
ReplyDeleteHi Suzanne, thank you for your sweet comment! I think grandma is having more fun with this dollhouse than granddaughter. LOL
DeleteIf that ain't the cutest upcycle EVER!! Marie, I love your idea and your way of making it look funtastic. I love dollhouse minis.
ReplyDeleteThanks so much, Larissa, I'm having way too much fun with this dollhouse!
DeleteOh! That turned out so great! I sure didn't see a coffee table when I looked at that!
ReplyDeleteTania
Thank you Tania, my granddaughter squealed with delight when she saw it. But she was more intrigued by the mini magazines sitting on top of it. LOL
DeleteThis is adorable Marie! And I was wondering about those mini magazines... omgosh...brilliant! XOXO
ReplyDeleteThank you very much, Denise! I think my granddaughter was more excited about those magazines than the coffee table (and so was grandma to be honest). LOL Sending hugs your way from the west, xoxo
DeleteMarie I love how your creative mind works. You can look at a bag of wood sticks and make a beautiful new treasure out of them. So creative my sweet friend. Have a great new week. xoxo Kris
ReplyDeleteThank you so much for your sweet comments my friend! Grandma is having way too much fun with this dollhouse. Wishing you a great new week as well. xoxo
DeleteThis is absolutely adorable, Marie! The attention to detail is amazing. What an amazing treasure of a dollhouse this will be.
ReplyDeleteThank you so much, Pam! I'm having so much fun with this project. The most rewarding part is looking at EVERYTHING as potential dollhouse accessories. LOL
Delete