Solar Lighted Address Planter Repurposed Jewelry Box
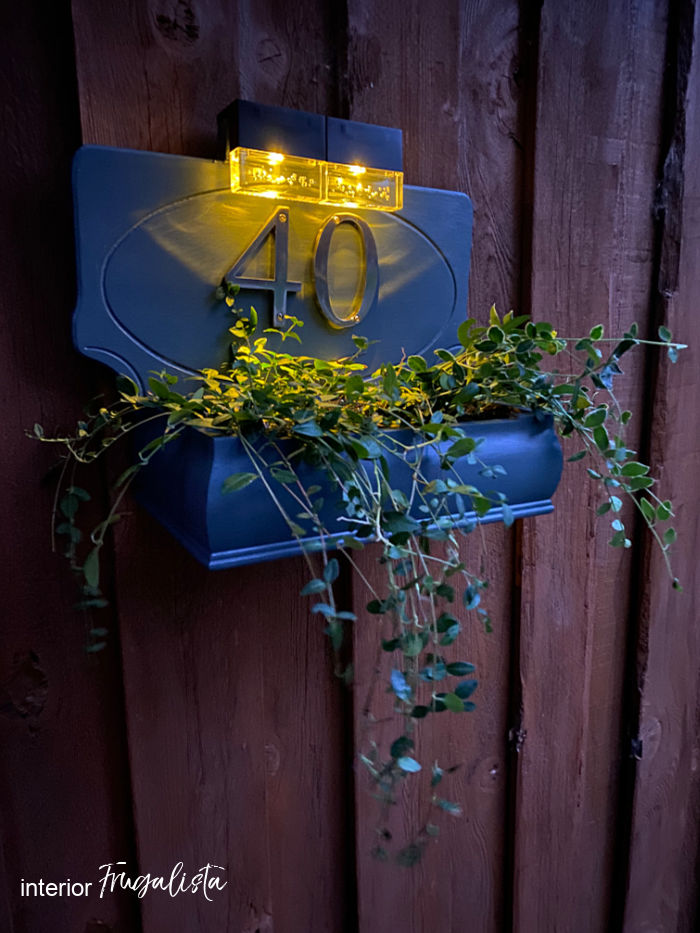
I'm sharing one last outdoor project before Fall on how to build a solar lighted address planter. But what makes this DIY house number planter unique is that it is made with a repurposed thrift store Bombay-style jewelry box and a recycled wooden plaque.
DIY House Number Planter With Solar Lights
This is a project a long time coming. I started making the house number planter back in June for our Int'l Bloggers Club fantabulous planters challenge. Life and a terrible bout with tendonitis prevented me from finishing it. Better late than never as they say!
I've had the Bombay jewelry box in my thrift store haul for a few years now. The lock mechanism is broken and the top on the inside of the lid is missing, so it's fair game for a hack in my mind.
The motivation for the house number planter was the wooden plaque that used to be an apron hanger in our kitchen. Several years ago one of our local home improvement stores had a bin full of unfinished wooden plaques on clearance for $3.50 each, originally priced at $32. No twisting my arm, I bought every.single.one.
I've made several signs with them for gifts and last year I made an herb drying rack with another. But this one has been waiting in the workshop to be recycled into a house number plaque for our home.
The inspiration for this house number planter box was the wonderful wall mount address planters I was seeing on Pinterest, and I decided I wanted one of those instead. But then I got to thinking maybe that old damaged jewelry box could be used as the planter box on my house plaque!
What You'll Need To Make It
This post contains affiliate links so you can see what products I used or recommend for this project. As an Amazon Associate, I earn a small commission from qualifying purchases at no extra cost to you.
Supply List
Wooden House Plaque
Deep Wooden Jewelry Box (thrift store)
4-Inch Satin Nickel House Numbers
2pc Waterproof Solar Step/Fence Lights
Gorilla Waterproof Patch & Seal Rubberized Sealant Spray
E6000 Glue
Wood Glue
Dark Gray Paint
Exterior Clear Coat
150-Grit Sandpaper
2 Metal Flat Brackets
What Size House Numbers Should Be Used On A Planter Box?
House numbers should be a minimum height of 4-inches in order to be visible from the street.
Here's How We Made The Solar Lit Address Planter
In order to build the house number planter, there were a few things that needed to be done first. One was to remove the lid from the jewelry box and remove the felt liner inside.
In order for the curvy Bombay-style jewelry box to sit flush with the wooden plaque, one side needed trimmed flat.
Mr. Frugalista did that on the table saw but a band saw would be a better option, but sadly we don't have one of those. However, my recommendation is to look for wooden jewelry, trinket, or tea box options with flat sides instead.
To prep the exterior of the box for paint it was sanded lightly with 150-grit sandpaper to give the paint some bite. Had the finish been quite glossy I would have primed the box first.
Because the wooden plaque used to have hooks on it, the holes needed to be filled with wooden dowels and wood glue. Also, the wood applique was carefully removed and saved for a future project. Nothing goes to waste around here!
In order to mount the solar fence lights on the top, we flipped the wooden plaque upside down so the flat end is facing up. We attached it to the back of the wooden jewelry box with wood glue and screws.
In order to have something wide to mount the solar fence lights on the top of the house number plaque, we cut a 3/4" x 1 1/2" piece of wood six inches long (width of both solar lights butt against one another). We mounted it flush with the back and attached it with E6000 glue and two metal flat brackets.
Now that the planter is assembled, the repurposed jewelry box planter needs to be waterproofed to prevent the wood from rotting. But first, cover the exterior of the wooden box and the house plaque with paper and masking tape.
How Do You Waterproof A Wooden Planter Box?
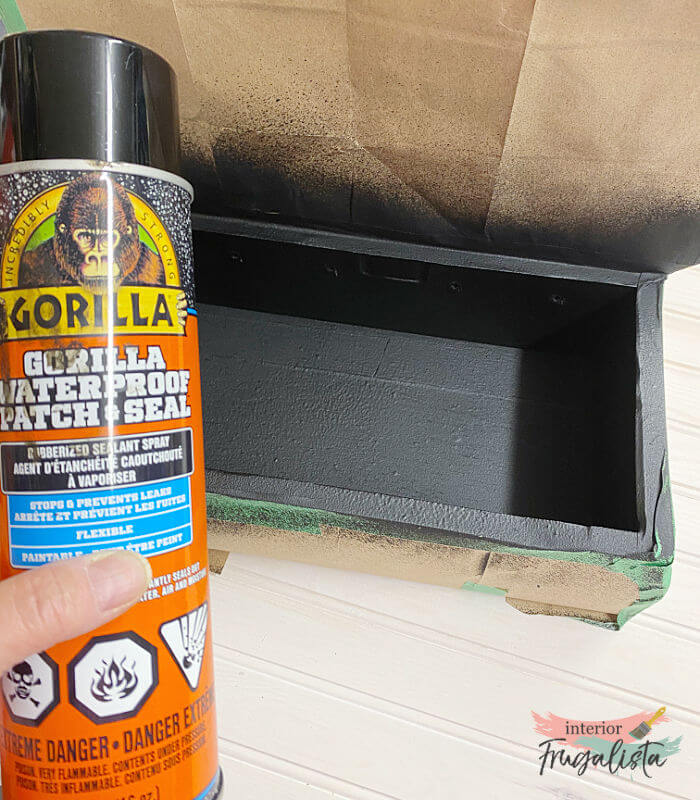
To waterproof the wooden planter box spray the inside of the box with several coats of a rubberized sealant spray (see supply list).
It has a 24-hour cure time between coats and requires at least 24 hours before exposing it to water. Be sure to completely seal all the corners and joints inside the box. I recommend at least three or four coats.
Alternatively, you could wrap the inside of the box with waterproof pond liner fabric.
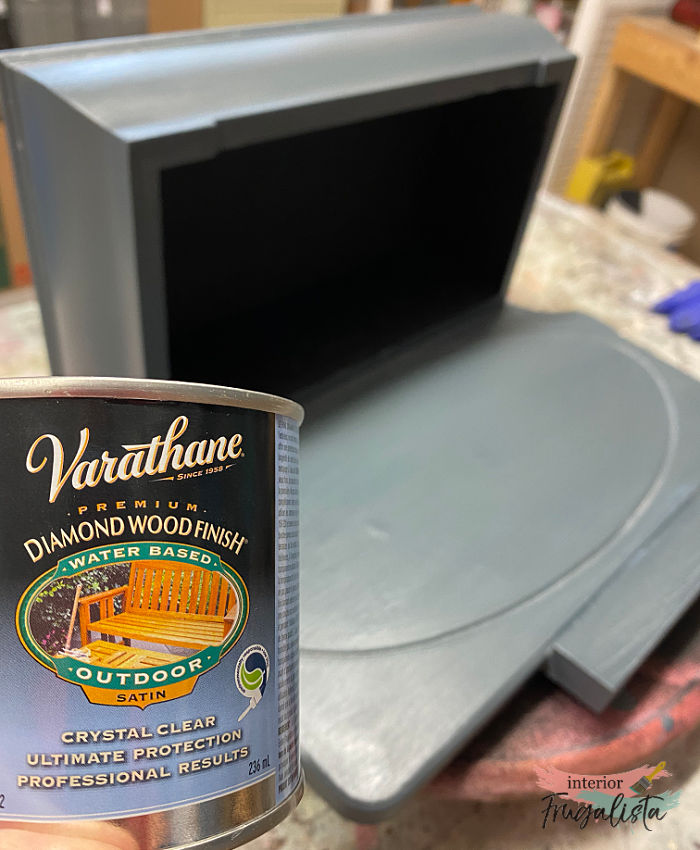
Now we're ready to paint the house number planter box. I used a custom mix of Classic Noir and Tin White Behr Chalk Decorative Paint. Sorry I didn't take note of the ratios but slowly drizzle the black paint into a small container of the white until you get a dark charcoal gray.
The next step is sealing the paint with two or three coats of an exterior grade water-based clear coat.
Before attaching the house numbers, attach the solar fence lights onto the woodblock at the top of the plaque with the screws provided. This way you'll know where to place the house numbers vertically on the plaque. These step or fence lights are waterproof and heat resistant and come in 2 piece or 10 piece packs.
Next, set the house numbers just below the solar light glass and center horizontally on the wooden plaque.
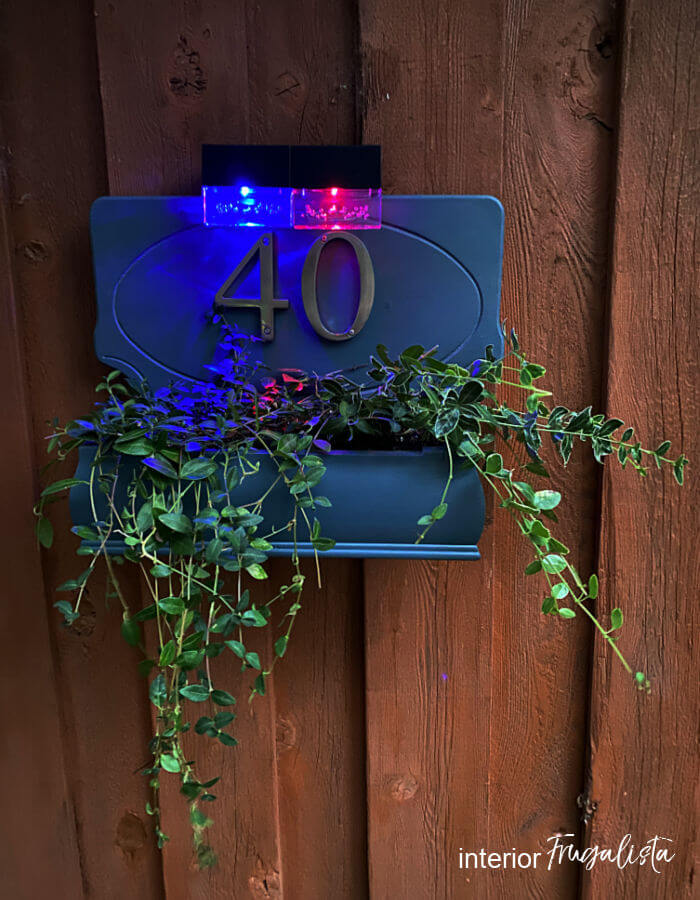
What's fun about these solar lights is that you can change the colors. In the summer set it to warm white and for the holidays fill the planter with holiday greens and set it to the changing RGB color mode!
Because the house plaque was turned upside down, the holes on the back for the hangers are now facing the wrong direction. I attached two D-Ring picture hangers on the back instead.
Fill the planter with potting soil and trailing flowers. Because it's so late in the season I transplanted some periwinkle from our flower beds. Next year I'll fill it with trailing vines and flowers.
Hang your house number planter box and enjoy!
Where Should The House Number Planter Box Be Placed?
The house number planter box should be placed near the front door where it is visible from the street without any obstructions, like trees. If you don't add a solar light like we did, then place it near outdoor lighting so it is visible at night.
How High Should The House Number Planter Be Hung On The House?
You want the address planter to be hung so the top is no higher than the top of the door and not too low where it will be obstructed by shrubs or trees. You also want to keep in mind being able to reach the planter box to water the flowers.
Here are a couple more outdoor wall planter ideas made with repurposed finds that you might like. This repurposed stave and door knocker hanging flower pot is perfect for hanging on a fence, gate, shed, or exterior wall. This outdoor flower planter is floor standing and made with a repurposed 5-panel door.
Thanks for stopping by the Interior Frugalista today! I hope you were inspired by this solar lit house number planter box idea.
Almost all of our DIY ideas have step-by-step tutorials so why not get your budget DIY on and subscribe. You can also find us on Pinterest, Facebook, Instagram, and YouTube.
If you have any questions, please leave them in the comment section below or the Contact Me tab at the top to drop me an email. I love hearing from you!
If you enjoyed this DIY address planter with solar lights idea, I'd be so thankful if you shared it with a friend and pinned it to your DIY House Number Ideas or Outdoor Wall Planter Ideas board on Pinterest.
I share my projects at these inspiring link parties.


This is so awesome! What a great tutorial and idea! love it! laura
ReplyDeleteHi Laura, thank you so much! I'm thrilled to finally have an address planter for our home and can't wait to fill it with flowers and vines next Spring.
DeleteThat is so freaking clever Marie!
ReplyDeleteTania
LOL, Tania, thank you so much! xo
DeleteThis is super creative! I love the addition of the lights. How fun!
ReplyDeleteThank you very much, Kim! I'm thrilled to finally have the address planter I've been wanting for our home.
DeleteCrazy fun trashure upcycle! The fact that you used up your stash makes it even more fun. Sharing!
ReplyDeleteYou are so kind to share this Larissa, thank you very much! xo
DeleteWhat a super creative way to repurpose an old jewelry box into something functional and just so darn pretty. And those solar lights are really cool.
ReplyDeleteThank you very much Michelle! I have our funtabulous planter challenge to thank for inspiring my vision for this planter. So glad that I was able to finally complete it and now have a lovely address planter for our home.
DeleteWhat a great look and those colour lights are so fun! Pinning and adding to out funtabulous planter post 😉.
ReplyDeleteI'm so glad you like my quirky idea for a house number planter, Sara. Thank you for your generous offer to add my (very late) planter to your funtabulous planter post. That is very kind of you! xo
DeleteThis is amazing Marie! 💕I'm going to share this post with my sister Andrea... she was JUST talking about how she wants ME to make one for her. With your great tutorial she can make her own!😉 🤣 Have a super Sunday my friend! XOXO
ReplyDeleteThat's awesome, Denise, I hope Andrea finds the address planter inspiring and the tutorial helpful. If she has any questions, I'd be happy to help. Wishing you a super Sunday too my friend. xoxo
DeleteOh Marie your creative soul just never ends. This is totally cool. You are amazing girl. This is not only clever but so pretty. Love that it is solar too. Happy New Week. xoxo
ReplyDeleteKris, you made my Monday morning with your very sweet comments. I'm glad you like my quirky idea for an address planter box. It's now hanging on the front of the house and has great curb appeal, especially at night.
DeleteThis is such a fantastic project and I love how it turned out! I'm a little late commenting but wanted you to know I featured your post at the Tuesday Turn About Link Party this week! Thanks so much for sharing!
ReplyDeleteHi Michelle, I'm thrilled to hear you are featuring our house number planter. Thank you very much! xo
DeleteBetter late than never is right! It's fantastic. So crazy good that we are featuring it at Farmhouse Friday tomorrow. Thank you for always linking up Marie. You are the best. Pinned
ReplyDeleteWell, do you know how to make a gal's day! Thank you for your sweet comment AND the feature, I'm thrilled. xo
Delete