Boho Witch Scrap Wood 3D Halloween Sign
Do you prefer an unscary approach to your Halloween porch decor? If so, then here's a unique boho witch scrap wood 3D Halloween sign idea for a front porch.
Instead of a witch, this one-of-a-kind sign is a 3D witch costume displayed on a mannequin dress form. And instead of your typical black attire, this bohemian gypsy plans on sporting a colorful rag ribbon skirt on hallows eve.
DIY Boho Witch Costume Sign For Halloween
This bohemian witch has her rag skirt and other witchy attire ready for Hallows' Eve. She says hocus pocus to that black gothic look the other witches will be sporting. This witchy woman embraces her wild and colorful eccentric side.
If this unique 3D Boho Halloween sign speaks to your eccentric bohemian heart, then you'll be happy to know it costs very little to make. Some recycled materials and a few embellishments from the dollar store are all you'll need to make this easy scrap wood sign.
When rummaging through my stencil stash the other day I came across a dress form stencil that I haven't used in a long time. Perhaps because the calendar flipped to October this week, a witch costume came to mind. But not your typical witch costume.
What You'll Need To Make DIY Boho Witch Sign
Here's what you'll need to make a version of this witch Halloween sign DIY.
This post contains affiliate links so you can see what products I used or recommend for this project. As an Amazon Associate, I earn a small commission from any qualifying purchases at no extra cost to you. Thank you for your support!
Supply List
Scrap Wood
Dress Form Stencil
Halloween Fabric Squares
Black Halloween Ribbon
Hardboard or Balsa Wood
Witches Hat Fascinator
Halloween Colors Acrylic Craft Paint
Straw (recycled straw wreath)
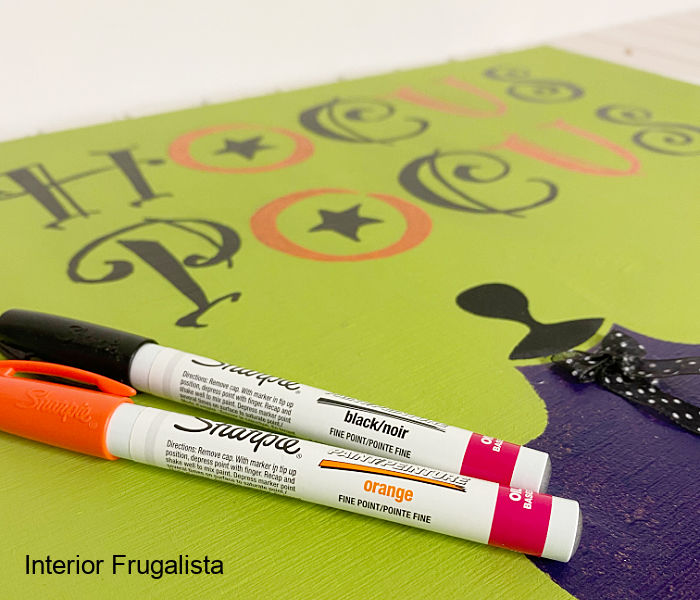
Orange & Black Sharpie Paint Pens
Carbon Paper
Needle & Thread
Hot Glue Gun
How To Make A DIY Boho Witch Sign
We'll begin with the wood you'll need to make the sign. Use scrap wood that you have on hand. Mine is a 30 x 16-inch piece of plywood found in our lumber pile.
Paint the wooden sign in whatever Halloween color you like. I used Behr Chalk Decorative Paint that I had on hand. Latex or acrylic craft paint is just fine to use too.
Dress Form Stencil
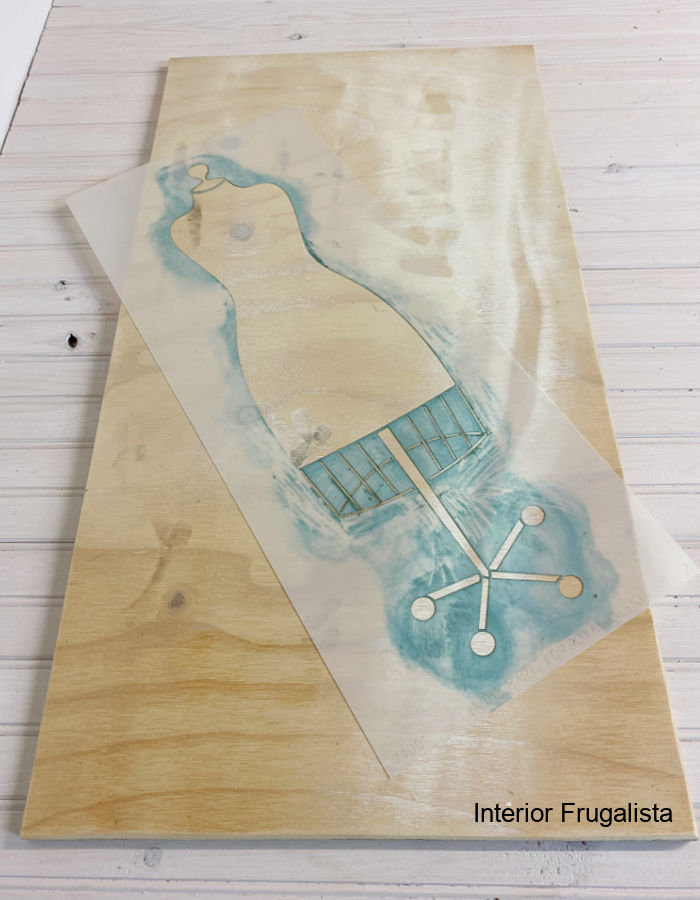
Next, I stenciled the bottom left side of the sign with a dress form stencil that I had in my stash. I share a link to the stencil in the supply list above. Alternatively, you could find a dress form graphic online and trace it onto the sign (I discuss how further down in the post).
In the photo below you'll notice the bodice of the dress form is stenciled purple but I changed my mind and changed it with black acrylic craft paint instead.
Also, I didn't stencil the bottom part of the dress form but decided halfway to go back and add it with the same black acrylic craft paint.
3D Rag Ribbon Skirt
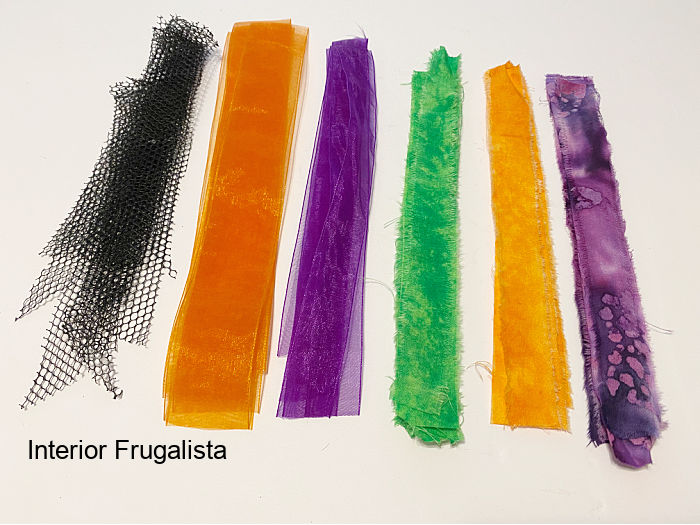
For the boho rag ribbon skirt, I used organza ribbon in Halloween colors cut at various lengths. I also found some tie-dye fabric squares that I ripped into one-inch wide strips.
Use whatever ribbons and fabrics you have on hand in colors that work for Halloween. Walmart carries inexpensive fabric squares in their craft aisle or you could recycle old garment fabric.
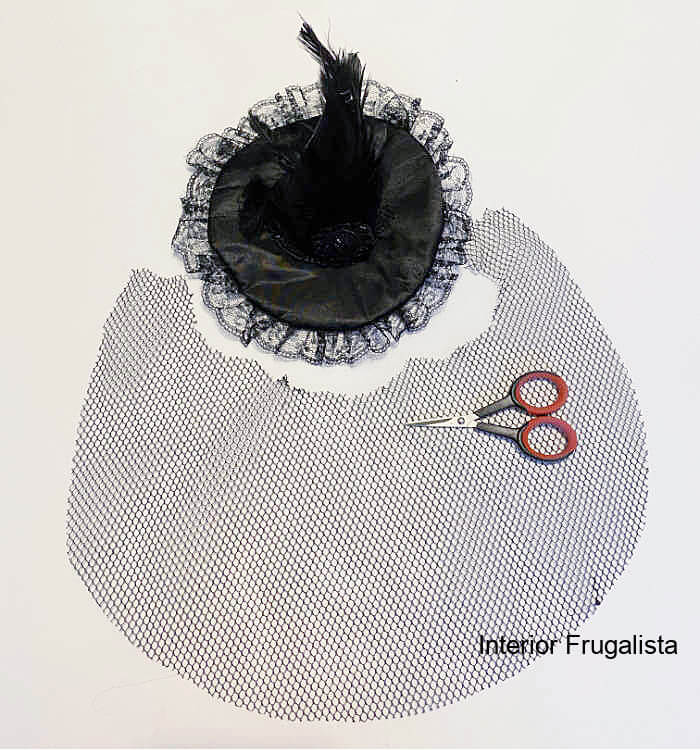
I removed the tulle from the dollar store witch hat fascinator that I'll be adding to the sign later. I cut the tulle into one-inch strips as well for the rag ribbon skirt. Alternatively, a black lace ribbon would be perfect instead of tulle or both.
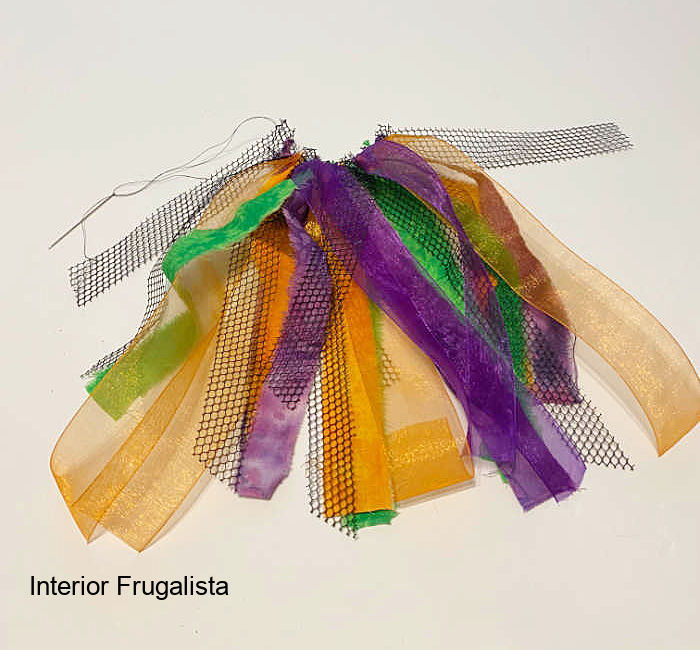
Line the strips of fabric and ribbon side-by-side and with a needle and thread join them all together with a simple running stitch. Pull the thread on either end to gather the fabric the same width as the waist on the dress form.
Attach the rag ribbon skirt to the sign with a bead of hot glue along the top. Glue a narrow ribbon on top for the waistband and to hide the raw edges.
Randomly cut the hem of each strip at various lengths with sharp scissors. Cut them both on the diagonal and with v-cuts.
3D Witch Boots
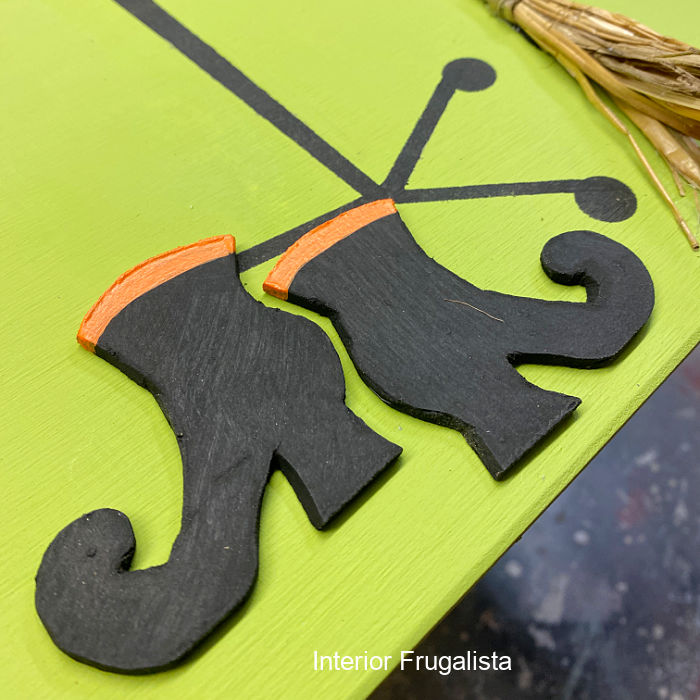
For 3D witch boots for the sign, I used salvaged hardboard. Use whatever thin wood scraps you have on hand or balsa wood.
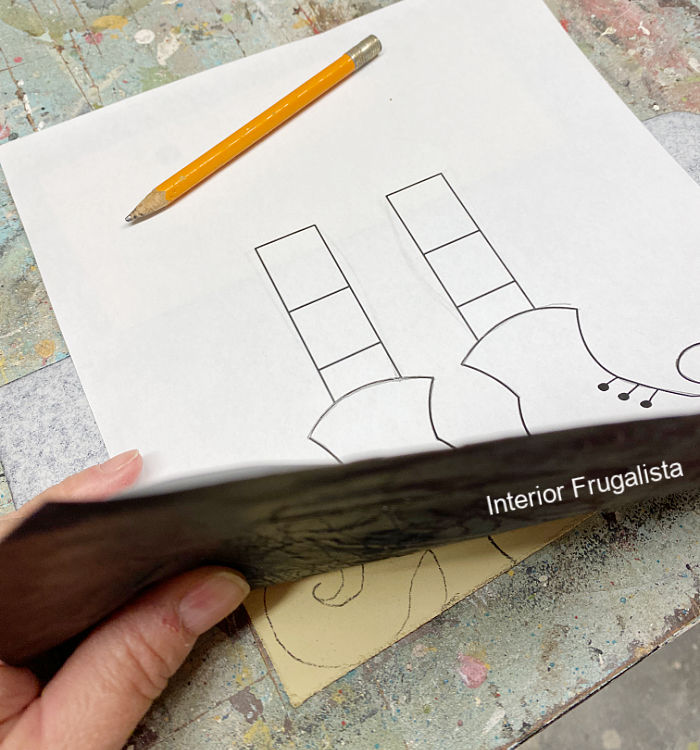
Search for witch boot clip art online. Print them on regular bond paper but change the print ratio so they fit the scale of your sign. Then use this image transfer technique to trace them onto the wood.
This step requires patience as it takes a bit of time to cut the boots out with a sharp retractable craft knife. It would take no time at all if you are lucky enough to have a scroll saw. The boots are too small to use a jigsaw.
With a small sheet of sandpaper or an emery board nail file, round out and smooth the edges of the boots.
Paint the boots with black and orange acrylic craft paint and attach them to the bottom of the sign with a hot glue gun.
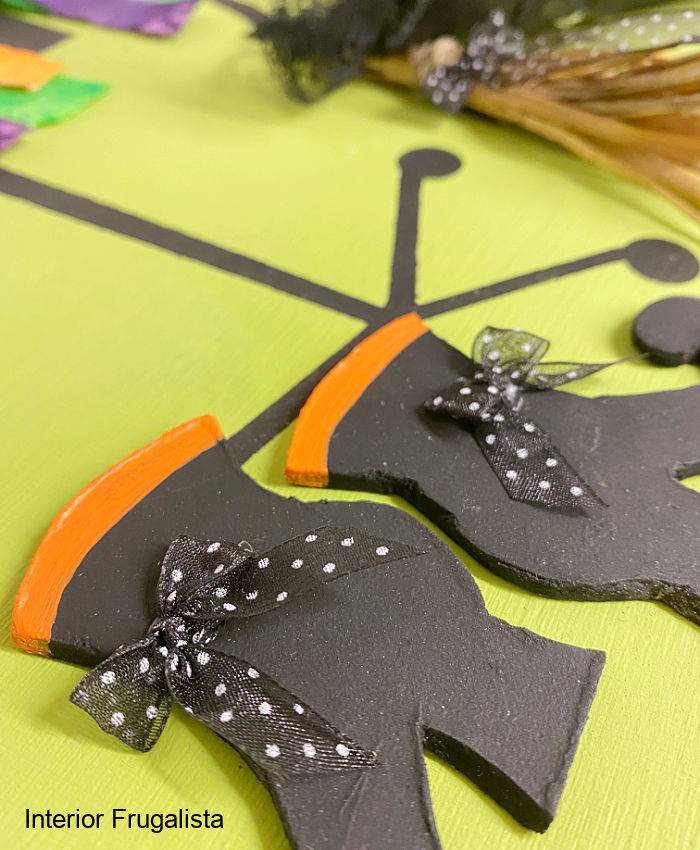
Next, make a bow with a narrow ribbon for the witch boots. The easiest way to make tiny bows is with a fork and I've included a link to a helpful mini bow video tutorial if you've never made them before.
Use a dab of hot glue to attach the tiny bows onto each witch boot.
Witches Broom
Next, I added a witches broom leaning against the dress form. To do this I searched Google images for a witch broom graphic that I liked.
I used the photo as a guide for drawing a freehand witch broom handle on the sign. But you could search for witch broom clip art and trace it onto the sign much like how I made the boots.
Once I was satisfied with the look, I painted the handle with an artist brush and black acrylic craft paint.
To make the straw end of the broom I recycled a straw wreath form that I had on hand. I bundled a few strands of straw in my hand and tied them together with a long thin strand of straw. Alternatively, raffia ribbon or jute twine would work too.
Then with a bead of hot glue, I attached the straw broom to the base of the painted witch broom handle on the sign.
Hocus Pocus Typography
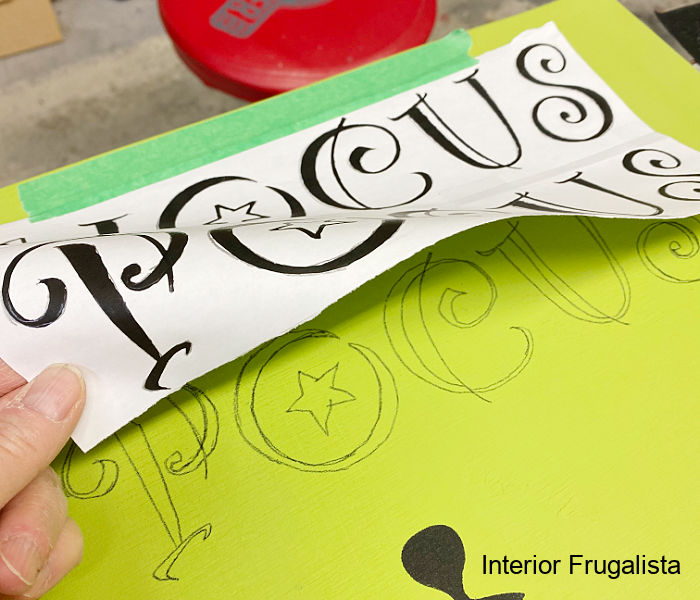
For the top of the sign, I designed hocus pocus typography in the Pages App on my iMac using the Party LET font sized at 167 points.
You could do the same in Microsoft Word or PicMonkey. Use the same image transfer technique as the boots to trace it to the top of the Halloween sign.
Then I painted the transferred graphic with orange and black Sharpie fine point oil-based paint pens.
3D Witches Hat
Adding a 3D witches hat to the bottom of the sign is completely optional. To add contrast I painted the black spider medallion on the front of the witch hat fascinator with orange acrylic craft glue.
Then I attached it to the sign with beads of hot glue and declared the DIY boho witch sign for Halloween complete.
It may not be your typical scary witch costume but it'll certainly stand out above the rest, and what's not to love about that?
I'm thrilled to learn that my bohemian dress form witch sign inspired my friend, Ann at The Apple Street Cottage to create a lifesize boho witch dress form costume.
Thanks for stopping by the Interior Frugalista today! I hope you were inspired by this unique boho witch Halloween sign DIY.
Almost all of our DIY ideas have step-by-step tutorials so why not get your budget DIY on and subscribe? You can also find us on Pinterest, Facebook, Instagram, and YouTube.
If you have any questions, please leave them in the comment section below or the Contact Me tab at the top to drop me an email. I love hearing from you!
If you enjoyed this boho witch decor idea, I'd be so thankful if you shared it with a friend and pinned it to your favorite board on Pinterest.
I share my projects at these inspiring link parties.










Marie, this is just darling. I'm not spooky Halloween decor fan, so this is right up my alley! Love it.
ReplyDeleteMe either, Kim, I've never been fond of the Halloween blood and gore. I was determined to make a sign with that adorable dress form stencil that I'd forgotten about and well the boho witch costume came out of nowhere. Perhaps I was embracing my eccentric witchy woman side. LOL
DeleteThis is adorable, Marie! I love, love, love the 3D effect! The ribbon skirt - and I wish I had a pair of those cool shoes! Lol! You did a fabulous job in creating this sign!
ReplyDeleteThank you very much, Gail, that means a lot coming from you, my crafting idol! xo
DeleteThis project is adorable!
ReplyDeleteThank you very much, Paula! It was fun using the dress form stencil again.
DeleteThis is the cutest witch sign ever!!!
ReplyDeleteI'm thrilled that you think so, Virginia, thank you so much!!
DeleteI do prefer an unscary approach to Halloween Marie, and I love your sign. It's so fun and the 3D effect with the rags is funky. A great way to use that dress form stencil. So cool!
ReplyDeleteThank you very much, Tuula! I'm happy to hear you like my quirky idea for an unscary halloween sign.
DeleteI absolutely love this, Marie! Rosie, my dress form needs a Halloween costume and you may have just inspired one for her.
ReplyDeleteSo happy to have inspired a Halloween costume for your Rosie. I can't wait to see your version, Ann!
DeleteThat's so cute, I love her little boots!
ReplyDeleteThanks Tania! Boy would a scroll saw have come in handy for making those little boots. Hoping Santa brings me one this year.
DeleteSuper cute! I love the way you made the bows, so smart!
ReplyDeleteJenna
Thank you very much, Jenna! Who knew a fork would be so handy for making tiny little bows.
DeleteMarie this is just too cute. Hope you are doing great. Happy New Week. xoxo Kris
ReplyDeleteThank you Kris! We're busy getting ready for hosting our Thanksgiving feast tomorrow so it's been a busy weekend. I hope you're doing well and enjoying a nice weekend. xo
DeleteWell bowl me over with a duck feather, this is soooooooooooo flippin cute Marie. Everything about it is perfect. We don't do big Halloween decorations here at home so I can't wait to play around with your 3D sign concept. Thanks so much for the inspo
ReplyDeleteROFLMAO at "bowl me over with a duck feather", I've never heard that saying before. I'm happy to hear you found 3D sign inspiration with my quirky Halloween sign. I know whatever you make it'll be AMAZING!
DeleteI can't believe you cut those boots with a craft knife; even I don't think I have patience for that - lol. Kidding - of course I do! I LOVE this; I think I need that stencil!
ReplyDeleteSara, if I could cut those little boots, you definitely can! You have WAY more patience than I do my friend. I'd forgotten I had that fun stencil and now I'm racking my brain trying to think of other fun projects ideas for it. Looking forward to seeing your ideas for it too!
DeleteMarie,
ReplyDeleteOMG, I love your boho Halloween sign. You are so clever. Congratulations, you are being featured on TFT. I hope you stop by. https://www.eclecticredbarn.com/2021/10/thursday-favorite-thing-party.htmlHugs,
Bev
You made my Thursday morning, Bev, thank you so much for the feature! xo
DeleteYour boho witch Halloween sign is wow, awesome! I love the colors. It pops and catches your eye. So cool and thank you for sharing. Now, I want to do something just like it. It's fun!
ReplyDeleteThank you very much, Joanne! I'm glad you like it and especially that it inspired you to want to make something like it. Happy signing making!
DeleteSo adorable! Thanks for sharing on Crafty Creators!
ReplyDeleteThanks a bunch Niki 😊
Delete