How To Make 3D Recycled Embroidery Hoop Pumpkins
What is your favorite decor to use when decorating your home for fall? For me, it's all about the pumpkins! Not carved pumpkins for Halloween but an assortment of interesting handmade pumpkins in different styles.
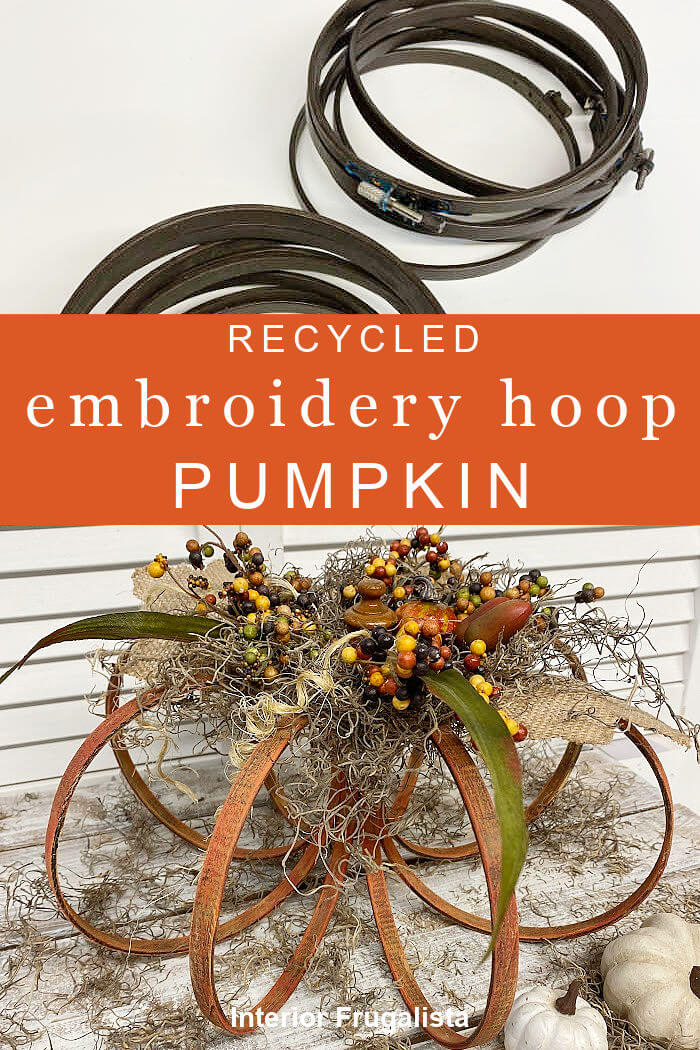
I've amassed quite a collection over the years because making DIY pumpkins is one of my favorite fall crafts. This year I'm adding some rustic pumpkins into the mix. I'm sharing how to make recycled embroidery hoop pumpkins but what makes these unique is that they are three-dimensional.
Rustic Recycled Embroidery Hoop Pumpkin
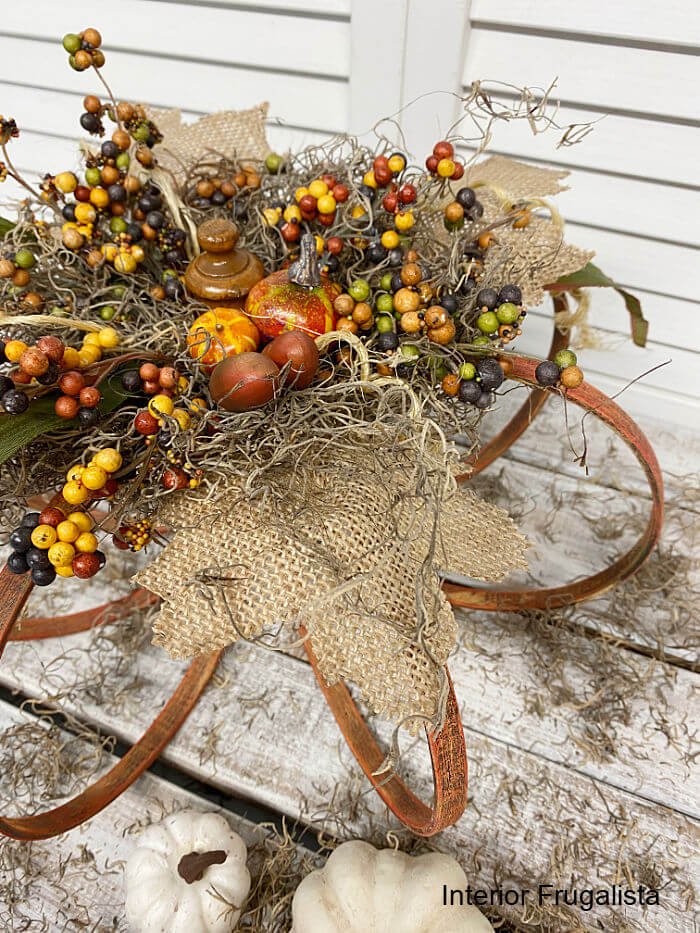
They may be inexpensive to make but they sure don't look that way! The preserved moss adds natural charm and the tiny artificial berries give it a pop of pretty fall colors.
What You'll Need To Make It
Almost everything you need to make the rustic 3D embroidery hoop pumpkins can be found at the dollar store.
This post contains affiliate links so you can see what products I used or recommend for this project. As an Amazon Associate, I earn a small commission from any qualifying purchases at no extra cost to you. Thank you for your support!
Supply List
8 6-inch Embroidery Hoops
1/2-inch Wooden Dowel
Small Wooden Finial
Preserved Spanish Moss
Fall Artificial Berry Stems
Mini Pumpkin Picks
Burlap Ribbon
Fabric Stiffener
Craft Paint In Fall Colors
Hot Glue Gun
Making this 3D hoop pumpkin is so quick and easy with fast-drying water-based paints and a hot glue gun. Let's get started.
Here's How I Made It
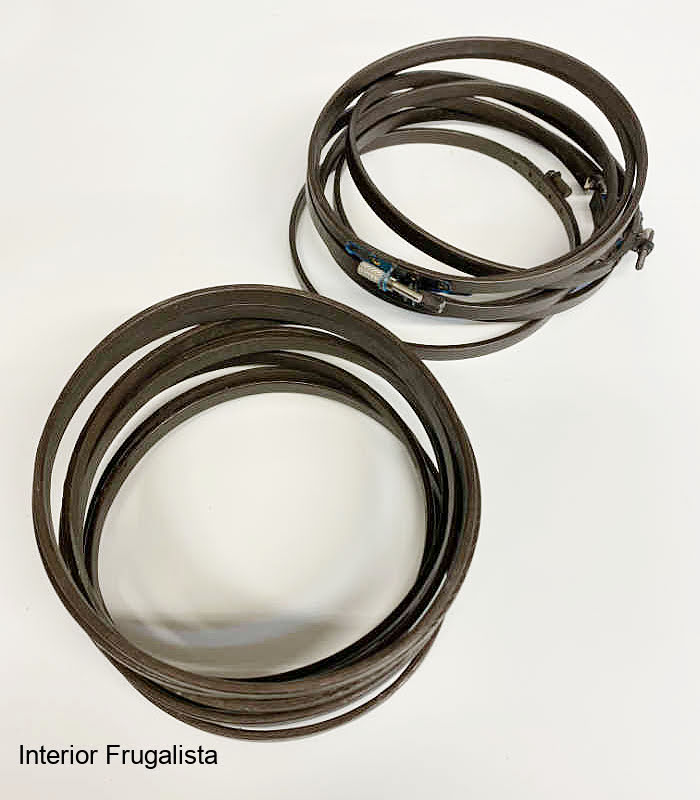
You'll need only the inner ring of eight 6-inch embroidery hoops. You can make these pumpkins larger or smaller with different size embroidery hoops. Better yet, make several in different sizes for an embroidery hoop pumpkin patch.
Save the outer ring of the embroidery hoops for future crafting potential and I'll be sharing ideas for those soon.
Mine are already stained a dark walnut color because they are salvaged from embroidery hoop orbs that I made several years ago. It's your choice whether you paint the hoops before assembling the 3D pumpkin or after like I did.
Wooden Dowel Center
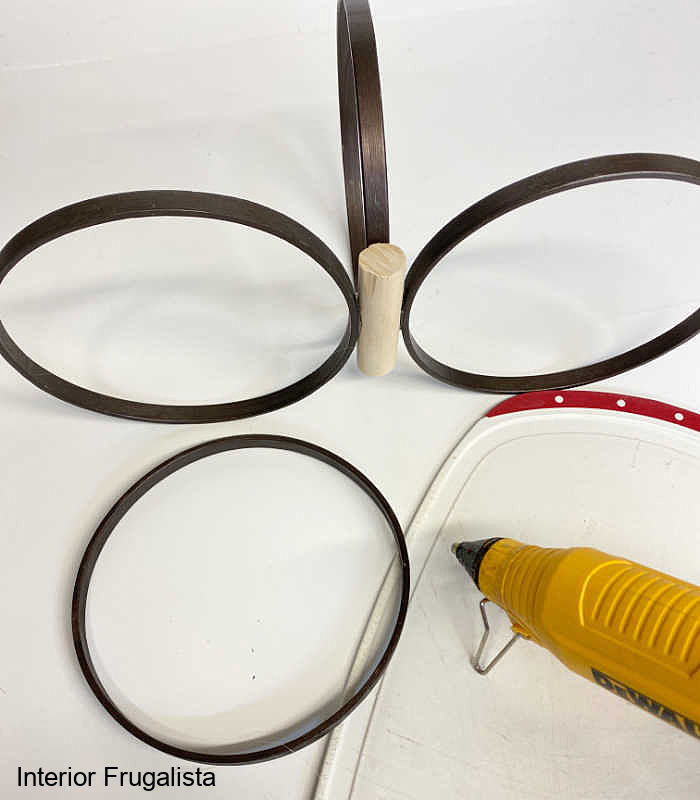
To anchor the embroidery hoop rings, we'll use a wooden dowel. For 6-inch embroidery hoops use a 1/2 - 3/4-inch wooden dowel cut 4-inches long.
The goal is to have enough spacing around the dowel to glue eight rings. Depending on the size of your embroidery hoops, go with a larger or smaller wooden dowel.
For an instant bond use a hot glue gun to attach the hoops. Start by gluing four embroidery hoop rings spaced evenly around the dowel. Make sure when gluing the hoops that they rest level with your work surface or you'll have wobbly pumpkins.
Glue the four remaining rings in between each of the glued embroidery hoop rings as pictured below.
Painting Embroidery Hoops
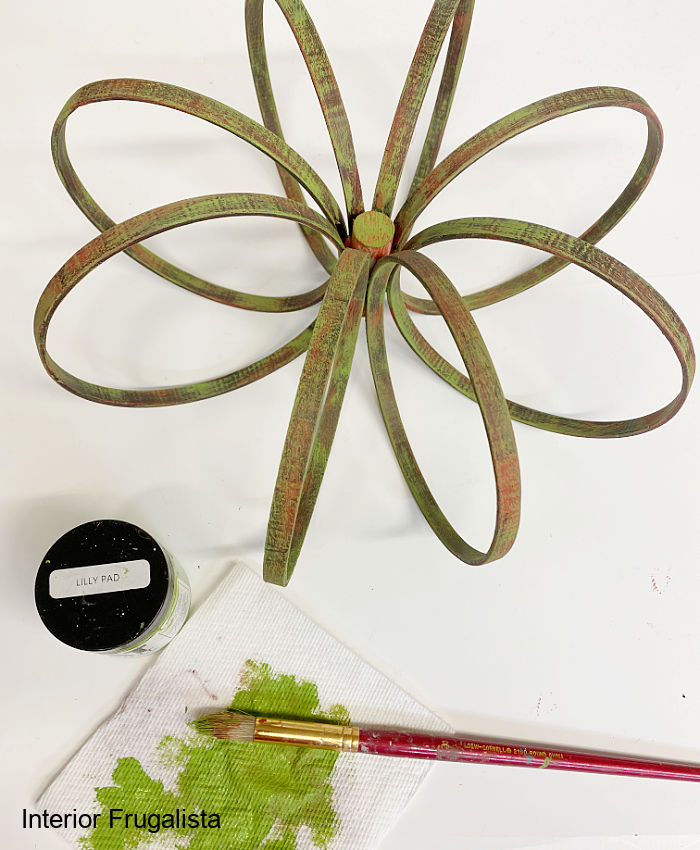
Once the hot glue is set, we'll paint the embroidery hoop rings and the dowel. The choice is yours whether you paint your pumpkin a solid color or give it rustic dry brushed layers of paint in fall colors like I did.
I recommend using matte water-based paint like chalk paint and/or acrylic craft paints for the dry brushed layers. I used a combination of both with paint that I had on hand.
Likely your embroidery hoops are natural wood so you'll want to paint the hoops first in either burnt umber or brown for the base coat. Just one thin coat to cover the light wood is all you need because we'll be adding more colors next.
Quick Paint Drying Tip
To speed up the drying time between coats of paint, use either a heat gun set on low or a blow dryer.
Tips For Painting Dry Brushed Layers Of Paint
The key for a time-worn patina with layers of paint colors is:
- Throw perfection out the window! We're going for random brush strokes here so let them go where they may.
- Less is more! You want very little paint on the brush - hence the term dry brush.
- For painting the narrow embroidery hoop rings my preference is a small flat or filbert art brush.
- Dip the brush into the paint and dab it onto a paper towel to remove the excess paint.
- With very light pressure let the paintbrush glide over the hoops in random brush strokes. The goal is to still see the other layers of paint underneath.
- Don't fret if you get too much paint in some areas because you can go over it with the next paint color.
- Wait for the paint to dry before moving on to the next color. Mere minutes if you use a blow dryer.
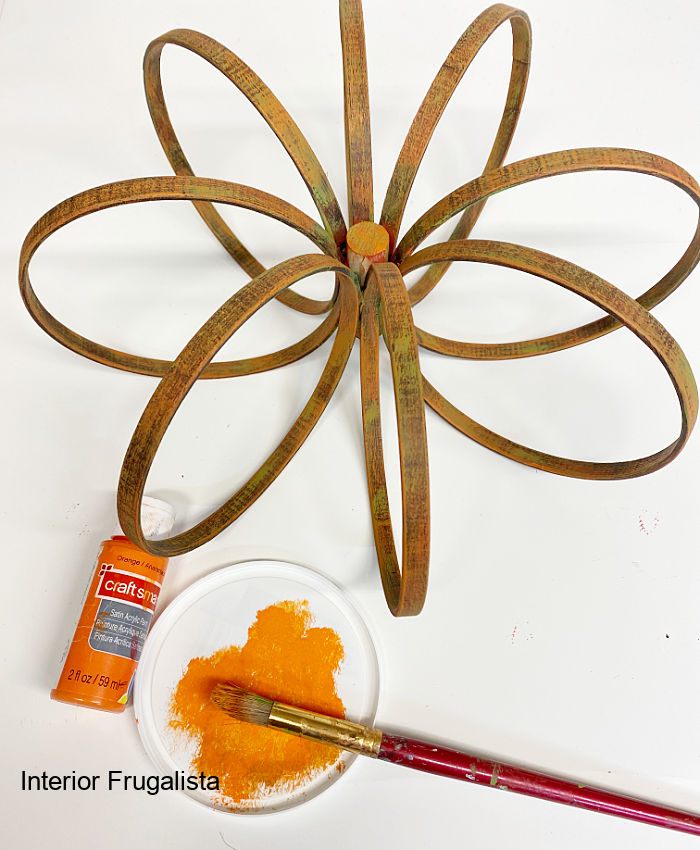
Paint Layer One: the first color I used over the brown color is called Autumn, a burnt orange color. You can see in the photo below how a lot of the brown base color is still peeking through.
Paint Layer Two: the second dry brushed layer of paint is called Lily Pad and applied much the same way as the first color.
Paint Layer Three: the third color (not pictured) is Goldenrod, a mustard yellow color and you'll be able to see it peeking through in the next photo.
Paint Layer Four: last but not least the final paint layer color is Orange, the brightest of all four colors to add some traditional pumpkin orange to the mix.
Remember, there are no rules and you can't make a mistake. Choose colors that complement one another starting with the darkest color. Play with the paint layers until you like the look.
Wood Finial Pumpkin Stem
I had this small wooden finial in my stash to use as the pumpkin stem. Alternatively, you could use a pretty furniture knob, like I did on my farmhouse ticking fabric pumpkins.
Whatever you use you'll want it to be elevated above the pumpkin so when we add moss later, it won't be hidden. If you use a furniture knob, adjust the screw accordingly.
To raise my small finial I drilled a hole in the top of the wooden dowel with a Forstner bit.
Then I glued one end of a small fluted dowel pin into the wooden finial and the other end in the hole at the top of the dowel.
Another option for a stem is a wine cork like the ones on these decoupage burlap pumpkins. Or you could use recycled chair spindles like on these retro upholstery fabric pumpkins.
The point is, get creative with your pumpkin stem choices using whatever you have readily available. Make sure it is large enough so it will not be hidden by the moss we'll be adding in the next step.
Embroidery Hoop Pumpkin Embellishments
I embellished the pumpkins with inexpensive dollar store finds like preserved Spanish moss, fall picks, and burlap ribbon.
Pumpkin Embellishment Tip
To embellish the pumpkin, apply the decorating rule of three or odd numbers. For example, I used seven clusters of fall berry stems, three burlap leaves, and three miniature elements on the top of the pumpkin.
Spanish Moss: First, glue clumps of Spanish moss around the top of the pumpkin, tucking it under the base of the stem with dabs of hot glue. Carry the moss slightly down each embroidery hoop spine.
Fall Berry Clusters: Remove the berry clusters from the fall stems. On three of the berry stems keep the leaves. Glue them around the top of the pumpkin with beads of hot glue tucked just under the wood finial stem.
Miniature Pumpkins And Acorns: Next group three small elements on the top of the pumpkin. Fall picks with miniature pumpkins, gourds, and other fall miniatures are perfect to use for this purpose.
Natural Jute Tendrils: For the tendrils, I used strands of jute twine tucked under the pumpkin stem with dabs of hot glue.
Tip For Curling Twine Tendrils
To curl the jute tendrils rub white school glue or Mod Podge along the twine and curl it around a pencil until it dries. Easy peasy!
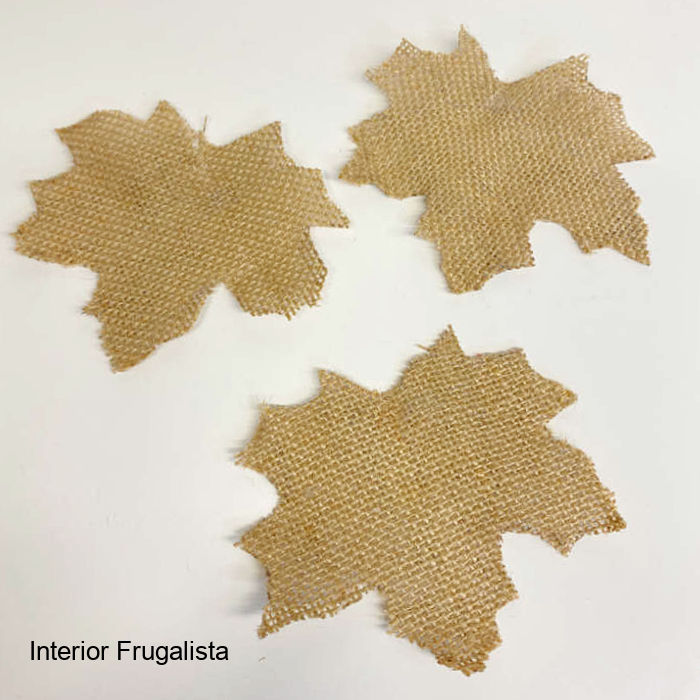
Burlap Maple Leaves: Last but not least I attached three large burlap maple leaves with beads of hot glue. They are so easy to make and I've included instructions below.
How To Make Burlap Fall Leaves
- Use a large maple leaf or a clip art image of one as a template.
- Trace three maple leaves onto burlap ribbon or burlap fabric.
- Cut them out and brush them with fabric stiffener or watered-down white school glue so they don't fray.
Enjoy your rustic embroidery hoop pumpkin and thanks for stopping by the Interior Frugalista today!
I hope you were inspired by this embroidery hoop pumpkin craft idea. Here's another easy idea that you may like for making a welcoming embroidery hoop pumpkin door wreath. For more pumpkin inspiration you may like these 12 DIY pumpkin ideas that are easy on the wallet.
Almost all of our DIY ideas have step-by-step tutorials so why not get your budget DIY on and subscribe. You can also find us on Pinterest, Facebook, Instagram, and YouTube.
If you have any questions, please leave them in the comment section below or the Contact Me tab at the top to drop me an email. I love hearing from you!
If you enjoyed this rustic embroidery hoop pumpkin, I'd be so thankful if you shared it with a friend and pinned it to your favorite board on Pinterest.
I share my projects at these inspiring link parties.









I love this project, Marie!
ReplyDeleteThank you so much, Paula! Today I'm working on an idea for the outer embroidery hoop rings for the holidays.
DeleteThis is outstanding, as usual, Marie. I love it. I just picked up a few hoops, but I think I'll need a few more for this project. I'm on the hunt!
ReplyDeleteI'm so glad you like this idea for three-dimensional pumpkins, Kim. Good luck on your hunt for more embroidery hoops. I've been lucky and hit the jackpot on occasion at thrift stores but I also order them in bulk on Amazon for a good price.
DeleteWhat a pretty wooden pumpkin, Marie! I recently ordered a set of wood hoops for a project and the leftovers would make a nice pumpkin! Thanks for the inspirations!
ReplyDeleteAwesome, I'm glad my three-dimensional pumpkin inspired a use for your leftover wood hoops. Happy pumpkin making!
DeleteMarie, this is absolutely divine! It would be a spectacular Thanksgiving table centerpiece!! Thank you for sharing - I pinned it!
ReplyDeleteSuper creative Marie! I have a good few embroidery hoops from my cross stitching days. I need to try this!!! XOXO
ReplyDeleteThanks Denise, I'm glad you like this idea. That's awesome you already have the embroidery hoops. Happy pumpkin making...next year!
DeleteThese look great! I have some hoops in my craft stash and this post was just the motivation I need to use them. Thanks for linking up your wonderful posts each week. #HomeMattersParty
ReplyDeleteThat's awesome Donna - happy pumpkin making!
DeleteMarie,
ReplyDeleteYou never cease to amaze me with your talent. Congratulations, you are being featured on Thursday Favorite Things. I hope you stop by.
https://www.eclecticredbarn.com/2021/11/thursday-favorite-things-party.html
Hugs,
Bev
You are the best Bev! I so appreciate the support you've given me over the years, it means a lot. xoxo
DeleteMarie, I simply adore this project! Thanks for sharing it at Farmhouse Friday - we're featuring you at tomorrow's party!
ReplyDeleteWell you know how to make a gal's Friday, thank you very much for the feature, Michelle! xo
DeleteI love these Marie! What fabulous pumpkins to make. You always have such great ideas. I have to get myself some hoops from the craft store. Perfect for this fall!
ReplyDeleteMeagan-Decorative Inspirations
I'm pleased you enjoyed this pumpkin idea, Meagan! I find the hoops are less expensive in multi packs on Amazon, if that helps.
DeleteYour hoop pumpkin looks amazing! It's nice that you have leftover hoops for future crafting. I'd love for you to share your links every week at the #HomeMattersParty Thursday 9pm (est) thru Monday!
ReplyDeleteThanks so much, Allyson! I'll definitely be taking you up on the party invitation too.
DeleteWOW, how pretty, love it!!
ReplyDeleteThank you so much, Dee, I'm glad to hear you like this idea for pumpkin decor!
DeleteI love this pumpkin! I wish I had more than one hoop of the same size. Can't wait to see what you have in store for the outer hoops! Thanks for sharing on Crafty Creators!
ReplyDeleteThanks Niki! I'm always on the hunt for embroidery hoop art at the thrift stores just so I can recycle the embroidery hoops. I also find multi-packs inexpensively on Amazon.
Delete