How To Recycle Old Drink Coasters For The Holidays
Are you like me and use the same drink coasters for years without giving it any thought? Then the day arrives when you serve guests a drink and realize how embarrassingly stained they are. Please say I'm not the only one.
When the time comes to finally replace them, instead of throwing them out, here's an idea for how to recycle those old drink coasters for the holidays and winter. They are so easy to make with just two supplies and you'll feel good knowing you saved them from ending up in the landfill.
Upcycled Stained Drink Coasters For The Holidays
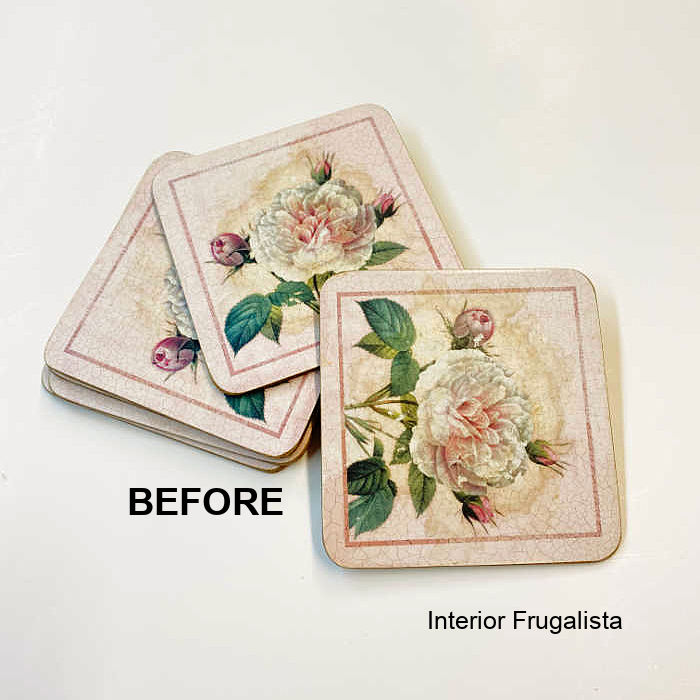
Earlier this summer when I realized how embarrassingly stained our drink coasters were I replaced them with these DIY resin coasters.
I was about to toss the old ones in the garbage when I thought maybe they could be turned into something useful and set them aside for another day.
Last weekend when I was putting out my pre-holiday decor I realized we have no winter coasters. I'm so glad I didn't toss those old ones out because in just a few short hours I had the perfect cozy cabin in the woods style winter drink coasters for our living room.
But I'll also be using them for Christmas drink coasters too because they go perfectly with the simple woodland theme I'm decorating with this holiday season.
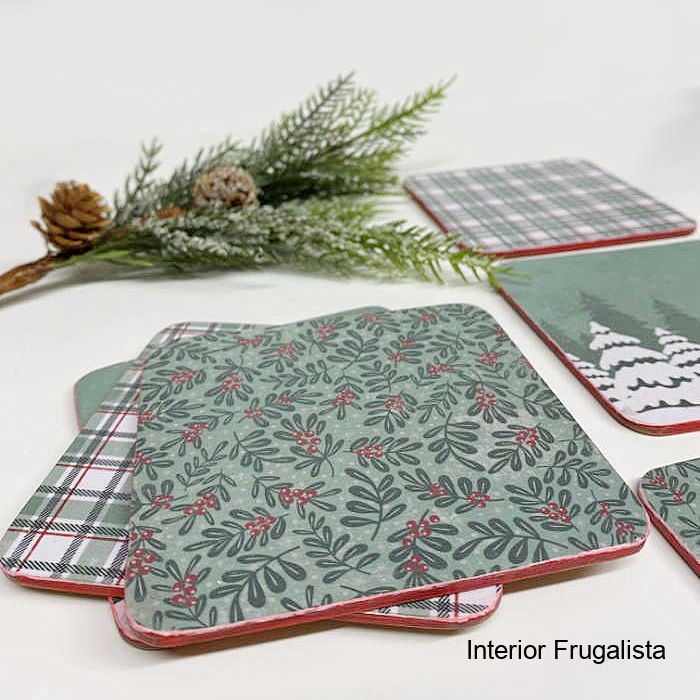
I made two of each of the three different styles. These green and white plaid coasters remind me of a warm and cozy flannel shirt.
The pretty winterberry pattern on these coasters works for both winter and the holiday season.
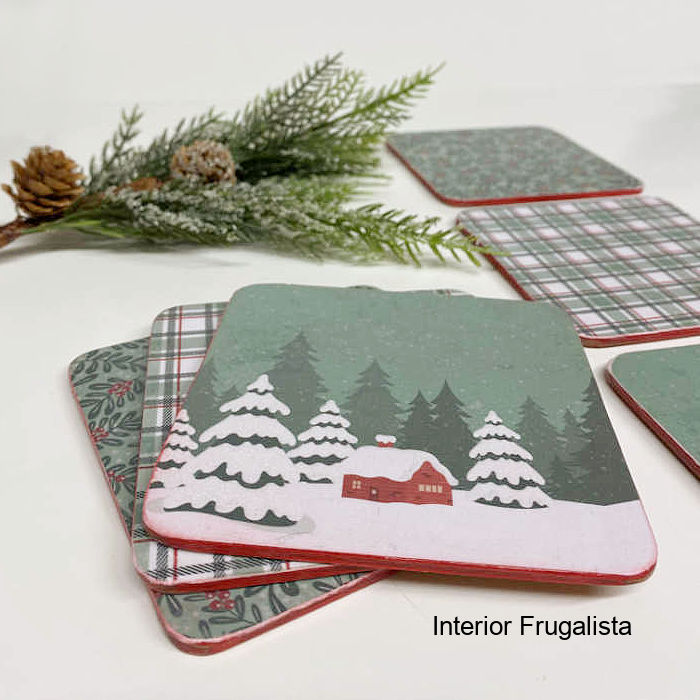
I couldn't resist the pretty winter scene coasters. It's hard to tell in the photo below but the snow is glistening with sparkles.
What You'll Need To Make It
This post contains affiliate links so you can see what products I used or recommend for this project. As an Amazon Associate, I earn a small commission from any qualifying purchases at no extra cost to you. Thank you for your support!
If the scrapbook paper booklet looks familiar that's because last year I used some of the sheets to make these adorable Christmas ornament shape drink coasters.
Supply List
Old Drink Coasters (recycled)
Holiday Homestead Paper Booklet
Mod Podge (glossy or matte)
How To Decoupage Recycled Drink Coasters
I've included a convenient printable instruction card further down in the post that you're welcome to use.
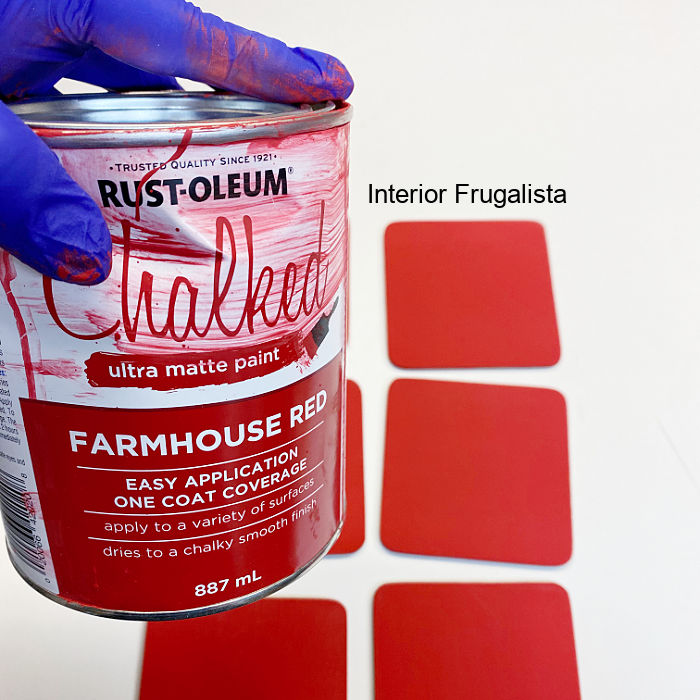
You'll notice that I painted the coasters red. Don't do that!
Instead of traditional red Christmas paper, I'm using a woodsy green and white scrapbook paper to decoupage on these winter coasters.
Prime Old Coasters
Instead of painting the coasters like I did, brush one coat of white primer on them instead to cover the original pattern.
Decoupage Scrapbook Paper
Once the primer is completely dry (a few hours) brush each coaster with either glossy or matte Mod Podge and set the scrapbook paper in place.
Don't worry about precutting the paper to size because we'll do that in another step. Press firmly with your fingers or use a decoupage squeegee for good adhesion.
Check to make sure there is enough Mod Podge along the edges and corners. If not, add more with a small art brush and let the coasters dry for a few hours.
With the bottom of the coasters facing towards you, trim the scrapbook paper along the edge of the coasters with a retractable craft knife.
For this next step, it's important that you have the paper side of the coaster facing towards you. If you go the opposite direction the white paper on the back will be visible along the edges.
With a small piece of 220-grit sandpaper or an emery board nail file, brush the edges and rounded corners in a downward motion to trim the excess paper.
Remove any dust particles with a lint-free rag and brush a light coat of Mod Podge over each coaster with a foam brush. Once dry, repeat with a second and third coat of Mod Podge.
And that my friends is how easy it is to recycle your old and stained coasters into lovely winter and/or Christmas drink coasters.
How To Recycle Old Drink Coasters For The Holidays

materials:
- Old Drink Coasters (recycled)
- Small Holiday Homestead Paper Booklet
- Mod Podge (glossy or matte)
- White Primer
tools:
- Retractable Craft Knife
- Decoupage Squeegee
- Sponge Brush
- Small Paintbrush
- 220-Grit Sandpaper OR Emery Board Nail File
steps:
- Brush one coat of white primer over the coasters to cover the original design.
- Once the primer is completely dry (a few hours) brush the coaster with glossy or matte Mod Podge and set the scrapbook paper in place.
- Check that there is enough Mod Podge along the edges and corners. If not, add more with a small art brush.
- Rub your fingers or a decoupage squeegee over the paper for a good bond with the coaster.
- Wipe away any seeping Mod Podge with a damp rag and let the coasters dry for a few hours.
- Turn the coasters upside down and with the bottom of the coasters facing towards you trim the scrapbook paper along the edges with a retractable craft knife.
- Working from the top of the coaster downward, carefully trim excess paper along the sides and rounded corners with a small piece of 220-grit sandpaper or an emery board nail file.
- Wipe coaster with a lint-free rag.
- Brush a thin coat of Mod Podge over the coaster with a foam brush and let dry.
- Repeat with a second and third coat of Mod Podge.
- Wait at least 24 hours before setting drinks on the coasters.
- Enjoy!
Thanks for stopping by the Interior Frugalista today! I hope you were inspired by this idea for upcycled drink coasters.
Almost all of our DIY ideas have step-by-step tutorials so why not get your budget DIY on and subscribe. You can also find us on Pinterest, Facebook, Instagram, and YouTube.
If you have any questions, please leave them in the comment section below or the Contact Me tab at the top to drop me an email. I love hearing from you!
If you enjoyed these recycled Christmas-Winter Drink Coasters, I'd be so thankful if you shared them with a friend and pinned it to your favorite board on Pinterest.
I share my projects at these inspiring link parties.


Marie these are just darling! I keep seeing them in my feed and I had to come over and peek. What charming designs you chose. LOVE them!
ReplyDeleteI'm thrilled to hear that you keep seeing them in your feed, Kim, and even more thrilled that you popped over to take a closer peek. Thank you, I'm glad you like them! They look so good with my pre-Christmas woodland theme.
DeleteOh so cute!! I love these better than the originals as they have all the feels perfect to accompany a cuppa. Sharing!
ReplyDeleteYou're the best Larissa, thank you for sharing! xo I've been using the coasters every evening while enjoying a cup of holiday tea by the fire.
DeleteHad to pin these Marie! They look gorgeous! I also hate throwing things that can be (re)used and I am always on the look for a little sprucing up and refashioning/recycling ideas! Thank you so much for sharing!
ReplyDeleteA gal after my own heart. I'm happy to hear you like this recycled and refashioned idea, Maya, and thanks for the pin!
DeleteThese are so pretty, Marie. I love the fabric you chose. They will be perfect all winter long. . Upcyling coasters is somethin I love to do. I just finished a set with funny reindeer and Santa on them. Mod Podge makes it so easy to do.
ReplyDeleteThank you Beverly! I'm thrilled you thought they are made with decoupage fabric because the scrapbook paper that I used reminded me of fabric. Sounds like you and I both enjoy upcycling secondhand coasters. Can't wait to see your reindeer and Santa ones.
DeleteI love these coasters. Great job!
ReplyDeleteThank you very much Rebecca. Let the holidays begin!
DeleteI love it! Thank you for sharing with us at the To Grandma's house we go link party - I'm featuring you this week!
ReplyDeleteThank you so much for the feature, Tarahlynn! xo
Delete