Horse Drawn Sleigh Ride Handmade Christmas Sign
When it comes to vintage holiday decor, are you drawn more to retro mid-century or a dickens old-fashioned Christmas style? There is something about Victorian-era holiday decor that instantly warms my heart and gives me all the holiday feels.
When I saw the nostalgic old fashioned Christmas stencil at a business closing sale a few summers ago, it had to come home with me. It only took two years but I finally put that stencil to good use by making a wooden handmade horse-drawn sleigh ride Christmas sign - no power tools required!
Old Fashioned Sleigh Ride Wood Christmas Sign DIY
I actually made the sign for our home in 2019 and didn't get it finished in time to share on the blog. I completely forgot about it last year where it remained tucked safely inside a bin.
It was like Christmas morning when I discovered it at the bottom of our holiday decor bin a few weeks ago. It's a blessing in disguise that I didn't share it on the blog back then because, to be honest, I'm not 100% happy with the results.
So in this post, I'll be sharing how I originally made the sign in 2019 and how I recently weaked it after it had been stenciled. I'm also sharing how to build a simple rustic wood frame for signs that can easily be made without power tools!
The takeaway? If you're not completely satisfied with something you made, don't throw in the towel, you can always change it with a little paint.
Did I take a photo of what the DIY sign looked like before I tweaked it? Heck no! A testament to how excited I was to make it even better.
This post contains affiliate links so you can see what products I used or recommend for this project. As an Amazon Associate, I earn a small commission from any qualifying purchases at no extra cost to you. Thank you for your support!
What You'll Need To Make It
The inspiration for the Christmas sign came from this Muddaritaville sleigh ride stencil (link in the supply list). At the same closing out sale I also found a Muddaritaville vintage car stencil that I used on my home for Christmas stenciled tray.
When I tweaked the sign, I also used part of the Funky Junk's Old Time Stencils Christmas blend hot Cocoa stencil (link in the supply list).
Supply List
Sleigh Ride Stencil
Christmas Blend Hot Cocoa stencil
Hardboard
1 x 2 Furring Strips
Corner Clamps
1-inch Wood Nails
Wood Glue
3/4-inch Finishing Nails
Needlenose Pliers
Hammer OR Brad Nailer
Hand Saw With Miter Box OR Miter Saw
Straight Edge
Retractable Utility Knife
Clear Wax
Brown Wax
Tobacco Road Brown Stain
Round Stencil Brush
Painter's Tape
White, Holiday Red, Bright Red, Holiday Green, Olive, and True Green Acrylic Craft Paint
Metallic Gold Craft Paint
Here's How I Made It
We'll begin the tutorial with the steps I used in 2019 to make the sign. Then we'll move on to the recent changes further down in the post.
For the base of the wood sign, I used a sheet of hardboard. It has a nice smooth finish that is perfect for stenciled signs and making homemade chalkboards. With a retractable utility knife and a straight edge, I cut the hardboard 17 1/2 inches long by 24 inches wide.
Next, I painted one side of the hardwood with two coats of white acrylic craft paint. Once that was dry, I used painter's tape to hold the stencil to the center of the painted hardboard.
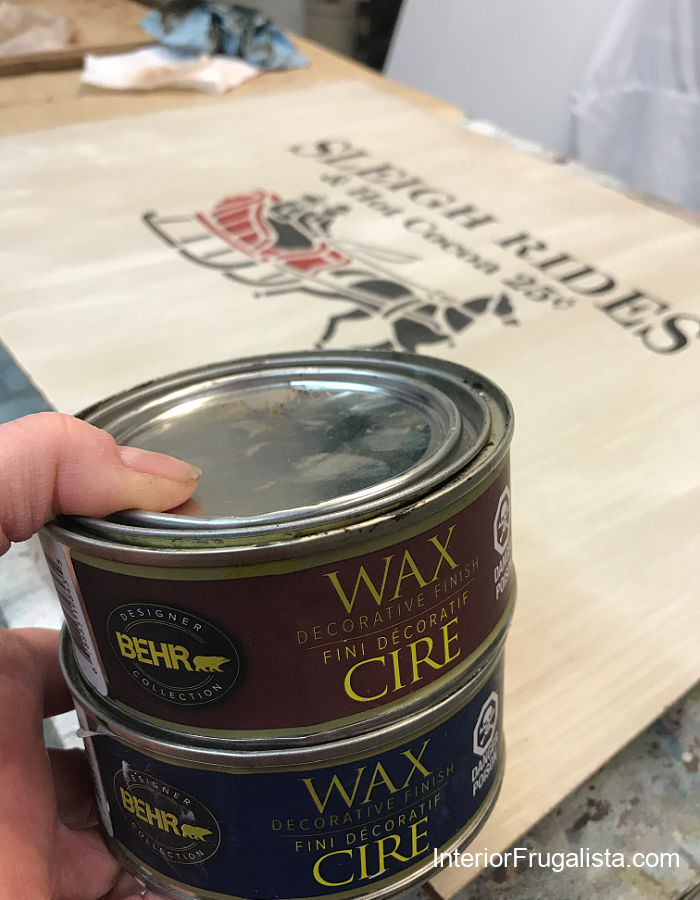
I used a round stencil brush with black and holiday red acrylic craft paint to stencil the sign. You get the gist of what the sleigh ride sign looked like before tweaking it in the photo below.
Once the stencil paint was completely dry, I gave the sign a time-worn vintage patina with wax.
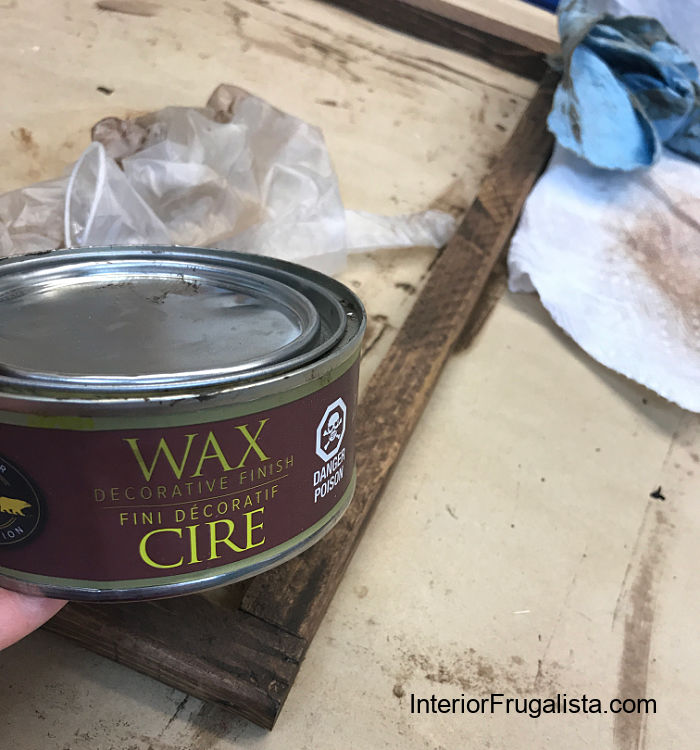
First, with a small wax brush, I applied a coat of clear wax. While the wax was still wet I applied a coat of brown wax. Then I immediately wiped the sign with a lint-free rag to remove the excess wax (like pictured above).
Building A Wood Frame - no power tools required!
The rustic wood frame is built with simple butt joints, much like this large DIY chalkboard. As mentioned earlier, you do not need power tools to make this simple frame. All you'll need is a hand saw, miter box, and a hammer.
However, if power tools are your jam like they are mine, a miter saw and a brad nailer will make the job much quicker. For both building methods, you'll also need some corner clamps (link in the supply list).
- Cut 1 x 2 furring strips into two 24-inch long pieces for the top and bottom.
- Cut two more furring strips 16-inches long for the sides.
- Dab wood glue on the ends of each 16-inch upright.
- Butt them to the top and bottom 24-inch pieces with corner clamps (see example below).
Option 1: With a good old fashion hammer and two 1-inch wood nails join them together.
Pro-Tip: Moisten the end of the nails to help prevent the wood from splitting.
Option 2: Join them with wood screws on the top and bottom pieces (like pictured below) and use wood filler to conceal the screw heads.
Option 3: Use a brad nailer to join them together.
I stained the frame with Dixie Belle Paint Company Tobacco Road gel stain that I had on hand, applied with a lint-free rag. After the stain dried I applied a thin coat of brown wax to both deepen the color and protect the finish.
Assembling Sleigh Ride Sign
Set the frame on a level work surface with the good side facing the work table. Lay the stenciled hardboard facing down on top of the frame. With 3/4-inch finishing nails or a brad nailer, attach the hardboard to the frame.
Pro-Tip
Save your fingers and use needle-nose pliers to hold the short nails while you hammer them in place.
Tweaking Stenciled Sleigh Ride Sign
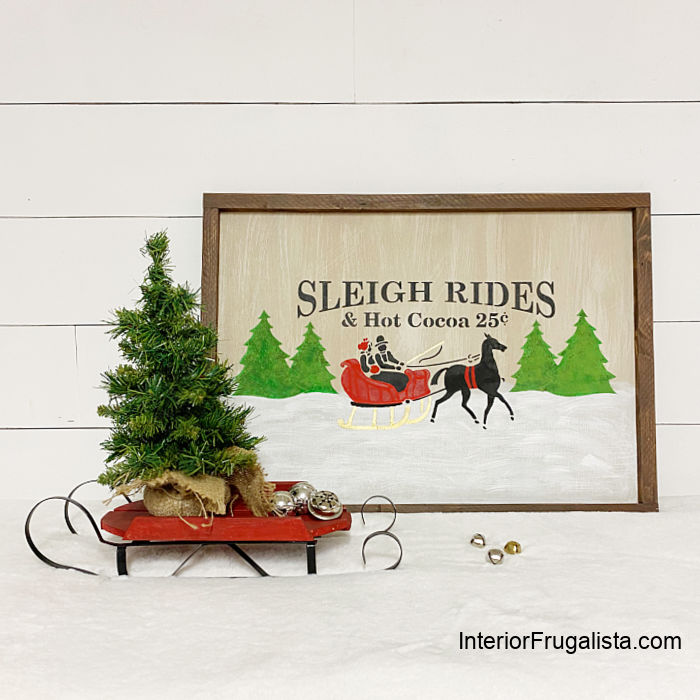
Here's the part where the stenciled sleigh ride sign was tweaked a few weeks ago.
Stenciling Evergreen Trees
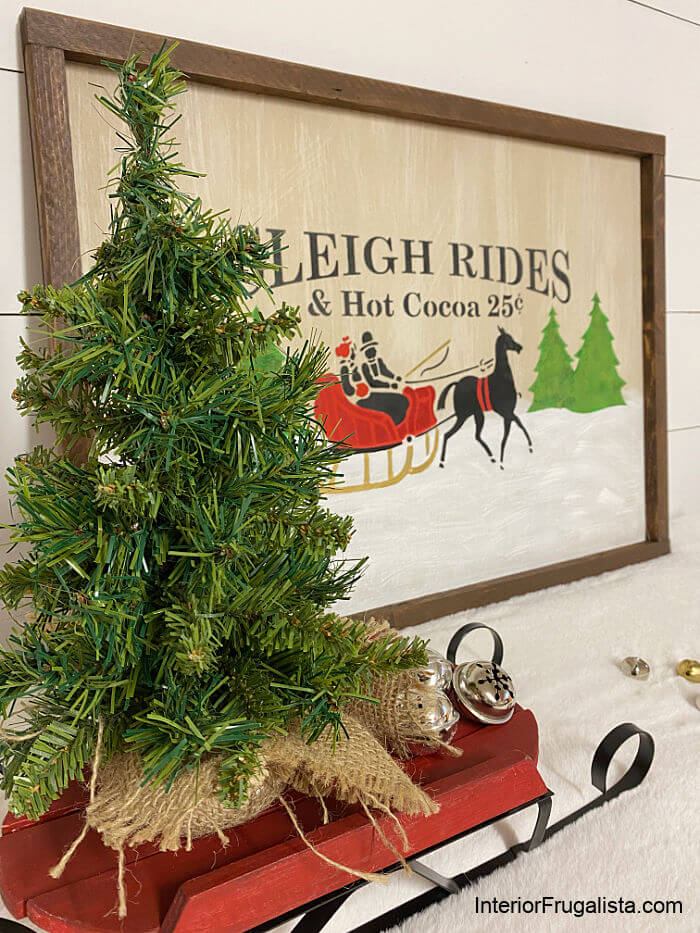
I thought the sleigh looked lost and needed a little something-something. That's when I grabbed the hot cocoa stencil that I had on hand to stencil some trees.
- I stenciled two trees on one side of the sleigh and then flipped the stencil over to stencil the trees on the opposite side.
- I used painter's tape to hold the stencil in place and block the areas of the stencil I didn't want to be transferred.
- With a small stencil brush, I pounced layers of holiday green, olive green, and true green acrylic craft paint to give the trees some depth.
- Very little time was needed between each layer of paint. A blow dryer or heat gun set on low speeds up the drying process as well.
Adding Snow
I wasn't happy with the time-worn patina on the bottom half of the sign because it felt like the scene needed snow. I mean it's a sleigh ride after all!
- To protect the inside of the frame I ran painter's tape along the edge.
- Then with a small paintbrush, I brushed the bottom portion of the sign with two coats of white acrylic craft paint.
- I carefully painted around the base of the trees but I brushed right over the bottom of the sleigh so there would be snow on both sides. No worries because the sleigh is being tweaked in the next section.
- Once the white paint dried, I took an inexpensive chip brush and with the same white paint, added snowdrifts in a swooping motion (like pictured below).
What I Did Differently On The Sleigh
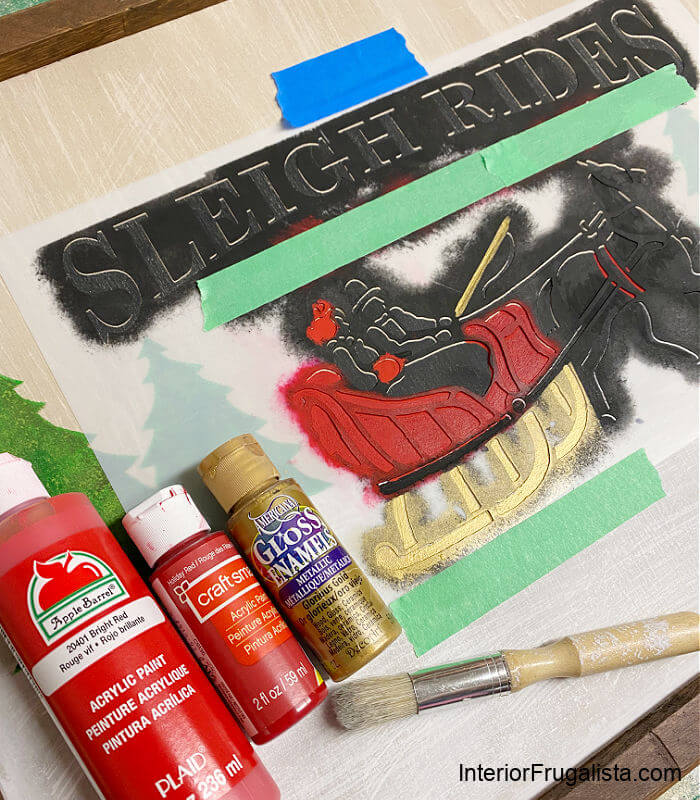
I decided to tweak the old-fashioned sleigh while I was at it. But first I went over the sled carriage with holiday red acrylic craft paint with a small paintbrush. I painted right over the previously stenciled bridges as well.
Once the paint dried, I realigned the sleigh ride stencil and held it in place with painter's tape. With the same holiday red craft paint, I stenciled the woman's bonnet, hand muff, and part of the bridle on the horse as well.
Next, I stenciled the sleigh runners with metallic gold craft paint. Once that dried, I re-stenciled the red sleigh carriage with bright red acrylic craft paint this time. It gave the sleigh a two-tone red finish that I like much better.
Last but not least, a sawtooth picture hanger was attached to the back of the sign and it's now ready to hang on a wall. I'm looking for the perfect spot to hang it near our Victorian Christmas village.
I'd hang it above the village but we have the oversized modern farmhouse plank clock that we made hanging above our 80s wall unit hack fireplace that the village now sits on. But the old-fashioned village and old-fashioned sign are meant to be together so the quest for the perfect wall ensues.
Anyway, wouldn't you agree that the sign looks so much better now? Thank you for stopping by the Interior Frugalista today! I hope you were inspired by this handmade horse drawn sleigh ride Christmas sign.
If you have any questions, please leave them in the comment section below or the Contact Me tab at the top to drop me an email. I love hearing from you!
If you enjoyed this old-fashioned Christmas sign idea, I'd be so thankful if you shared it with a friend and pinned it to your favorite board on Pinterest.









This is gorgeous, Marie!
ReplyDeleteThank you very much, Paula. Merry Christmas!
DeleteLove the romantic and nostalgic feel of this Marie! I sure do miss my blogging days when I see great projects like this.
ReplyDeleteHi Lucy, I miss seeing you in blogland too! Thanks for stopping by and I'm glad you like the stenciled Christmas sign. Merry Christmas!
DeleteMarie, this is just lovely. You could sell these in a high end shop (and I would be your first customer!!)
ReplyDeleteYou are very kind for saying so, Kim, thank you! Something to ponder for 2022.
DeleteYou certainly nailed 'the vintage Christmas charm' look Marie! Funny how some projects need more time to 'bake'... looks like an extra year was the perfect timeline for this number! LOL Because it looks FANTASTIC!
ReplyDeleteI'm glad you think so too, Donna. I can't count the number of times I've used the Christmas blend hot cocoa stencil. Thank you so much for featuring the sign this week, it is much appreciated. Merry Christmas!
DeleteI really like your sign, Marie. Anything vintage and nostalgic fits my style any day. I hope you are still using it each year. This post will be a feature this week. #HomeMattersParty
ReplyDeleteMy favorite decorating style for the holidays is anything nostalgic Christmas as well. I'm thrilled that you'll be featuring my sleigh ride sign this week. Thank you so much Donna! xo
DeleteSO adorable Marie! Thank you for sharing this with us at Farmhouse Friday. I'm featuring it tomorrow. Already looking forward to what you link up next! pinned
ReplyDeleteCindy, you sure know how to make a gal's day. Thank you so much for the feature and the pin! xo
DeleteI love the vintage charm this sign has, Maria! How funny for you to find it at the bottom of a tote from a few years ago. That happens to me all the time and it is such a fun little surprise. I heard you were still not feeling well. So sending tons of get well thoughts to you. I hope you have a wonderful weekend my friend.-Meagan
ReplyDeleteThank you for your sweet message Meagan, it truly brightened my day! Wishing you and your family a Happy Thanksgiving. xo
Delete