Vintage-Style Decoupage Wooden Book Box
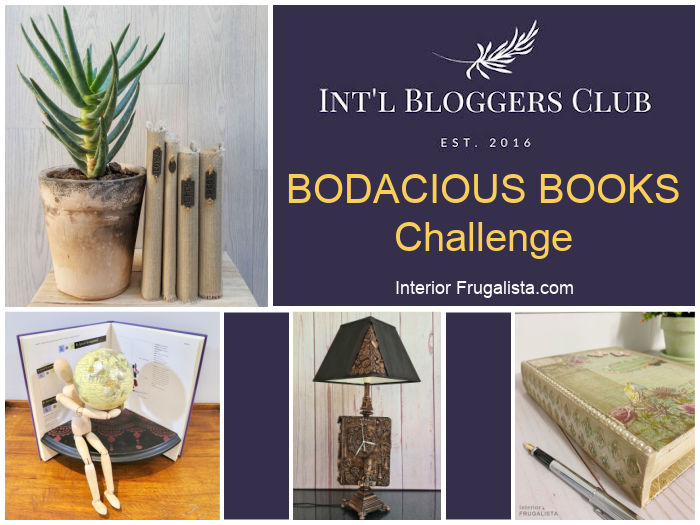
It's time for another monthly International Bloggers Club challenge and the motivation for the vintage-style decoupage wooden book box I'm sharing today is thanks to our bodacious books challenge this month.
I've had an unfinished wooden book box from Goodwill waiting in the workshop queue for about a year. So our challenge has forced me to finally figure out what to do with it. I had no vision whatsoever for the box and decided to jump in feet first and see where it takes me.
Oftentimes when you tell your head to step out of the way and let intuition take the wheel, you get the best results. So I got lost in the zone and found this mixed media project relaxing and quite enjoyed the process.
Upcycled Wooden Book Box Vintage-Style
If you haven't heard of our International Bloggers Club, we are a group of blogging friends from South Africa, Australia, Spain, the USA, and Canada who come together on the third Monday of every month to share a DIY project with a common theme.
For our felted fixations challenge in November, I made no-sew felt elf shoe gift cardholders for the holidays. I've included links to our talented member's bodacious books ideas further down in the post.
Pictured below is the unfinished wooden book box that I plan on embellishing.
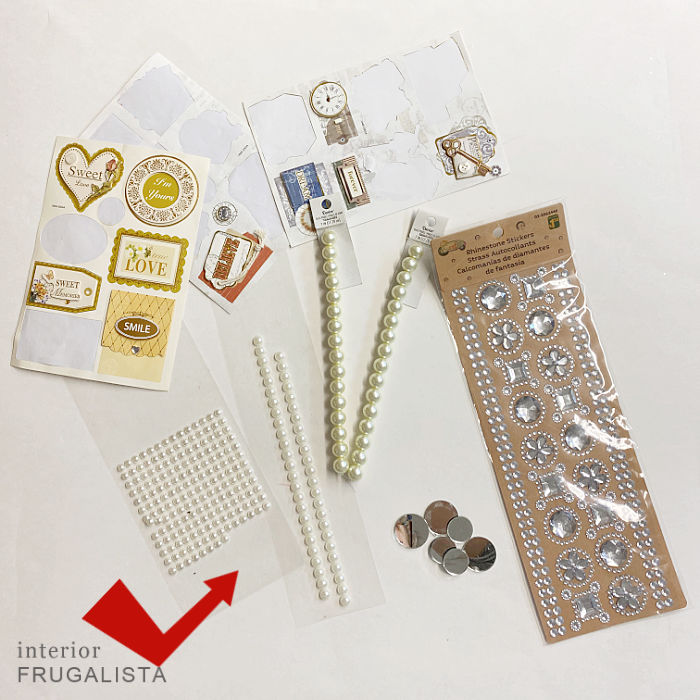
Having no clue what I was going to do with it, I grabbed whatever craft supplies I thought might work to decorate the box. Figuring I'd use the process of elimination as I went along.
This post contains affiliate links so you can see what products I used or recommend for this project. As an Amazon Associate, I earn a small commission from any qualifying purchases at no extra cost to you. Thank you for your support!
Supply List
Wooden Book Box
Vintage-Style Scrapbook Paper
Paper Cutter
Mod Podge
Pearl Bead Stickers
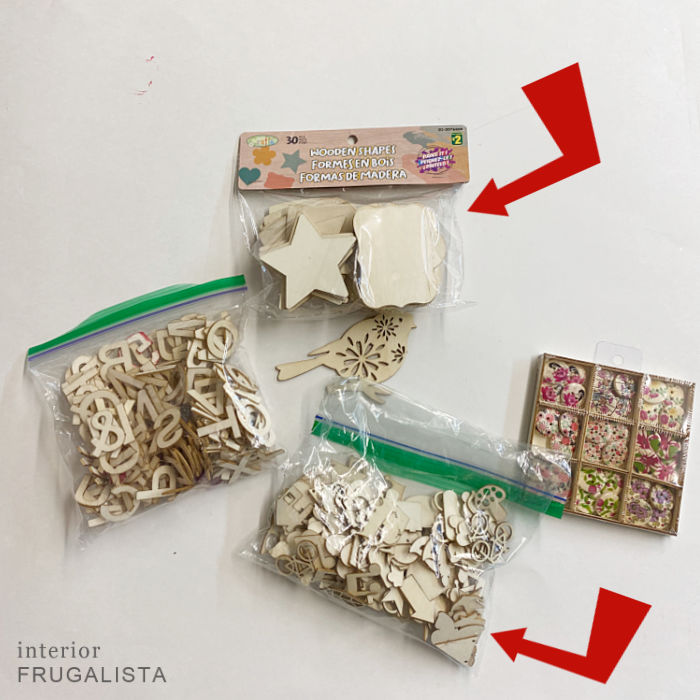
Small Wooden Shapes
Buttercream Color Paint
Gesso (homemade recipe)
Harlequin Diamond Stencil
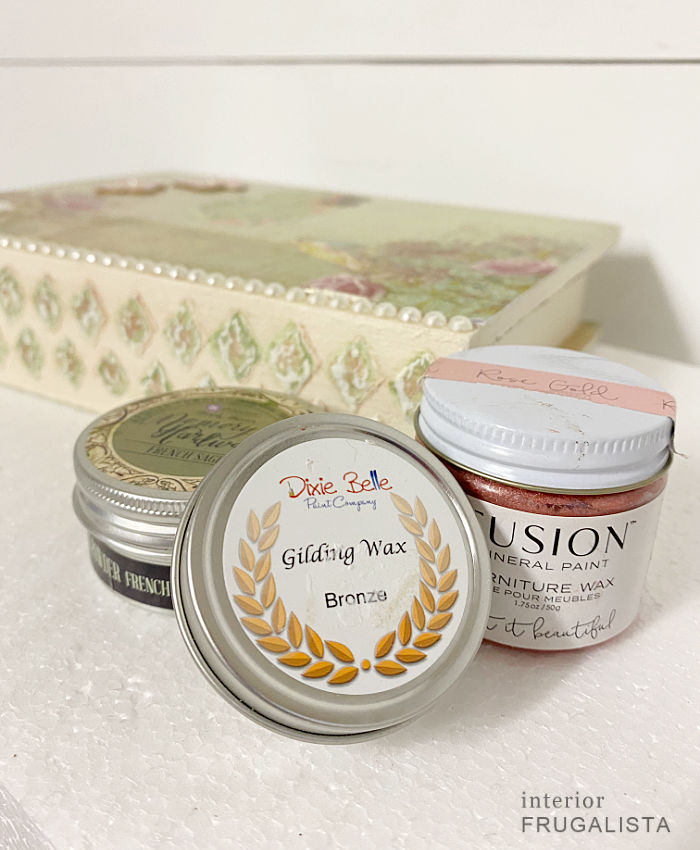
Rose Gold, Bronze, Sage, and Brown Wax
E6000 Glue
While I was at it, I grabbed a bunch of small stencils that I had on hand.
One thing I knew for certain, was that I wanted to use the box for pretty stationery, my special fountain pen, and to hold cherished letters from my international penpals.
When my kids were young I joined an International Penpal group and was paired with five amazing ladies from around the world. Two in Australia, one in the Netherlands, one in Germany, and one in the United Kingdom. We have been friends for over thirty years!
I had the pleasure of meeting one friend from Australia when she visited my hometown. My wonderful German friend opened her home to Mr. Frugalista and me after attending a business conference in the Westphalia region of Germany. It was such a pleasure meeting her and her family and the friends she spoke so fondly of for so many years.
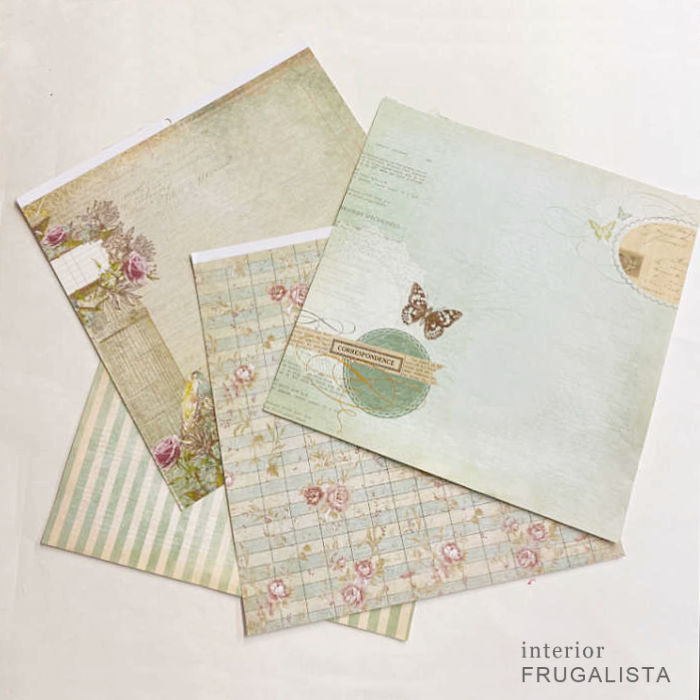
So you can see why this box will have so much meaning for me. I knew I wanted muted colors with a vintage shabby chic style. So I rummaged through my scrapbook paper collection and narrowed my choices to four.
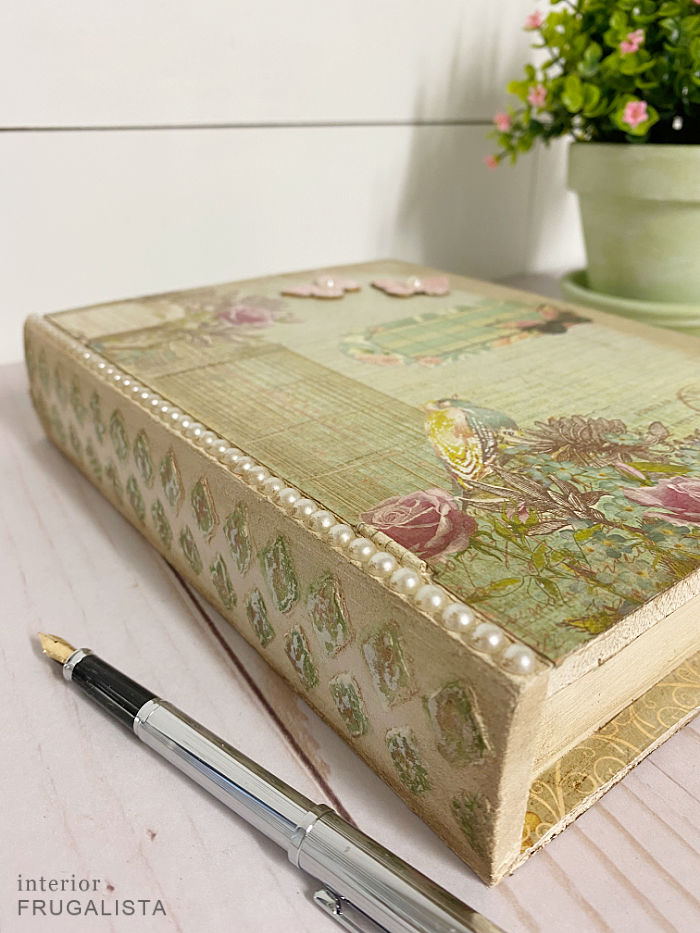
This is the end result of the winging it vintage-style decoupage wooden book box on the outside.
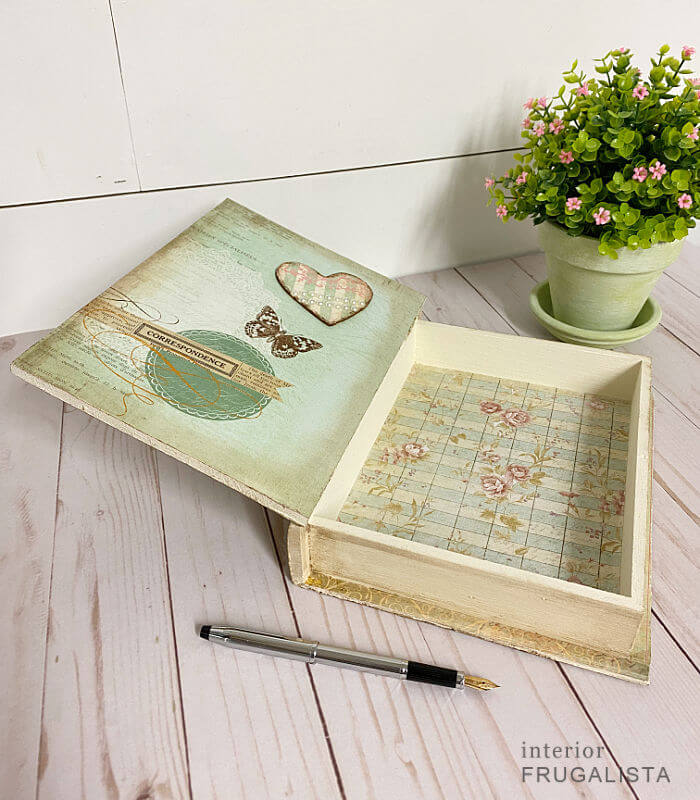
And here it is on the inside. Thank goodness for being a scrapbook paper hoarder, it paid off in the end!
But before I could begin the upcycle, you'll see in the photo below that the lid was warped. I hadn't noticed that before but perhaps it was caused by sitting in a damp basement for a year.
How To Repair Warped Wood Box Lid
To repair the warped lid, open the box and flip it upside down so the lid is laying flat on a work surface. Saturate the lid by spraying it with a water bottle. Set something heavy on top and leave it overnight. It worked like a charm!
Here's How I Made It
Now that the lid is repaired, I figured the safest bet was beginning with the easiest part, painting the box. I painted the inside and outside of the box with two coats of buttercream paint from Dixie Belle Paint Company that I had on hand.
With the box painted, now what?
Considering I still didn't have a vision for the front of the box, I figured the next place to start is the book spine. Recently I had so much fun adding a raised stencil to an upcycled terracotta wine cooler, I decided I'd give that a try on the book spine.
Except instead of drywall spackle, this time I'd use Gesso. But the only problem was I didn't have any so I did a quick google search and found this homemade recipe using the supplies pictured below.
Homemade Gesso
1 part (tbsp) White School Glue
3 parts (3 tbsp) Water
3 parts (3 tbsp) Cornstarch
3 parts (3 tbsp) Baking Soda
A few drops of waterbased Buttercream paint
Raised Gesso Stencil
The more water you add, the thinner the Gesso but I wanted mine on the thick side for the raised stencil. I chose the small harlequin diamond stencil from my stencil stash.
I taped it to one side of the book spine with painter's tape and with a small rounded paintbrush, stenciled the gesso in a pouncing motion.
I used my heat gun on the low setting to dry the gesso and then repeated the process to build the raised diamonds. Then I switched the stencil to the other side, offsetting the diamonds, and repeated the process.
Adding Color To Raised Stencil With Wax
While I love the diamond detail on the book spine I'm not keen on leaving it the buttercream color. So I grabbed some assorted waxes to add color (acrylic craft paint would work fine too).
With my fingers, I rubbed sage green gilding powder followed by bronze gilding wax. Then with a small brush, I applied rose gold wax between the raised bits on the spine.
Decoupage Wooden Book Box Interior
I picked two sheets of scrapbook paper that complimented one another to decoupage inside the box. I lined up one sheet on the inside of the lid and marked where it needed to be trimmed with a pencil.
I used a paper cutter and trimmed it slightly larger for a little wiggle room in case my measurement was off. The excess will be trimmed later. My preference would have been to rip the paper for a jagged edge but the color doesn't go all the way through so it would leave a white edge.
Then I repeated the process with the other sheet of scrapbook paper for the bottom of the box.
To decoupage the paper onto the box, brush a generous coat of Mod Podge onto the back of the paper as well as on the painted box. Set the two papers in place and gently use a scraper tool to remove any air bubbles.
Decoupage Wooden Book Box Exterior
While the interior was drying I began working on the exterior of the book box with the remaining two sheets of scrapbook paper. Following the same steps as the interior, I started with the bottom of the box.
For the narrow edge along the perimeter of the box, I used the scraps from the trimmed paper on the front of the box. Again cutting them slightly larger and can be trimmed later.
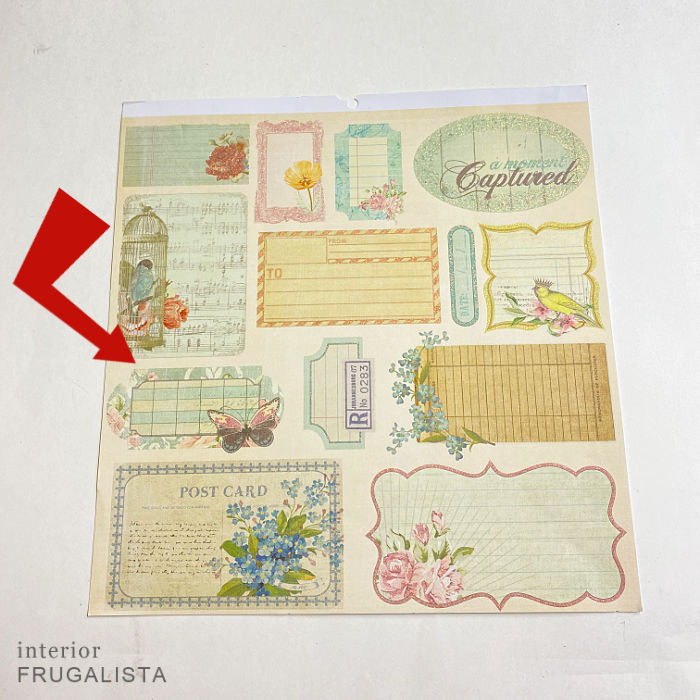
On the front of the book box, I used this pretty vintage birdcage scrapbook paper. We'll get into the aged patina and other embellishments on the box next.
Embellishing Book Box
Both the inside and outside of the lid are embellished with decoupage shape cutouts. I used pink coordinating scrapbook paper for the wooden butterflies and some of the trimmed paper from the back of the box for the wooden heart.
Before attaching the heart to the front of the box, I added two diagonal strands of pearl bead stickers across the bottom. I also added matching pearl stickers to the center of each butterfly. Then I added a strand of pearl bead stickers to the front of the box.
All the elements are attached to the decoupage box with E6000 glue. I also added a pretty decoupage scrapbook paper label to the front of the book box.
Once all the decoupage and embellishments were added to the box, I trimmed the excess paper along the edges with a sharp retractable craft knife. Any little bits can be trimmed with either fine sandpaper or an emery nail file but be sure to sand from the good side downward.
Aging The Decoupage Wooden Book Box
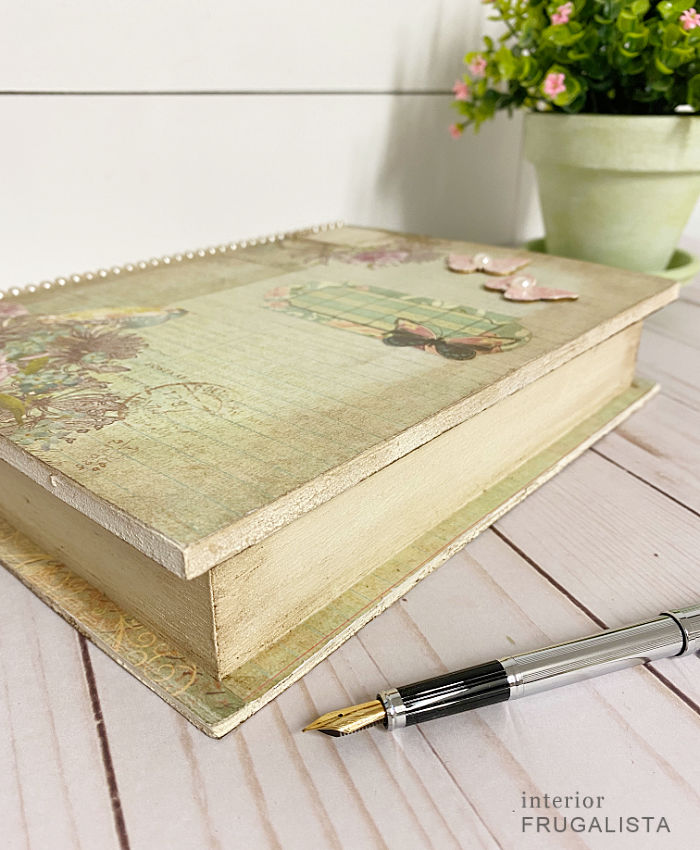
I wanted the shabby chic book box to have a time-worn patina. To do that it's important that you seal the scrapbook paper and the painted box first with a thin coat of Mod Podge. If not, the dark wax will stain the paint and paper.
Once the clear coat is dry, feather the wax along the edges of the paper with a small round tip art brush, blending it as you go along and go wider with the wax around the corners.
On the book pages side of the book box, use brown wax to get in the rough surface of the wood to look like aged book pages. Simply brush brown wax over the buttercream paint and wipe the excess with a lint-free rag. Next, feather more brown wax along the edges of the faux book pages like pictured below.
For someone who went into this project without a plan, I'm so pleased with the results! I will cherish my shabby chic book box every time I sit down to write a letter or when setting a lovely letter from my penpals inside.
I think the pretty book box would make a lovely gift idea for book lovers. Set some pretty bookmarks, personalized book labels, or a book inside. For journal writers, a pretty new journal and a special fountain pen would be a great gift idea to include with the book box.
Thanks for stopping by the Interior Frugalista today! I hope you were inspired by this decoupage vintage-style wooden book box. If you can't find a wooden book box to give this a try, here's a similar idea using an upcycled flatware chest.
Almost all of our DIY ideas have step-by-step tutorials so why not get your budget DIY on and subscribe. You can also find us on Pinterest, Facebook, Instagram, and YouTube.
If you have any questions, please leave them in the comment section below or the Contact Me tab at the top to drop me an email. I love hearing from you!
If you enjoyed this bodacious wooden book box upcycle, I'd be so thankful if you shared it with a friend and pinned it to your favorite board on Pinterest.
I invite you to click on the links below to visit our talented group members' bodacious books projects. If you don't have time today, you can bookmark the page by pressing the pink heart icon on the right to come back later.
DIY Linen Book Covers | A Crafty Mix
DIY Upcycled Book Shelf | Birdz Of A Feather
Steampunk Book Lamp | Unique Creations By Anita
Decoupage Wooden Book Box | Interior Frugalista (that's me)
I share my projects at these inspiring link parties.











I think it's so cool that you have pen pals from around the world and made over the box to keep your letters; handwritten letters are so special and a rarity these days. Gorgeous transformation Marie and I learned so much. I didn't know you could unwarp wood! I too have a similar box sitting around somewhere; if I find it's warpy when I finally do something with it, I'll know what to do!
ReplyDeleteIt sure is a rarity which makes finding one in my mailbox like opening gifts Christmas morning. I don't open them until I can find time to sit and relax with a cup of freshly brewed coffee to soak in every word. Glad you found the wood warping tip helpful, Sara!
DeleteCraft projects that just take on a life of there own are always the most fun and when they turn out this gorgeous, then it's a double win. What a lovely way to keep all those pen pal letters safe. I wonder if kids of today will ever experience that specialness of receiving a letter from a friend far, far away.
ReplyDeleteThank you so much, Michelle! Sadly, I think snail mail letters are thing of the past thanks to technology. There is nothing like opening an envelope from a dear friend that's travelled great distances than simply clicking open an email.
DeleteI think the best projects are a true labor of love, Marie and your box is just beautiful. I think the details are perfect. When I was in elementary school I had a pen pal from Australia. We wrote back and forth to each other for years on special tissue paper like airmail sheets and matching envelopes that my mother used to get from the post office. It was always so exciting to get and send a letter and even though we lost touch many, many years ago, I still have some of the letters tucked away in the attic...in a box not nearly as pretty as yours!
ReplyDeleteThank you very much, Kim! I've kept every single letter, postcard, and greeting card from all of them since the beginning. I'll use this box for the current year's letters and cards then transfer them to the (far from pretty) BIG box. Awe, that's too bad you lost touch with your Australian penpal.
DeleteI see a wooden box and I am all sold! Have a soft spot for them :)
ReplyDeleteYou made this one a masterpiece, Marie! I love it!
I'm glad you like it Maya and I'm happy to hear I'm not the only one who loves collecting wooden boxes. They are so much fun to upcycle.
DeleteI really love your shabby chic mixed media box. It is a style I have never tried and you made it look so simple. I had no idea you could make your own gesso either so that is a trick I will be copying. I found mixed media to be so addictive because it allows you to add so many different items to each project.
ReplyDeleteThank you Anita, it means a lot coming from you! This was a baby step entry into mixed media and you were in my thoughts often. Far from the amazing steampunk creations you make but within my comfort zone...for now. 😉
DeleteThis turned out so pretty Marie, I love what you've done, especially the little raised diamonds, how cool! I remember the days of having pen pals :)
ReplyDeleteThanks so much Tania, I'm glad you like it. Right! Having pen pals was quite popular back in the day and I feel so blessed that we have kept in touch for over thirty years. We've walked throughout adulthood, parenthood, and now grandparenthood together.
DeleteWhat a beautiful box to store your precious letters, Marie. I love the papers and the textures you added. Thanks for the homemade gesso recipe - I had no idea you could make it!
ReplyDeleteThank you very much Ann, I quite enjoyed working on this little box that I had no idea what I was going to do with when I started.
DeleteSuch a special project Marie, and it turned out so great. Sometimes winging it has the best results, and it's so much fun figuring it out along the way.
ReplyDeleteThank you Tuula! Yup, it sure is fun figuring it out along the way by just going into a creative zone without any attachment to the end result.
DeleteI love it!!! ♥
ReplyDeleteThank you Elsa, I'm glad you like it!
DeleteIt's a good thing you collect beautiful papers! You made that box look so vintage and so pretty Marie! Pinned 😊
ReplyDeleteI can't resist a pretty book of scrapbook paper when I see them. It's becoming a problem. LOL Thanks Cindy and the pin!
DeleteLooks so great!
ReplyDeleteGreat job!
many greetings
Holey moley Marie... never did I ever feel I NEEDED a wooden book in my life as much as I do right now. My head just exploded with all the creative decorating possibilities! I just may have to make one! Thanks for the awesome inspiration!
ReplyDeleteGlad to hear you found inspiration from my wooden book box upcycle, Donna. Have fun making yours!
DeleteI'm intrigued by your beautiful box, Marie! I want to make one!! And, I love that you have had international pen pals for so long! The box is absolutely gorgeous.
ReplyDeleteThank you so much, Pam! I'm happy to have a pretty box at long last for my writing stationary and to save the cherished letters I receive from my penpals. Thank you so much for featuring it this week! xo
DeleteOh, Marie, this is absolutely beautiful. I've featured it at the TFT party today. Thanks for sharing!
ReplyDelete